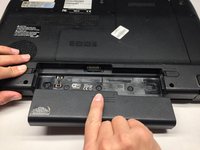
주요 콘텐츠로 건너뛰기

Toshiba Satellite L675D-S7016 Keyboard Replacement

필요한 것

  1. Toshiba Satellite L675D-S7016 Keyboard Replacement, Battery: 1 단계, 이미지 1/1
    • Power down the computer and unplug the power adapter.

  2. Toshiba Satellite L675D-S7016 Keyboard Replacement: 2 단계, 이미지 1/1
    • Flip the laptop upside down. Locate the two latches on both sides of the battery.

  3. Toshiba Satellite L675D-S7016 Keyboard Replacement: 3 단계, 이미지 1/3 Toshiba Satellite L675D-S7016 Keyboard Replacement: 3 단계, 이미지 2/3 Toshiba Satellite L675D-S7016 Keyboard Replacement: 3 단계, 이미지 3/3
    • Slide the latch on the right outwards, releasing the lock. The latch stays unlocked once moved.

    • Simultaneously slide the latch on the left outwards while pulling the battery towards you.

    • Do not touch the metal connectors on the laptop and the battery.

  4. Toshiba Satellite L675D-S7016 Keyboard Replacement, Keyboard: 4 단계, 이미지 1/3 Toshiba Satellite L675D-S7016 Keyboard Replacement, Keyboard: 4 단계, 이미지 2/3 Toshiba Satellite L675D-S7016 Keyboard Replacement, Keyboard: 4 단계, 이미지 3/3
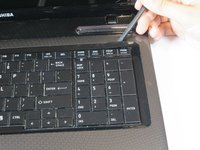
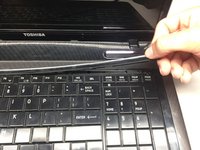
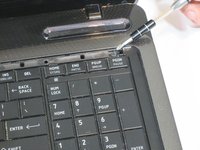
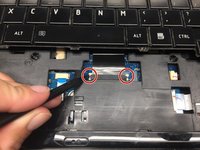
    • Pry under the plastic strip, starting on the top right side of the key board with a Heavy Duty Spudger.

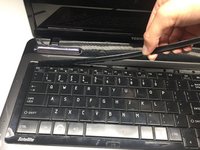
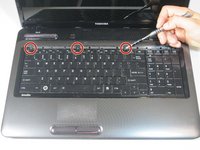
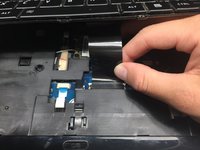
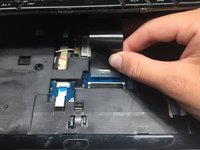
    • Once the first corner is raised, use your hand pulling upwards and release the rest of the strip.

  5. Toshiba Satellite L675D-S7016 Keyboard Replacement: 5 단계, 이미지 1/2 Toshiba Satellite L675D-S7016 Keyboard Replacement: 5 단계, 이미지 2/2
    • Remove the first 3mm screw with the Phillips #1 screwdriver.

    • Remove the next three 3mm screws.

  6. Toshiba Satellite L675D-S7016 Keyboard Replacement: 6 단계, 이미지 1/2 Toshiba Satellite L675D-S7016 Keyboard Replacement: 6 단계, 이미지 2/2
    • Lift the keyboard gently . Slide it forward towards the screen and speakers. This reveals the connection needed for the next step.

  7. Toshiba Satellite L675D-S7016 Keyboard Replacement: 7 단계, 이미지 1/3 Toshiba Satellite L675D-S7016 Keyboard Replacement: 7 단계, 이미지 2/3 Toshiba Satellite L675D-S7016 Keyboard Replacement: 7 단계, 이미지 3/3
    • Use the pointed end of the Heavy-Duty Spudger and push the pins toward the screen, leaving them in this position.

    • Carefully slide the connector out of the port.

결론

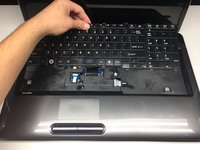
To reassemble your device, follow these instructions in reverse order.

다른 한 분이 해당 안내서를 완성하였습니다.

Austin Bons

회원 가입일: 09/22/16

1,131 평판

안내서 8개 작성하였습니다

UC Davis, Team 2-2, Oliver Fall 2016 UC Davis, Team 2-2, Oliver Fall 2016 회원

UCD-OLIVER-F16S2G2

5 회원들

안내서 10개 작성하였습니다

댓글 0개

댓글 쓰기

조회 통계:

24 시간 전: 0

7일 전: 4

30일 전: 8

전체 시간: 779