주요 콘텐츠로 건너뛰기

Toshiba Satellite L855-S5119 Optical Drive Replacement

필요한 것

  1. Toshiba Satellite L855-S5119 Optical Drive Replacement, Back Plate Removal: 1 단계, 이미지 1/3 Toshiba Satellite L855-S5119 Optical Drive Replacement, Back Plate Removal: 1 단계, 이미지 2/3 Toshiba Satellite L855-S5119 Optical Drive Replacement, Back Plate Removal: 1 단계, 이미지 3/3
    • Turn the laptop over to place it top down.

    • Use a Phillips #1 screwdriver to remove the screw holding in the back plate. This screw does not come out of the plate.

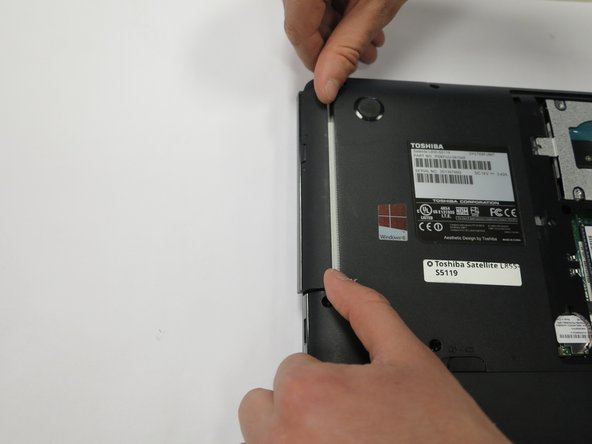
    • Lift the back plate off the laptop, exposing the RAM and Hard Disk.

  2. Toshiba Satellite L855-S5119 Optical Drive Replacement, Optical Drive: 2 단계, 이미지 1/2 Toshiba Satellite L855-S5119 Optical Drive Replacement, Optical Drive: 2 단계, 이미지 2/2
    • Using a Phillips #0 screwdriver, remove the single 3mm screw.

  3. Toshiba Satellite L855-S5119 Optical Drive Replacement: 3 단계, 이미지 1/2 Toshiba Satellite L855-S5119 Optical Drive Replacement: 3 단계, 이미지 2/2
    • Rotate the laptop so that you have access to the optical drive.

    • The optical drive is now only attached by a port in the drive's back. The optical drive can be pulled straight out of its housing.

    • Remove the drive.

결론

To reassemble your device, follow these instructions in reverse order.

다른 한 분이 해당 안내서를 완성하였습니다.

Tyler Shafer

회원 가입일: 02/12/18

426 평판

안내서 3개 작성하였습니다

Washington State, Team S1-G5, Lobnitz Spring 2018 Washington State, Team S1-G5, Lobnitz Spring 2018 회원

WSU-LOBNITZ-S18S1G5

4 회원들

안내서 18개 작성하였습니다

댓글 0개

댓글 쓰기

조회 통계:

24 시간 전: 0

7일 전: 0

30일 전: 5

전체 시간: 248