주요 콘텐츠로 건너뛰기

Toshiba Satellite M55-S135 Screen Replacement

필요한 것

  1. Toshiba Satellite M55-S135 Screen Replacement, Battery: 1 단계, 이미지 1/1
    • Orient the laptop so that it is closed, faced down, and the battery is facing away from you.

    • Slide the unlock switch in the top left-hand corner to the left/unlock position.

  2. Toshiba Satellite M55-S135 Screen Replacement: 2 단계, 이미지 1/1
    • Hold the switch in upper right-hand corner to the right.

    • With the switch held open, pull the battery straight away from the laptop.

  3. Toshiba Satellite M55-S135 Screen Replacement, Screen: 3 단계, 이미지 1/2 Toshiba Satellite M55-S135 Screen Replacement, Screen: 3 단계, 이미지 2/2
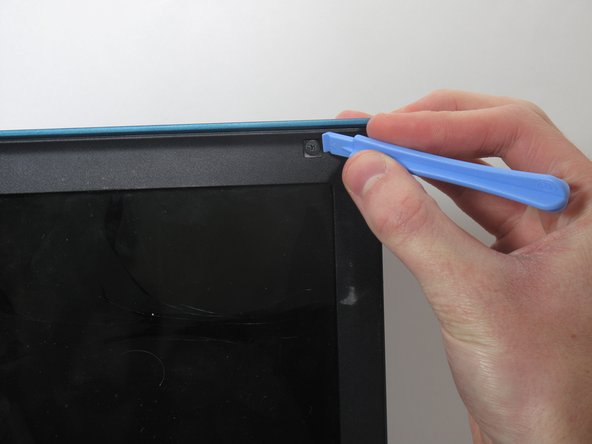
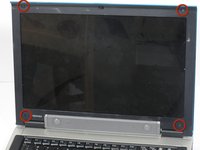
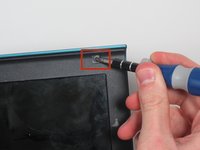
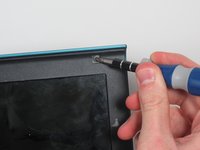
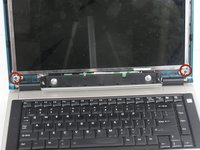
    • Use the plastic opening tool to remove the four small rubber pop-out squares from the corners of your screen.

    • The laptop displayed in the picture does not have these plastic squares.

  4. Toshiba Satellite M55-S135 Screen Replacement: 4 단계, 이미지 1/2 Toshiba Satellite M55-S135 Screen Replacement: 4 단계, 이미지 2/2
    • Use the Phillips 00 screwdriver to unscrew the four 6.72mm screws from the corners of the screen.

    • The screws will be located underneath the previously removed black squares.

  5. Toshiba Satellite M55-S135 Screen Replacement: 5 단계, 이미지 1/1
    • Use the plastic opening tool to pop off the black plastic casing that surrounds the screen.

  6. Toshiba Satellite M55-S135 Screen Replacement: 6 단계, 이미지 1/2 Toshiba Satellite M55-S135 Screen Replacement: 6 단계, 이미지 2/2
    • Use the Phillips 00 screwdriver to remove the two 6.72mm screws at the bottom left and right of the screen.

  7. Toshiba Satellite M55-S135 Screen Replacement: 7 단계, 이미지 1/2 Toshiba Satellite M55-S135 Screen Replacement: 7 단계, 이미지 2/2
    • Turn the laptop 90 degrees clockwise.

    • Use the Phillips 00 screwdriver to remove the six 3.78mm screws from both sides of the screen.

    • Hold on to the screen while removing the screws.

  8. Toshiba Satellite M55-S135 Screen Replacement: 8 단계, 이미지 1/1
    • Fold the screen down so that the back of the screen is visible.

    • Remove the yellow wiring connected to the top of the back of the screen by pulling it out and then up.

  9. Toshiba Satellite M55-S135 Screen Replacement: 9 단계, 이미지 1/1
    • Use the Phillips 00 screwdriver to remove the 5.54mm screw connecting the green panel to the laptop frame.

  10. Toshiba Satellite M55-S135 Screen Replacement: 10 단계, 이미지 1/1
    • Pull out the green panel and disconnect the black cable from the belly of the green panel.

    • The screen should be fully disconnected from laptop at this point.

결론

To reassemble your device, follow these instructions in reverse order.

다른 한 분이 해당 안내서를 완성하였습니다.

Matthew Trinh

회원 가입일: 01/31/13

63 평판

안내서 4개 작성하였습니다

Cal Poly, Team 7-11, Maness Winter 2013 Cal Poly, Team 7-11, Maness Winter 2013 회원

CPSU-MANESS-W13S7G11

4 회원들

안내서 5개 작성하였습니다

댓글 0개

댓글 쓰기

조회 통계:

24 시간 전: 0

7일 전: 1

30일 전: 1

전체 시간: 1,097