소개
This is a replacement guide for the Toshiba Satellite P105-S6147 Screen. This part is responsible for the display of the laptop. Replace this part if your screen has dead pixels, is unresponsive, or has any physical damage. Refer to this troubleshooting guide before replacing the laptop screen.
All the tools you will need in this guide can be found in the iFixit Pro Toolkit. We suggest you perform this replacement on a large, level workspace where you can avoid knocking small parts onto the floor. Label any small parts so you know where to put them when reassembling the laptop.
Consult the Toshiba Satellite P105-S6147 Device Page for further questions.
-
-
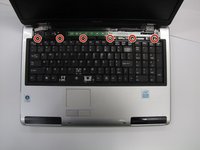
Use the iFixit opening tool to remove the cover at the top of the keyboard.
-
Insert the tool in the small space above the keyboard and gently pry until the cover pops out of its retaining clips.
-
Repeat the prying across the top of the keyboard until the whole cover is loose.
-
-
-
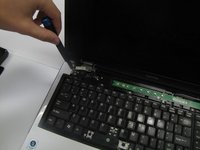
Use the iFixit opening tool to pry the keyboard out of its retaining clips.
-
Insert the tool into the groove surrounding the laptop and pry until the keyboard “pops” out of the laptop body.
-
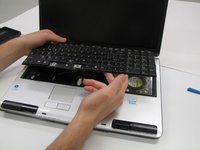
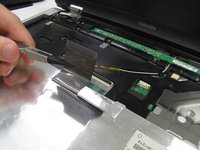
Once the keyboard is free from the laptop body, gently flip the keyboard over, as seen in the third picture.
-
-
-
-
Lay the keyboard down on the bottom of the laptop, as seen in image one.
-
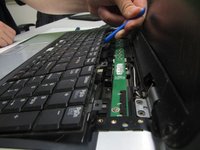
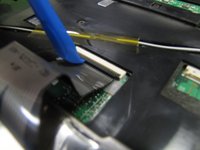
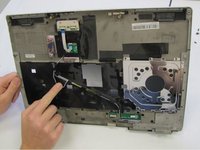
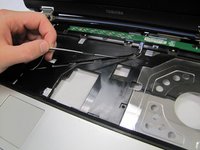
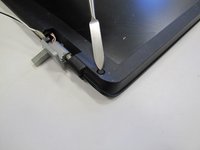
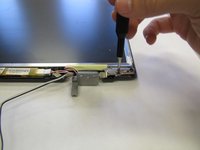
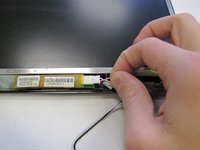
Locate the ribbon cable connecting the bottom of the keyboard to the laptop. There will be a small black and white clip securing the ribbon cable to the laptop.
-
Use the iFixit opening tool to gently open the clip, freeing the ribbon cable from the laptop body.
-
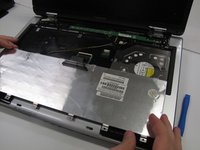
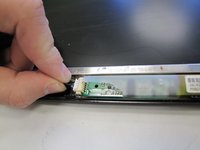
Gently remove the keyboard from the laptop body.
-
-
-
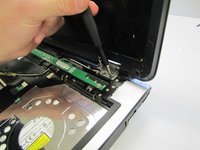
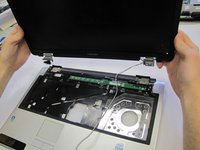
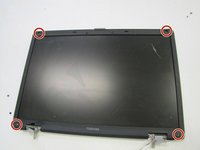
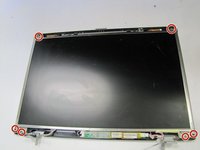
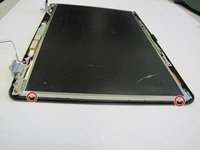
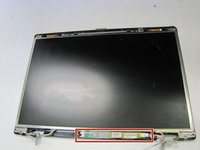
Use the Phillips #0 screwdriver to unscrew the four 3 mm screws connecting the screen to the keyboard.
-


To reassemble your device, follow these instructions in reverse order.
To reassemble your device, follow these instructions in reverse order.
팀

University of North Texas, Team S1-G2, Friess Fall 2019 University of North Texas, Team S1-G2, Friess Fall 2019 회원
UNT-FRIESS-F19S1G2
2 회원들
안내서 5개를 작성함