주요 콘텐츠로 건너뛰기

Toshiba Satellite P205D-S8804 Screen Replacement

필요한 것

  1. Toshiba Satellite P205D-S8804 Screen Replacement, Screen: 1 단계, 이미지 1/1
    • With the screen on a flat surface, remove the screws in each corner of the screen. There will be 4 in total.

    • Note: The screws for the screen may be hidden under rubber pad at the top of the screen so they will have to be removed.

  2. Toshiba Satellite P205D-S8804 Screen Replacement: 2 단계, 이미지 1/1
    • Using a metal spudger wedge open the front and back cover of the screen.

    • Take care to not damage the camera in the process.

  3. Toshiba Satellite P205D-S8804 Screen Replacement: 3 단계, 이미지 1/2 Toshiba Satellite P205D-S8804 Screen Replacement: 3 단계, 이미지 2/2
    • After the front cover is removed remove the two screws at the very bottom of the screen.

    • This will give you access to the screws running along the side of the screen.

  4. Toshiba Satellite P205D-S8804 Screen Replacement: 4 단계, 이미지 1/1
    • Remove the four screws on the each side of the screen. There will be eight in total.

    • We recommend starting from the bottom and working upward.

  5. Toshiba Satellite P205D-S8804 Screen Replacement: 5 단계, 이미지 1/1
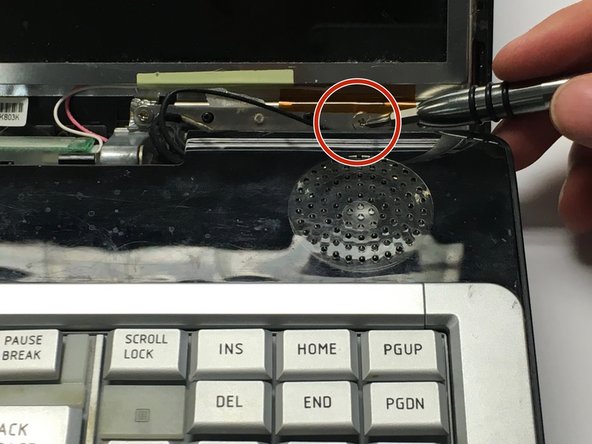
    • Lay the screen flat on the keyboard so they the back panel can be accessed.

    • Remove all the tape on the video cable that connects the screen to the computer.

  6. Toshiba Satellite P205D-S8804 Screen Replacement: 6 단계, 이미지 1/1
    • Remove the video cable from the screen.

    • After the video cable is removed the screen is free and can be removed from the computer.

결론

To reassemble your device, follow these instructions in reverse order.

Caroline Camp

회원 가입일: 01/30/17

1 평판

안내서 3개 작성하였습니다

Baylor, Team 3-2, Whitney Spring 2017 Baylor, Team 3-2, Whitney Spring 2017 회원

BU-WHITNEY-S17S3G2

4 회원들

안내서 4개 작성하였습니다

댓글 0개

댓글 쓰기

조회 통계:

24 시간 전: 0

7일 전: 0

30일 전: 0

전체 시간: 82