주요 콘텐츠로 건너뛰기

Toshiba Satellite P75-A7100 Fan Replacement

필요한 것

  1. Toshiba Satellite P75-A7100 Fan Replacement, Battery: 1 단계, 이미지 1/1
    • Slide the tabs apart from each other.

  2. Toshiba Satellite P75-A7100 Fan Replacement: 2 단계, 이미지 1/2 Toshiba Satellite P75-A7100 Fan Replacement: 2 단계, 이미지 2/2
    • Lift the battery upwards and remove it from the device.

  3. Toshiba Satellite P75-A7100 Fan Replacement, Wi-Fi Adapter: 3 단계, 이미지 1/2 Toshiba Satellite P75-A7100 Fan Replacement, Wi-Fi Adapter: 3 단계, 이미지 2/2
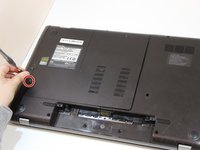
    • Using a Phillips #1 screwdriver, remove the screw from the back cover.

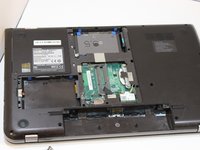
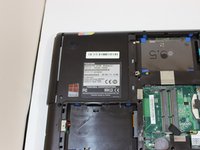
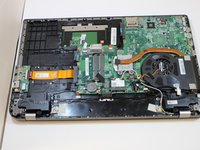
    • Remove the back cover from the device.

  4. Toshiba Satellite P75-A7100 Fan Replacement: 4 단계, 이미지 1/3 Toshiba Satellite P75-A7100 Fan Replacement: 4 단계, 이미지 2/3 Toshiba Satellite P75-A7100 Fan Replacement: 4 단계, 이미지 3/3
    • Remove the optical drive from the device.

  5. Toshiba Satellite P75-A7100 Fan Replacement: 5 단계, 이미지 1/2 Toshiba Satellite P75-A7100 Fan Replacement: 5 단계, 이미지 2/2
    • Using a Phillips #1 screwdriver, unscrew the remaining screws that are visible on the laptop.

    • Remove the back cover from your device.

  6. Toshiba Satellite P75-A7100 Fan Replacement: 6 단계, 이미지 1/3 Toshiba Satellite P75-A7100 Fan Replacement: 6 단계, 이미지 2/3 Toshiba Satellite P75-A7100 Fan Replacement: 6 단계, 이미지 3/3
    • Using a Phillips #1 screwdriver, remove the screw connecting the Wi-Fi adapter to the motherboard.

    • Remove the Wi-Fi adapter from the device.

  7. Toshiba Satellite P75-A7100 Fan Replacement, Fan: 7 단계, 이미지 1/2 Toshiba Satellite P75-A7100 Fan Replacement, Fan: 7 단계, 이미지 2/2
    • Using a Phillips #1 screwdriver, unscrew the 6 remaining screws attached to the fan.

    • Unplug the connector connecting the fan to the motherboard.

    • Remove the fan from the device.

결론

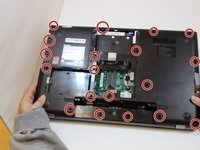
To reassemble your device, follow these instructions in reverse order.

다른 2명이 해당 안내서를 완성하였습니다.

Pria Dalrymple

회원 가입일: 01/17/18

144 평판

안내서 1개 작성함

댓글 한 개

How do you remove and replace the fan from from/to the heatsink? Mine is secured with a metallic tape that is not sticky once removed.

Bruce - 답글

댓글 쓰기

조회 통계:

24 시간 전: 0

7일 전: 5

30일 전: 14

전체 시간: 2,244