필요한 것
-
-
To remove the outer casing, wedge the pry tool in between the front and back panel, and pull them apart.
-
-
-
Locate the lock switch, at the top left corner of the device, and adjust to the unlocked position. (from left to right)
-
-
-
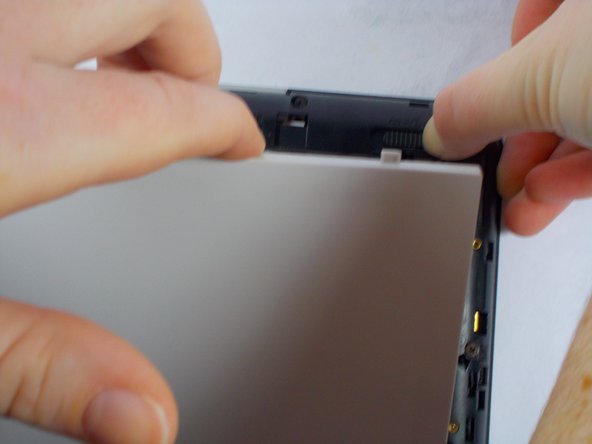
Use your fingers to push the release switch, which is located at the top right corner of the device to the right.
-
While pushing the release switch to the right, use your other hand to pull the battery away from the inner casing.
-
-
-
To replace the battery, take your replacement piece and flip it upside down, revealing the warnings and specifications of that specific battery.
-
Locate the crevice at the bottom of the battery, which has black openings in it.
-
Line up the black openings with the golden prongs located on the inner casing, and slide the battery into place.
-
Move the lock/unlock switch to the locked position
-
-
-
-
Follow the steps outlined in the battery replacement guide to remove the outer casing, and the battery from their position
-
Locate and remove the 14 screws that are located along the outer edge of the tablet. To do this use the a phillips #0 screwdriver.
-
Use the pry tool to loosen the bond between the inner casing and the metal shell below the plastic casing. To do this place the pry tool between the two surfaces and push up.
-
Repeat the last step on each side of the tablet
-
When the plastic casing becomes loose enough you can pull it off using your hands
-
-
-
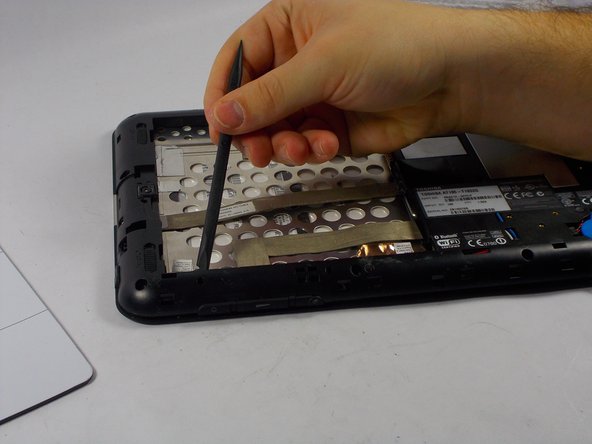
When lifting the plastic casing up you will notice multiple ribbons attached to the metal shell.
-
Use the pry tool to gently lift up the tape holding the ribbons down
-
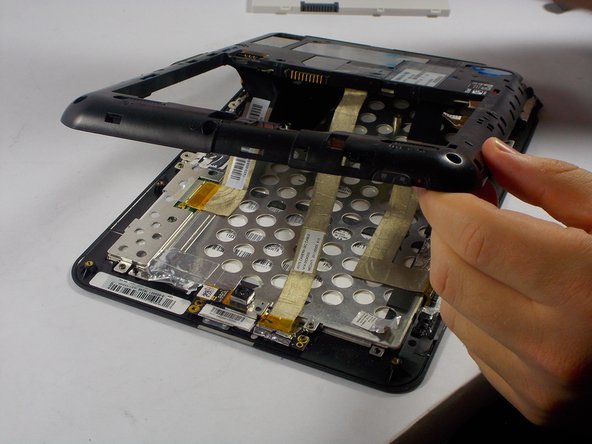
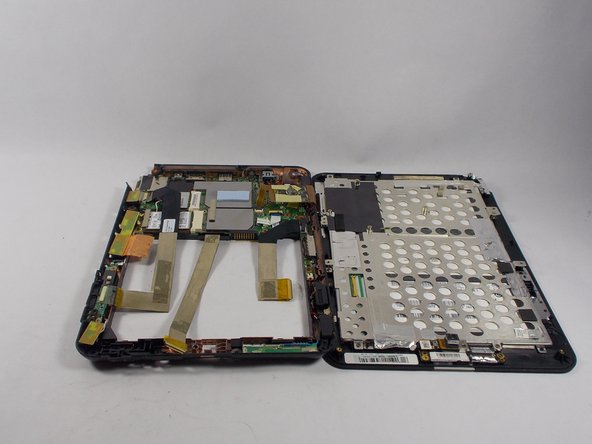
You can now safely lift the rest of the plastic shell up off of the device
-
-
-
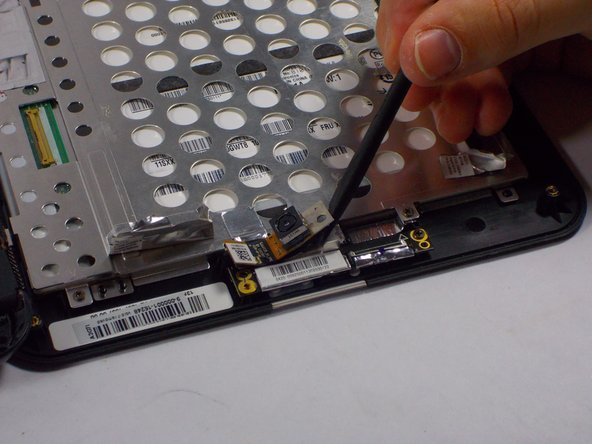
To remove the camera you must first remove one screw that is holding it in place. You will need the phillips #0 screwdriver to complete this step
-
Next you must detach the ribbon connected to the camera. To do this use the pry tool to gently lift the tape out of place
-
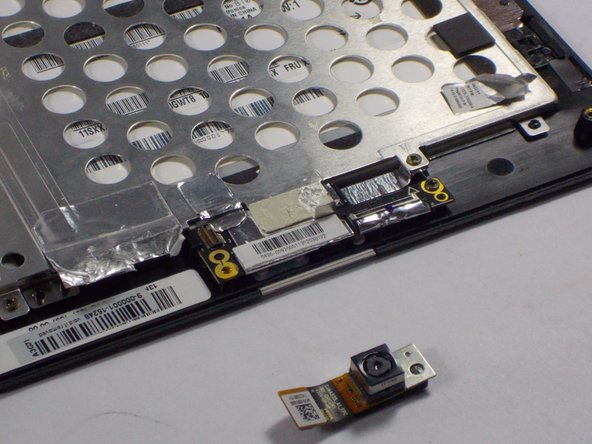
Next use the pry tool to lift the rest of the camera off of the platform
-
-
-
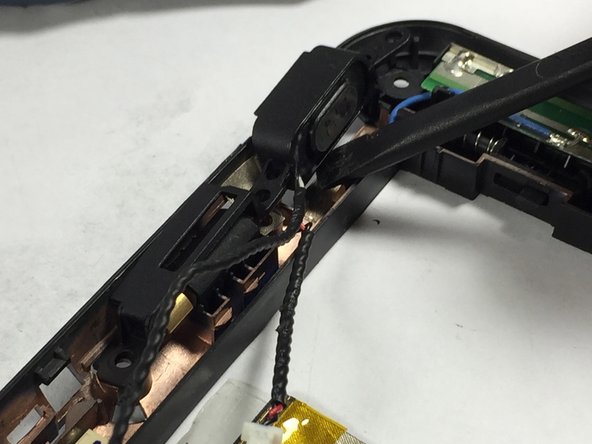
The speakers are located on the right side of the device. There is one speaker towards the top of the device and one on the bottom, just below the volume control buttons.
-
-
-
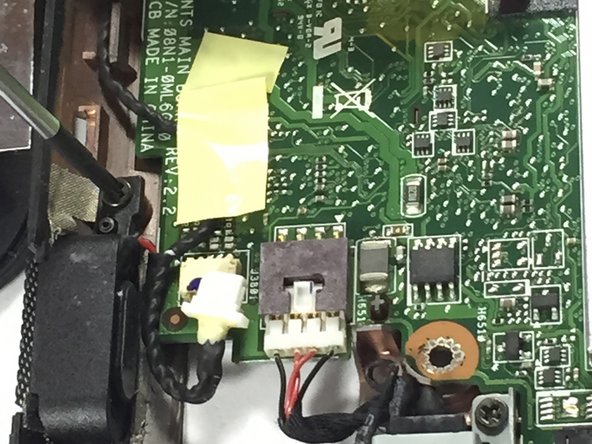
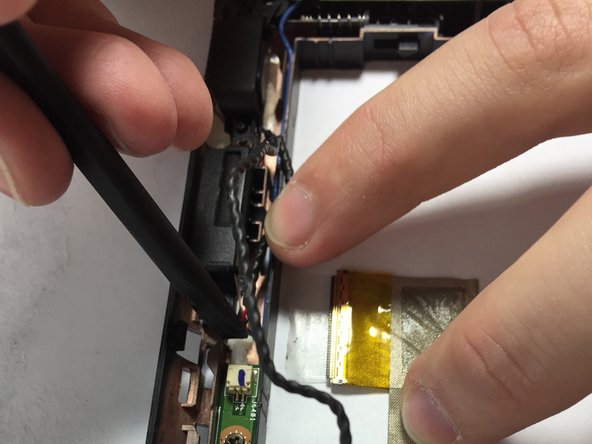
Once locating the speaker, detach the wire that is connected to the logic board.
-
Use the pry tool to pull the cord away from the logic board.
-
-
-
Locate the screw holding the speaker in place. It will be located at the bottom edge of the speaker.
-
Use the phillips #0 screwdriver to remove the screw
-
Use the pry tool to remove the speaker from the board.
-
-
-
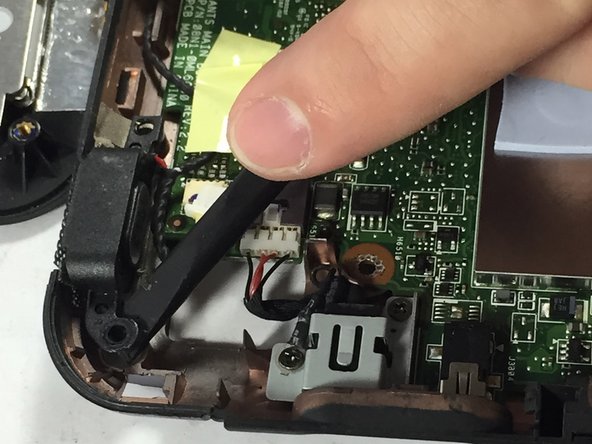
The top speaker is connected to the bottom speaker through a black wire.
-
Pull the wire out of place with your fingers, until you reach the second speaker which is just below where the volume control buttons are located.
-
-
-
Removing the second speaker is the same as removing the first speaker.
-
Locate the screw and unscrew the speaker, using the phillips #0 screwdriver.
-
Use the pry tool to remove the speaker from it's place
-


To reassemble your device, follow these instructions in reverse order.
To reassemble your device, follow these instructions in reverse order.
팀

UMass Dartmouth, Team 1-1, Shastany Fall 2014 UMass Dartmouth, Team 1-1, Shastany Fall 2014 회원
UMASSD-SHASTANY-F14S1G1
3 회원들
안내서 6개 작성하였습니다