주요 콘텐츠로 건너뛰기

Toshiba Thrive Charging Port Replacement

필요한 것

  1. Toshiba Thrive Charging Port Replacement, Back Cover: 1 단계, 이미지 1/1
    • Make sure the lock switch for the back cover is unlocked.

    • The cover is unlocked when the switch is slid in the direction of the 'unlock' icon.

  2. Toshiba Thrive Charging Port Replacement: 2 단계, 이미지 1/2 Toshiba Thrive Charging Port Replacement: 2 단계, 이미지 2/2
    • Remove back cover by prying away from the Thrive.

    • The easiest place to pry from is one of the two speakers.

  3. Toshiba Thrive Charging Port Replacement: 3 단계, 이미지 1/1
    • To remove the battery, make sure the lock switch is in the unlocked position.

    • The battery is unlocked when the switch is slid to the unlocked position.

  4. Toshiba Thrive Charging Port Replacement: 4 단계, 이미지 1/3 Toshiba Thrive Charging Port Replacement: 4 단계, 이미지 2/3 Toshiba Thrive Charging Port Replacement: 4 단계, 이미지 3/3
    • Slide the battery switch release to the right.

    • While holding the switch in place, lift up the battery.

  5. Toshiba Thrive Charging Port Replacement, Midframe: 5 단계, 이미지 1/2 Toshiba Thrive Charging Port Replacement, Midframe: 5 단계, 이미지 2/2
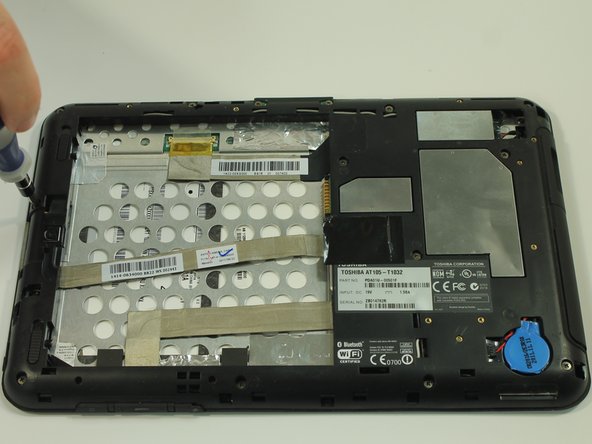
    • Start by using a screwdriver to remove the 12 screws holding on the back cover. The screws are 5mm in length and require a PH0 screwdriver.

    • All of these screws are identical so don't worry about getting them mixed up.

  6. Toshiba Thrive Charging Port Replacement: 6 단계, 이미지 1/3 Toshiba Thrive Charging Port Replacement: 6 단계, 이미지 2/3 Toshiba Thrive Charging Port Replacement: 6 단계, 이미지 3/3
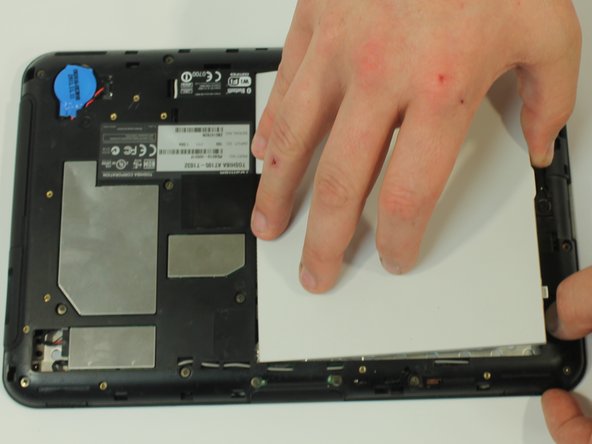
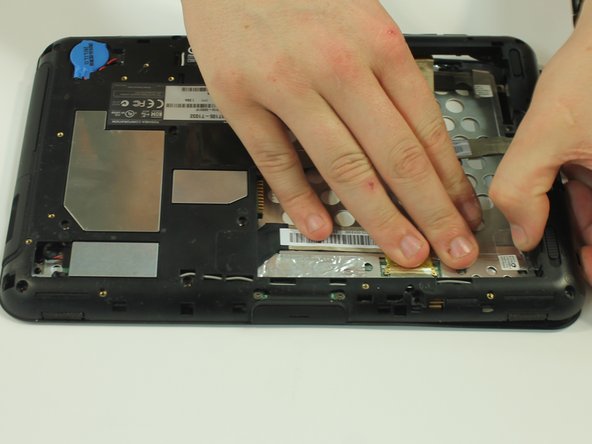
    • Start to gently pry the back of the device off, while leaving it loosely in place.

    • Be careful not to tear or damage the cables when removing the back.

  7. Toshiba Thrive Charging Port Replacement: 7 단계, 이미지 1/3 Toshiba Thrive Charging Port Replacement: 7 단계, 이미지 2/3 Toshiba Thrive Charging Port Replacement: 7 단계, 이미지 3/3
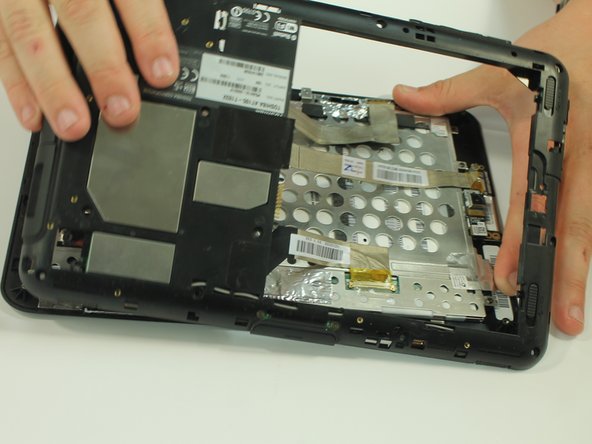
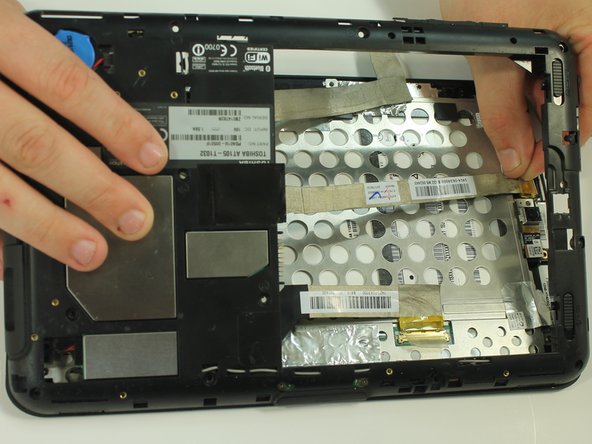
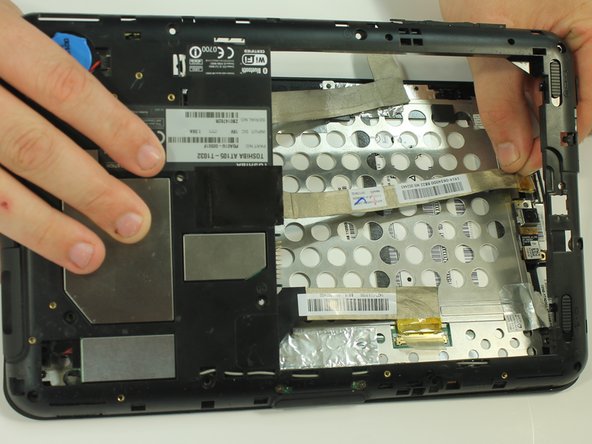
    • Once the back of the case is off, disconnect the wires by gently pulling on the plastic tabs as shown.

  8. Toshiba Thrive Charging Port Replacement: 8 단계, 이미지 1/2 Toshiba Thrive Charging Port Replacement: 8 단계, 이미지 2/2
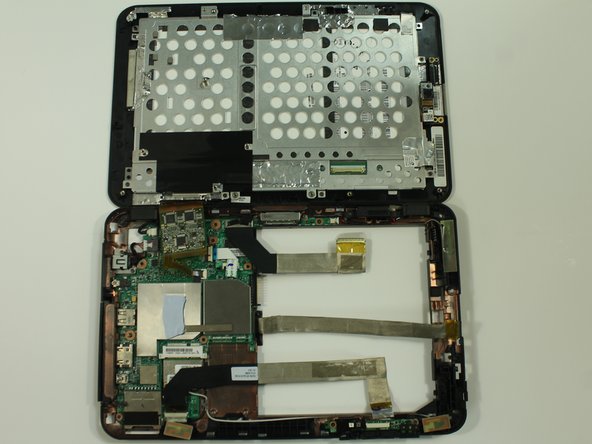
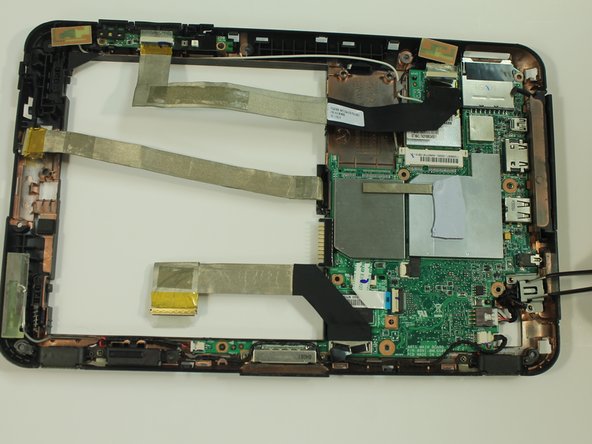
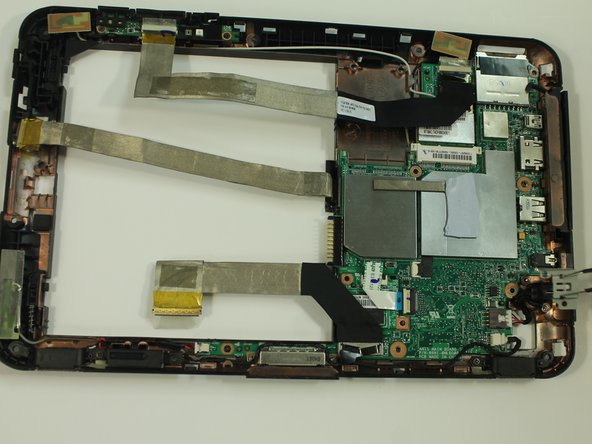
    • Carefully open the device like a book and lay the two halves beside each other.

  9. Toshiba Thrive Charging Port Replacement, Charging Port: 9 단계, 이미지 1/3 Toshiba Thrive Charging Port Replacement, Charging Port: 9 단계, 이미지 2/3 Toshiba Thrive Charging Port Replacement, Charging Port: 9 단계, 이미지 3/3
    • Remove the two screws holding the charging port in place. The screws are 3mm in length and require a PH0 screwdriver.

    • Using a pair of tweezers, lift up the charging port's protective covering

  10. Toshiba Thrive Charging Port Replacement: 10 단계, 이미지 1/3 Toshiba Thrive Charging Port Replacement: 10 단계, 이미지 2/3 Toshiba Thrive Charging Port Replacement: 10 단계, 이미지 3/3
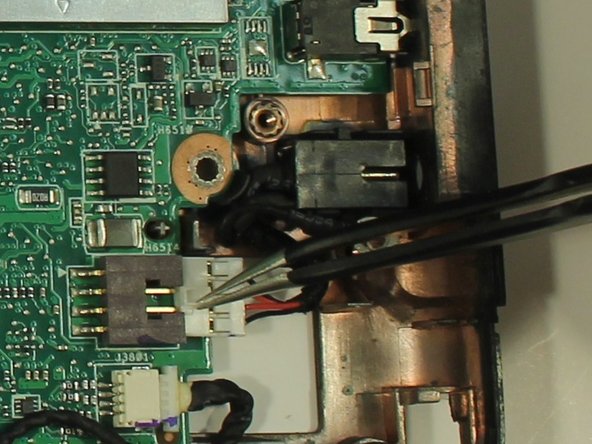
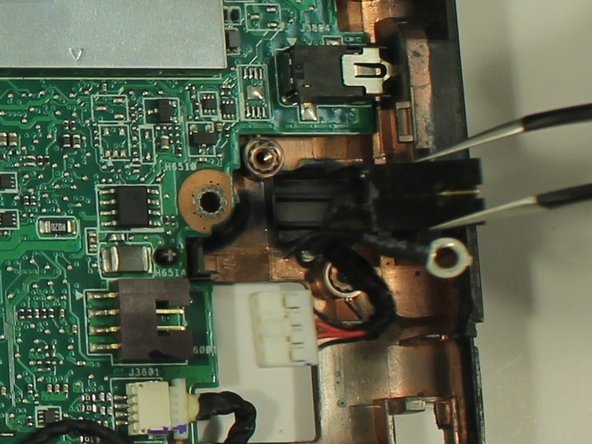
    • Use the tweezers to pull out the connector connecting the charging port to the motherboard.

    • Using the tweezers again, gently lift up the charging port from your Thrive.

결론

To reassemble your device, follow these instructions in reverse order.

다른 7명이 해당 안내서를 완성하였습니다.

Kason

회원 가입일: 09/22/14

1,120 평판

안내서 5개 작성하였습니다

USF Tampa, Team 10-1, Brown Fall 2014 USF Tampa, Team 10-1, Brown Fall 2014 회원

USFT-BROWN-F14S10G1

3 회원들

안내서 12개 작성하였습니다

댓글 한 개

I added "better pictures" flag because i was having trouble following the last step cause i couldnt see anything.

Sun Fai Lau - 답글

댓글 쓰기

조회 통계:

24 시간 전: 0

7일 전: 0

30일 전: 5

전체 시간: 4,041