주요 콘텐츠로 건너뛰기

Uniden UTAB71 Camera Replacement

필요한 것

  1. Uniden UTAB71 Camera Replacement, Camera: 1 단계, 이미지 2개 중 1개 Uniden UTAB71 Camera Replacement, Camera: 1 단계, 이미지 2개 중 2개
    • Use a plastic pry tool to separate the two halves of the tablet.

    • Make sure to be gentle with the pry tool and work your way around the edges of the tablet slowly.

    • Make sure the tablet is powered off before prying open.

    • There are two power ribbons connecting the screen to the back of the tablet. Make sure not to put too much stress on them.

  2. Uniden UTAB71 Camera Replacement: 2 단계, 이미지 2개 중 1개 Uniden UTAB71 Camera Replacement: 2 단계, 이미지 2개 중 2개
    • Use a credit card to lift the battery off the back of the tablet.

    • Do not put any pressure on the motherboard or any other internal components.

    • The battery is glued onto the back of the tablet so make sure to apply as much pressure as needed

  3. Uniden UTAB71 Camera Replacement: 3 단계, 이미지 1개 중 1개
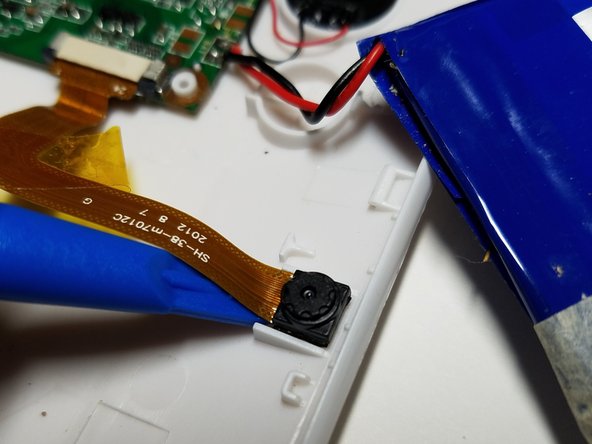
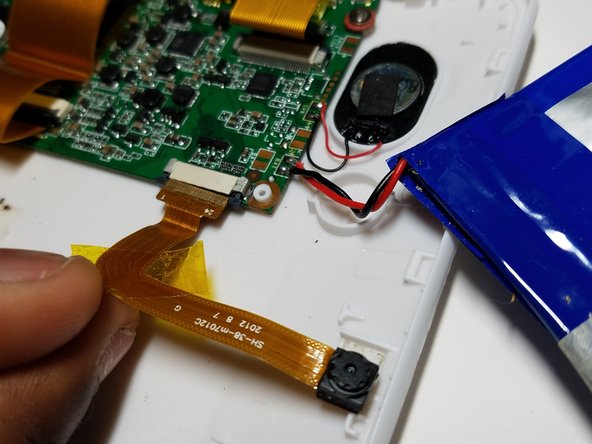
    • Undo the clips off the power ribbon connecting the camera to the motherboard using the blue pry tool.

  4. Uniden UTAB71 Camera Replacement: 4 단계, 이미지 3개 중 1개 Uniden UTAB71 Camera Replacement: 4 단계, 이미지 3개 중 2개 Uniden UTAB71 Camera Replacement: 4 단계, 이미지 3개 중 3개
    • Use the pry tool to remove the yellow tape from the power ribbon connected to the camera.

    • Place the plastic pry tool under the camera component and lift it off the tablet.

결론

To reassemble your device, follow these instructions in reverse order.

작성자

3다른 기여자 명과 함께

Ryan Jewell

회원 가입일: 10/20/16

431 평판

안내서 4개를 작성함

UMass Dartmouth, Team 5-4, Martin Fall 2016 UMass Dartmouth, Team 5-4, Martin Fall 2016 회원

UMASSD-MARTIN-F16S5G4

3 회원들

안내서 8개를 작성함

0가이드 댓글

댓글 쓰기

조회 통계:

지난 24시간: 0

지난 7일: 2

지난 30일: 2

전체 시간: 194