주요 콘텐츠로 건너뛰기

Verizon Ellipsis 10 Motherboard Replacement

필요한 것

  1. Verizon Ellipsis 10 Motherboard Replacement, Back Cover: 1 단계, 이미지 1/1
    • Open the SD/SIM card cover to start prying off the back cover.

  2. Verizon Ellipsis 10 Motherboard Replacement: 2 단계, 이미지 1/1
    • Start using the iFixit Opening Tool in the SD/SIM area to release the clips holding the back panel on.

  3. Verizon Ellipsis 10 Motherboard Replacement: 3 단계, 이미지 1/1
    • Follow along the edge of the device to undo all of the retaining clips.

  4. Verizon Ellipsis 10 Motherboard Replacement: 4 단계, 이미지 1/1
    • Once all the clips are undone, the back panel should come off with little effort.

  5. Verizon Ellipsis 10 Motherboard Replacement, Battery: 5 단계, 이미지 1/1
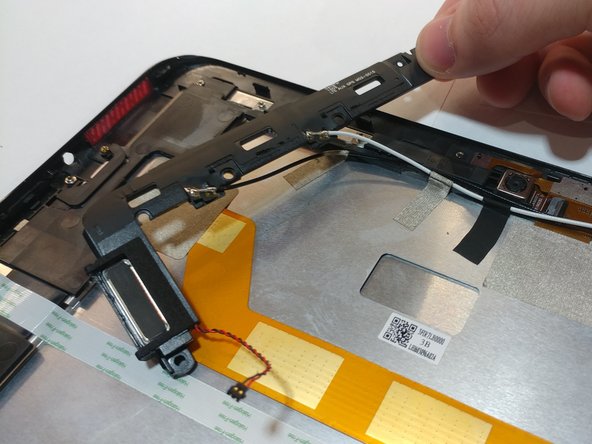
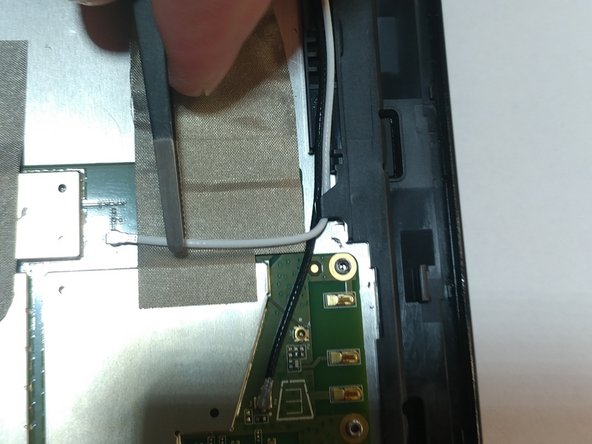
    • Remove the bottom piece of tape securing the battery making sure you are not peeling up anything else in the process.

  6. Verizon Ellipsis 10 Motherboard Replacement: 6 단계, 이미지 1/1
    • Remove the top piece of tape using an iFixit opening tool.

  7. Verizon Ellipsis 10 Motherboard Replacement: 7 단계, 이미지 1/1
    • Once you have a hold on the tape, carefully remove it making sure you aren’t damaging the battery in the process.

  8. Verizon Ellipsis 10 Motherboard Replacement: 8 단계, 이미지 1/1
    • Unplug the battery power connector by sliding the white plastic plug down away from the board.

  9. Verizon Ellipsis 10 Motherboard Replacement: 9 단계, 이미지 1/1
    • The battery should be free to come out of the device. Make sure not to bend or damage the battery.

  10. Verizon Ellipsis 10 Motherboard Replacement, Camera: 10 단계, 이미지 1/1
    • Remove 4 M1.5 screws holding in the labeled LTE module.

  11. Verizon Ellipsis 10 Motherboard Replacement: 11 단계, 이미지 1/1
    • Use a nylon spudger to pry up the module.

    • It's held in with some clips so there will be a little bit of resistance.

  12. Verizon Ellipsis 10 Motherboard Replacement: 12 단계, 이미지 1/2 Verizon Ellipsis 10 Motherboard Replacement: 12 단계, 이미지 2/2
    • Remove the 4 M1.5 screws holding in the labeled auxiliary LTE/GPS module.

    • The module should come up with a little resistance.

  13. Verizon Ellipsis 10 Motherboard Replacement: 13 단계, 이미지 1/1
    • Use a pair of tweezers to lift up the front camera off its locating post.

  14. Verizon Ellipsis 10 Motherboard Replacement: 14 단계, 이미지 1/2 Verizon Ellipsis 10 Motherboard Replacement: 14 단계, 이미지 2/2
    • Remove the non-conductive tape covering the camera ribbon cable.

    • You may need to remove the white antenna cable to remove the tape.

  15. Verizon Ellipsis 10 Motherboard Replacement: 15 단계, 이미지 1/1
    • Carefully unplug the ribbon cable from the motherboard.

  16. Verizon Ellipsis 10 Motherboard Replacement: 16 단계, 이미지 1/2 Verizon Ellipsis 10 Motherboard Replacement: 16 단계, 이미지 2/2
    • Peel up the ribbon cable carefully as it is glued to the device.

    • After having peeled up the cable, the cameras should be free to come out of the device.

  17. Verizon Ellipsis 10 Motherboard Replacement, Motherboard: 17 단계, 이미지 1/1
    • Remove the non-conductive tape covering two ribbon cables.

  18. Verizon Ellipsis 10 Motherboard Replacement: 18 단계, 이미지 1/1
    • Gently unplug both the orange and white ribbon cables.

  19. Verizon Ellipsis 10 Motherboard Replacement: 19 단계, 이미지 1/1
    • Use tweezers to pry/disconnect both the black and white antenna cables from the top of the motherboard.

  20. Verizon Ellipsis 10 Motherboard Replacement: 20 단계, 이미지 1/1
    • Unplug the last ribbon cable from the bottom of the motherboard.

  21. Verizon Ellipsis 10 Motherboard Replacement: 21 단계, 이미지 1/1
    • Remove all M1.5 screws holding in the motherboard.

  22. Verizon Ellipsis 10 Motherboard Replacement: 22 단계, 이미지 1/1
    • Once all screws are removed, the motherboard should easily come off the device without any resistance.

결론

To reassemble your device, follow these instructions in reverse order.

다른 한 분이 해당 안내서를 완성하였습니다.

Marco Bellutta

회원 가입일: 04/05/19

253 평판

안내서 1개 작성함

댓글 0개

댓글 쓰기

조회 통계:

24 시간 전: 0

7일 전: 0

30일 전: 0

전체 시간: 353