주요 콘텐츠로 건너뛰기

Viewsonic gTablet UPC300-2.2 Antenna Replacement

필요한 것

  1. Viewsonic gTablet UPC300-2.2 Antenna Replacement, Back Cover Screws: 1 단계, 이미지 1/3 Viewsonic gTablet UPC300-2.2 Antenna Replacement, Back Cover Screws: 1 단계, 이미지 2/3 Viewsonic gTablet UPC300-2.2 Antenna Replacement, Back Cover Screws: 1 단계, 이미지 3/3
    • Using your spudger or metal tweezers, work the rubber screw covers out of their sockets, found on each of the four corners of the back cover.

    • Have patience! These are held in with glue and can take time and a few attempts to remove.

    • Using a PH00 screwdriver, remove the 5.8mm screws found beneath each rubber cover (4 total).

  2. Viewsonic gTablet UPC300-2.2 Antenna Replacement, Pry Off Back Cover: 2 단계, 이미지 1/3 Viewsonic gTablet UPC300-2.2 Antenna Replacement, Pry Off Back Cover: 2 단계, 이미지 2/3 Viewsonic gTablet UPC300-2.2 Antenna Replacement, Pry Off Back Cover: 2 단계, 이미지 3/3
    • Using the flat end of your prying tool, work the back cover away from the rest of the gTabet.

    • Starting near the charging port, work in one direction around the perimeter of the device.

    • Do not insert prying tool deeper than is necessary to separate back cover. You may damage other components!

    • Lift off back cover to reveal the interior of the device.

  3. Viewsonic gTablet UPC300-2.2 Antenna Replacement, Identify Battery & Prepare for Removal: 3 단계, 이미지 1/3 Viewsonic gTablet UPC300-2.2 Antenna Replacement, Identify Battery & Prepare for Removal: 3 단계, 이미지 2/3 Viewsonic gTablet UPC300-2.2 Antenna Replacement, Identify Battery & Prepare for Removal: 3 단계, 이미지 3/3
    • The battery is the large black square that dominates much of the device interior.

    • There is tape holding several wires in place. This must be removed before the battery can be removed. Peel it gently; you will want to use it later.

  4. Viewsonic gTablet UPC300-2.2 Antenna Replacement, Disconnect Battery Power Cable: 4 단계, 이미지 1/3 Viewsonic gTablet UPC300-2.2 Antenna Replacement, Disconnect Battery Power Cable: 4 단계, 이미지 2/3 Viewsonic gTablet UPC300-2.2 Antenna Replacement, Disconnect Battery Power Cable: 4 단계, 이미지 3/3
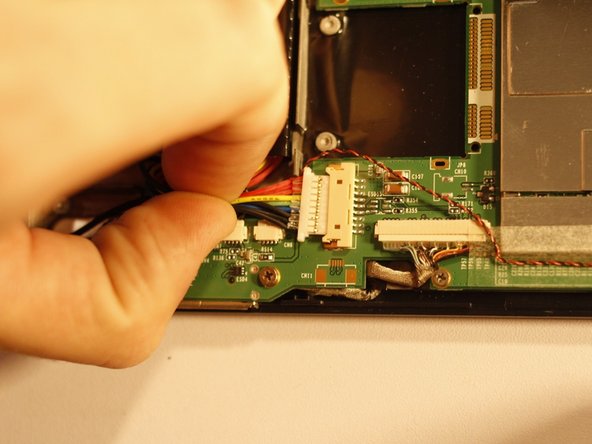
    • Using a PLASTIC tool of your choice, push both ends of the power cable connector, one at a time, away from its housing. This will slowly wiggle the connector out of place.

    • The white connector(red markup) comes off while the off white connector(orange markup) stays on the motherboard.

  5. Viewsonic gTablet UPC300-2.2 Antenna Replacement, Move Front-Facing Camera & Remove Battery: 5 단계, 이미지 1/3 Viewsonic gTablet UPC300-2.2 Antenna Replacement, Move Front-Facing Camera & Remove Battery: 5 단계, 이미지 2/3 Viewsonic gTablet UPC300-2.2 Antenna Replacement, Move Front-Facing Camera & Remove Battery: 5 단계, 이미지 3/3
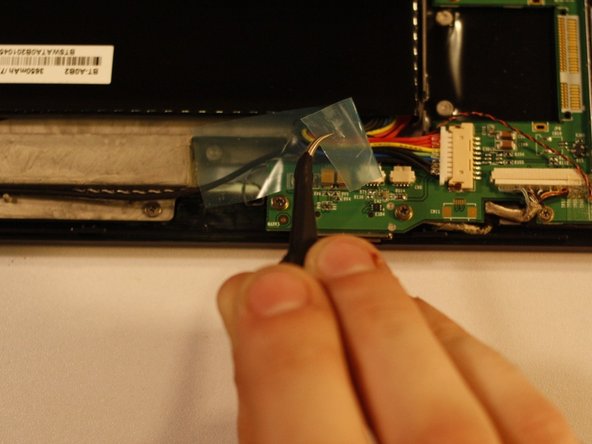
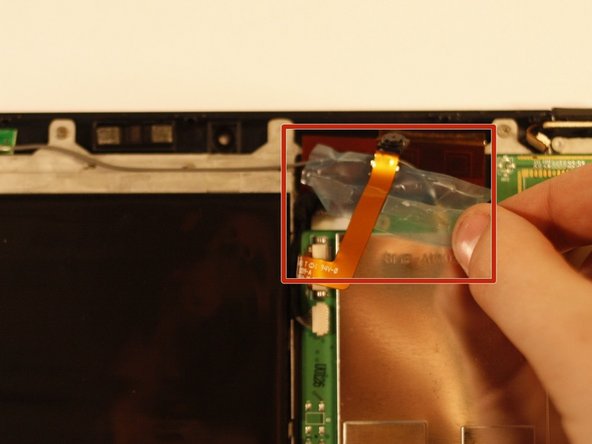
    • Using tweezers, remove the protective foam backing arch from the front-facing camera.

    • Pull the camera out of its housing and move it aside.

    • Be sure to move any wires out of the way before attempting to move the battery, as these are still connected and shouldn't be stressed!

    • Gently lift the battery up and away from the rest of the device and set it aside.

  6. Viewsonic gTablet UPC300-2.2 Antenna Replacement, Disconnect the Speaker Assembly: 6 단계, 이미지 1/3 Viewsonic gTablet UPC300-2.2 Antenna Replacement, Disconnect the Speaker Assembly: 6 단계, 이미지 2/3 Viewsonic gTablet UPC300-2.2 Antenna Replacement, Disconnect the Speaker Assembly: 6 단계, 이미지 3/3
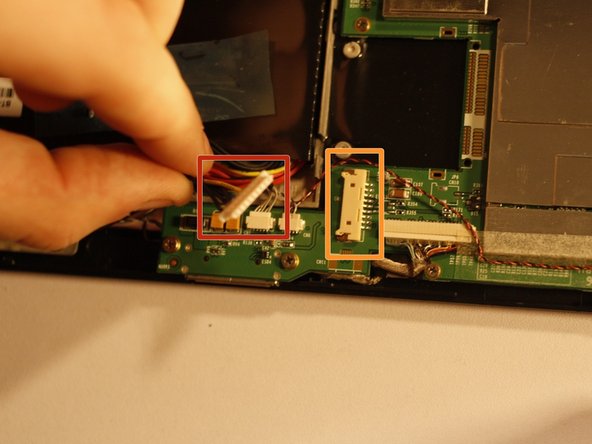
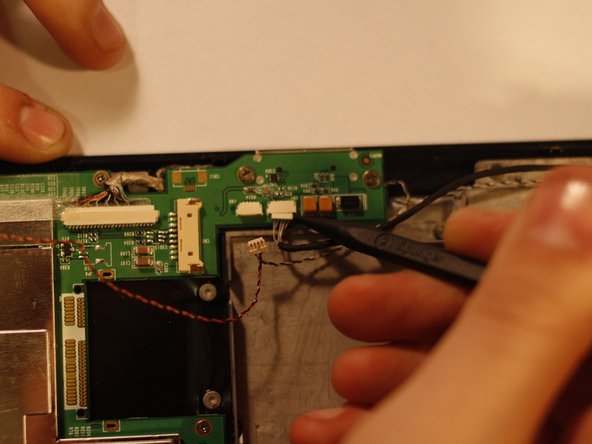
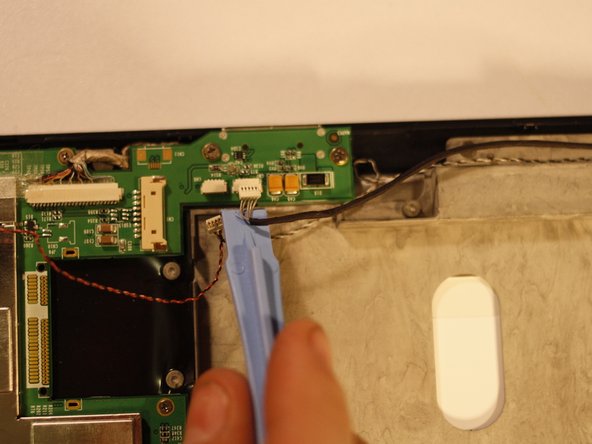
    • Using tweezers or the spudger-wiggle technique, disconnect the two wires (shown here to the right of the battery power cable housing) from their housings.

    • It is very easy to damage the wires going to and from these connectors! Going slow and using as little force as possible will help to prevent this.

  7. Viewsonic gTablet UPC300-2.2 Antenna Replacement, Disconnect the Antenna: 7 단계, 이미지 1/3 Viewsonic gTablet UPC300-2.2 Antenna Replacement, Disconnect the Antenna: 7 단계, 이미지 2/3 Viewsonic gTablet UPC300-2.2 Antenna Replacement, Disconnect the Antenna: 7 단계, 이미지 3/3
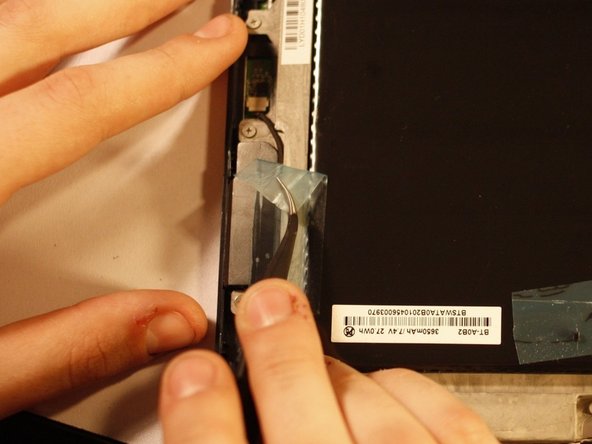
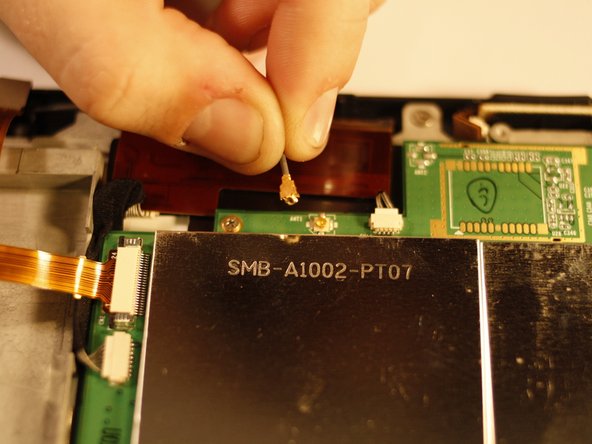
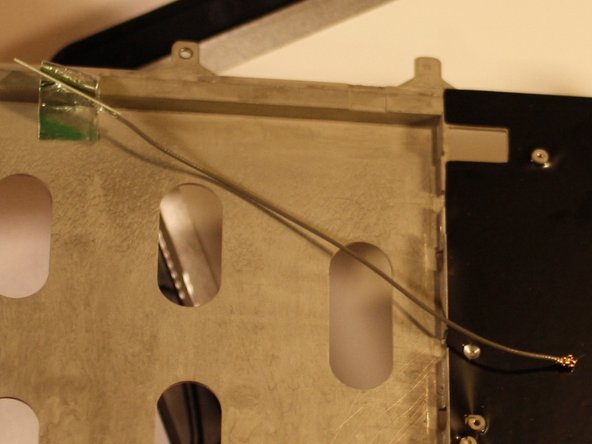
    • Find the antenna receiver affixed to the LCD Screen chassis with foil tape. Gently peel back the foil tape and remove the antenna.

    • Now follow the wire attached to the antenna back to where it connects to the motherboard. Gently rotate and lift the connection until it lifts away.

    • You may now install a replacement antenna by reversing these steps.

결론

To reassemble your device, follow these instructions in reverse order.

다른 한 분이 해당 안내서를 완성하였습니다.

Cristian

회원 가입일: 11/05/14

591 평판

안내서 5개 작성하였습니다

UMass Dartmouth, Team 4-1, Miles Fall 2014 UMass Dartmouth, Team 4-1, Miles Fall 2014 회원

UMASSD-MILES-F14S4G1

3 회원들

안내서 10개 작성하였습니다

댓글 0개

댓글 쓰기

조회 통계:

24 시간 전: 0

7일 전: 0

30일 전: 0

전체 시간: 207