주요 콘텐츠로 건너뛰기

Visual Land Prestige 10 Battery Replacement

필요한 것

  1. Visual Land Prestige 10 Battery Replacement, Back Case: 1 단계, 이미지 1/3 Visual Land Prestige 10 Battery Replacement, Back Case: 1 단계, 이미지 2/3 Visual Land Prestige 10 Battery Replacement, Back Case: 1 단계, 이미지 3/3
    이 단계에 사용된 도구:
    Magnetic Project Mat
    $19.95
    구매
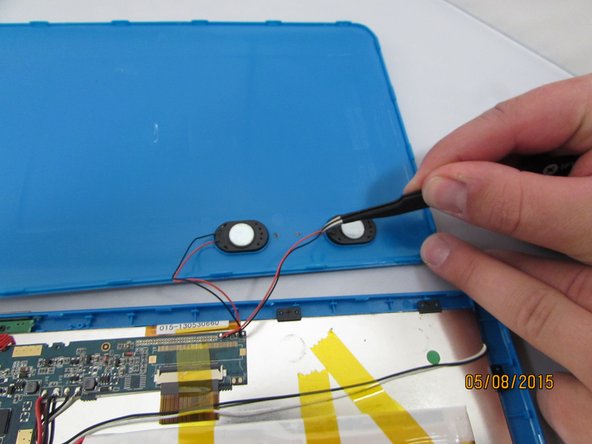
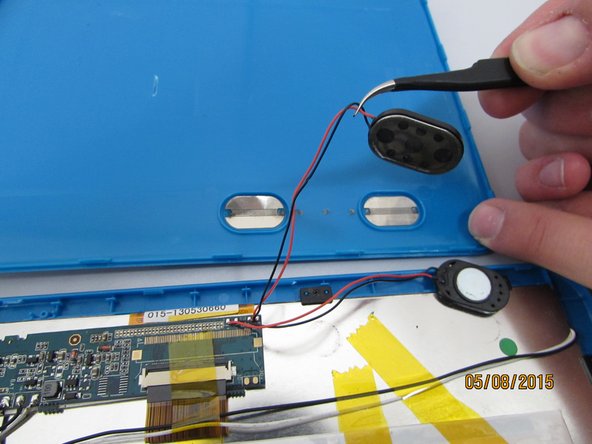
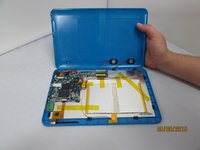
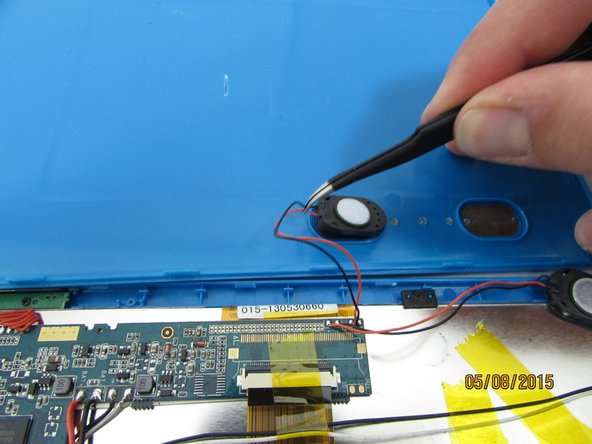
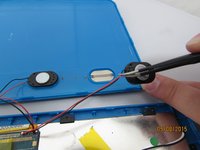
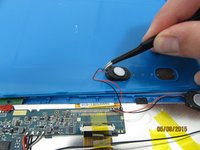
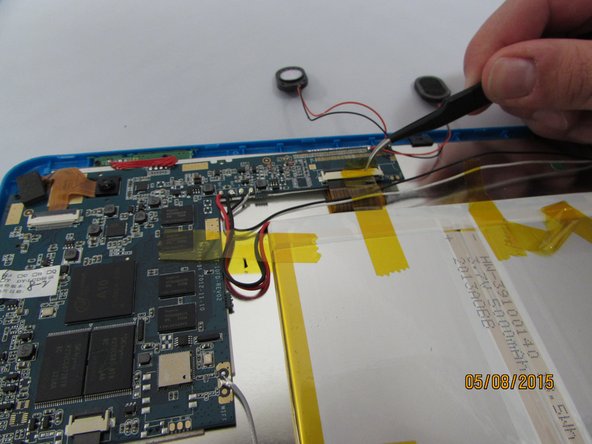
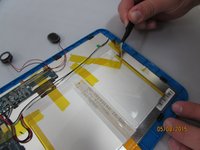
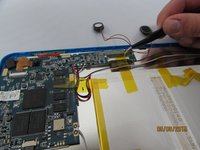
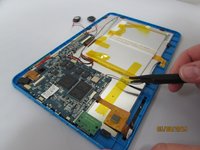
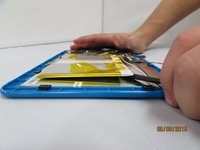
    • Remove the 3mm screws from bottom of tablet with the precision screwdriver and place on magnetic mat. label where they came from.

    • All screws throughout this guide are the same 3mm size.

  2. Visual Land Prestige 10 Battery Replacement: 2 단계, 이미지 1/3 Visual Land Prestige 10 Battery Replacement: 2 단계, 이미지 2/3 Visual Land Prestige 10 Battery Replacement: 2 단계, 이미지 3/3
    • Using the spudger, create a small opening to be used to open the back case.

    • While holding the case open, insert the plastic opening tool to get a larger opening.

    • Once you have a slight opening, insert the spudger and work around the edges, separating the back plate from the front.

  3. Visual Land Prestige 10 Battery Replacement: 3 단계, 이미지 1/3 Visual Land Prestige 10 Battery Replacement: 3 단계, 이미지 2/3 Visual Land Prestige 10 Battery Replacement: 3 단계, 이미지 3/3
    • now that the case is open, carefully remove the speakers and set aside.

  4. Visual Land Prestige 10 Battery Replacement: 4 단계, 이미지 1/2 Visual Land Prestige 10 Battery Replacement: 4 단계, 이미지 2/2
    이 단계에 사용된 도구:
    Tweezers
    $4.99
    구매
    • Gently remove the speakers from the back case with tweezers and set the case aside.

  5. Visual Land Prestige 10 Battery Replacement, Battery: 5 단계, 이미지 1/3 Visual Land Prestige 10 Battery Replacement, Battery: 5 단계, 이미지 2/3 Visual Land Prestige 10 Battery Replacement, Battery: 5 단계, 이미지 3/3
    • Remove yellow tape from surrounding components.

  6. Visual Land Prestige 10 Battery Replacement: 6 단계, 이미지 1/3 Visual Land Prestige 10 Battery Replacement: 6 단계, 이미지 2/3 Visual Land Prestige 10 Battery Replacement: 6 단계, 이미지 3/3
    • insert the spudger and gently work around and underneath the battery.

    • With the battery separated from the LCD Display, set it aside.

    • The battery is held down by very strong adhesive.

  7. Visual Land Prestige 10 Battery Replacement: 7 단계, 이미지 1/1
    • Desolder and remove the 2 wires from the motherboard.

    • Use caution when desoldering to avoid damage to yourself or to the components.

결론

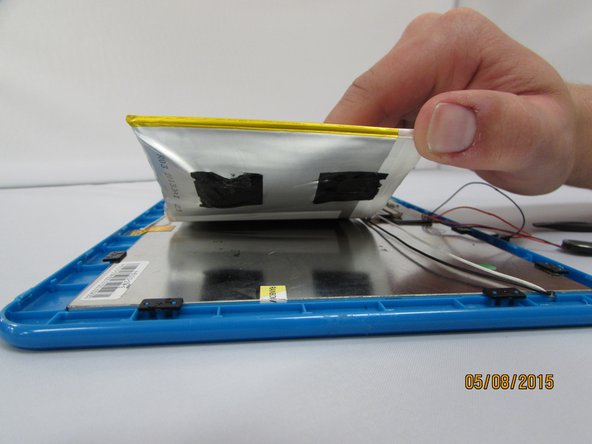
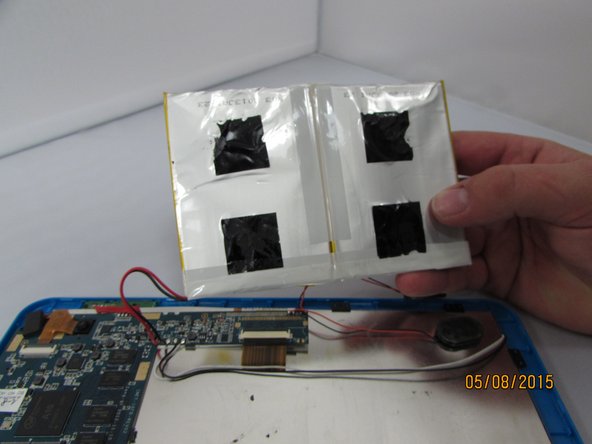
To reassemble your device, follow these instructions in reverse order.

다른 8명이 해당 안내서를 완성하였습니다.

Connor Reese

회원 가입일: 04/08/15

1,298 평판

안내서 6개 작성하였습니다

댓글 7개

Wat if the charge port how do u replace it Visaul land 10.1

jessiepettway - 답글

Thank you for posting. Great illustrations. Got mine apart so easy.

Lori Pepper - 답글

where can I get a replacement battery for Visual Land Prestige 10D tablet?

John Conger - 답글

Where can I get a replacement battery for Visual Land Prestige 10.1 tablet???

Thank you.

Belinda Rivera

brp52@hotmail.com

Belinda Lorenzana - 답글

where can I get a replacement battery for visionland prestige 10 3.7v

Fred Maxwell - 답글

댓글 쓰기

조회 통계:

24 시간 전: 1

7일 전: 7

30일 전: 25

전체 시간: 8,169