주요 콘텐츠로 건너뛰기

Vivitar DVR 781HD Front Case Replacement

필요한 것

  1. Vivitar DVR 781HD Front Case Replacement, Front Case: 1 단계, 이미지 1/3 Vivitar DVR 781HD Front Case Replacement, Front Case: 1 단계, 이미지 2/3 Vivitar DVR 781HD Front Case Replacement, Front Case: 1 단계, 이미지 3/3
    • Begin with the camcorder lens up on a clear working surface.

    • Remove the two 4mm Phillips #1 screws holding the switch plate in place. Rotate the device 180 degrees and repeat for the screws on the opposite side.

  2. Vivitar DVR 781HD Front Case Replacement: 2 단계, 이미지 1/1
    • Slide the plastic opening tool into the seam between the front and back sections of the case and apply a small amount of force to pop the case open.

  3. Vivitar DVR 781HD Front Case Replacement: 3 단계, 이미지 1/3 Vivitar DVR 781HD Front Case Replacement: 3 단계, 이미지 2/3 Vivitar DVR 781HD Front Case Replacement: 3 단계, 이미지 3/3
    • Move the plastic opening tool around the seam and apply force at each step to separate the front plate from the back plate and motherboard.

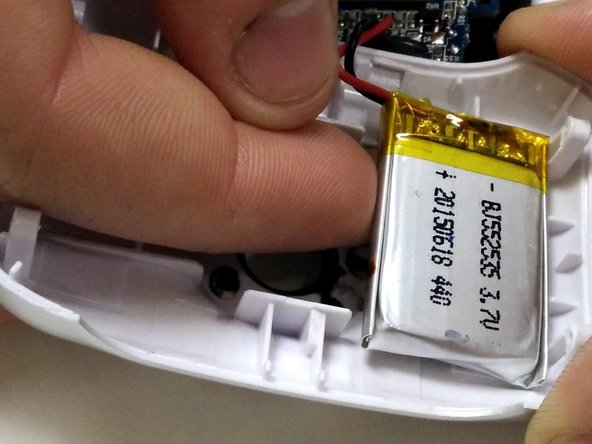
    • The battery is held to the front half of the case with double-sided tape. Peel it up with a finger, being careful not to damage the battery.

결론

To reassemble your device, follow these instructions in reverse order.

Jordan Baum

회원 가입일: 02/13/16

355 평판

안내서 2개 작성하였습니다

IUPUI, Team 54-6, Wilson Spring 2016 IUPUI, Team 54-6, Wilson Spring 2016 회원

IUPUI-WILSON-S16S54G6

3 회원들

안내서 10개 작성하였습니다

댓글 0개

댓글 쓰기

조회 통계:

24 시간 전: 1

7일 전: 6

30일 전: 8

전체 시간: 284