소개
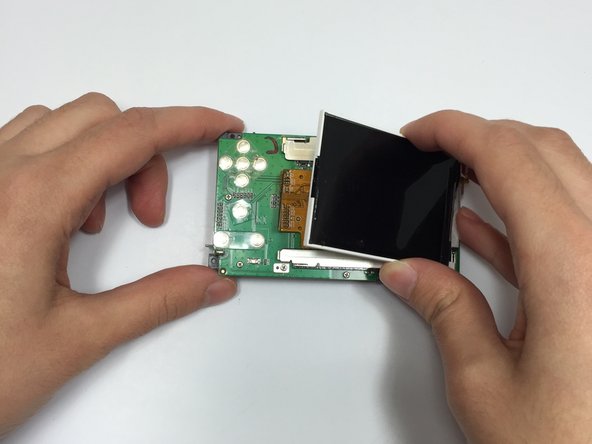
If the screen on your Vivitar Vivicam T027 isn’t giving you the full picture because it’s scratched, cracked or otherwise damaged, use this guide to replace the 320 x 240 pixel 2.7” TFT LCD Display screen.
Having a clear, fully functional screen helps you take and view the best pictures possible. Don’t let a damaged screen come between you and great pictures.
Before using this guide, gather the tools you will need for the project and ensure you have a clean, clear work area. This will make it easy to keep track of all the parts and pieces you’ll be working with. Using a small white towel will keep tiny screws from rolling away from you and make them easy to see.
Don’t forget to remove the batteries from the camera before starting!
필요한 것
-
-
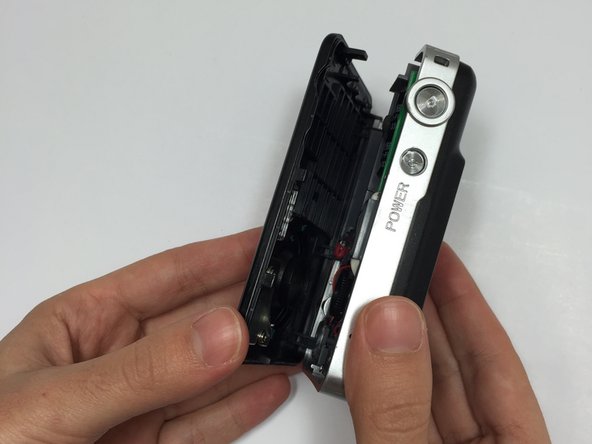
Remove the 3 mm screws on the sides of the camera, using a Phillips #00 screwdriver.
-
-


To reassemble your device, follow these instructions in reverse order.
To reassemble your device, follow these instructions in reverse order.
다른 한 분이 해당 안내서를 완성하였습니다.
팀

Marist, Team 15-13, Laflen Spring 2015 Marist, Team 15-13, Laflen Spring 2015 회원
MARS-LAFLEN-S15S15G13
4 회원들
안내서 3개 작성하였습니다
댓글 2개
Any heat required for this? How would I tap into the a/v feed from a digital camera to extend the screen? Data output to the sd card or usb?
How much would a screen replacement for a Vivitar Vivicam s124