이 버전에는 잘못된 편집 사항이 있을 수 있습니다. 최신 확인된 스냅샷으로 전환하십시오.
필요한 것
-
이 단계는 번역되지 않았습니다. 번역을 도와주십시오
-
Unplug any cables from the USB, power, display or DVI-D ports by gripping the cord by the connector and pulling straight out of the port.
-
-
이 단계는 번역되지 않았습니다. 번역을 도와주십시오
-
Place the device screen down on a flat surface.
-
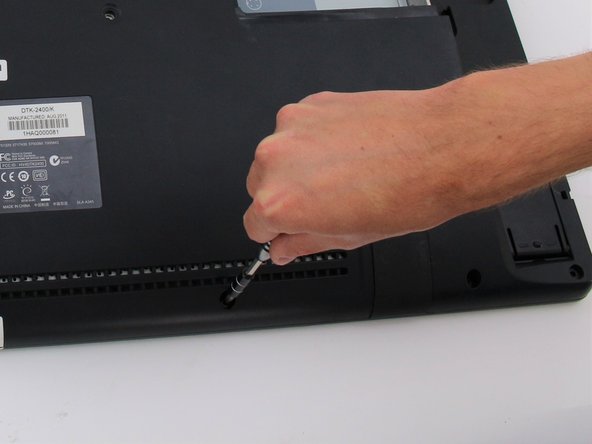
Remove eight 10mm Phillips #2 screws (four on each leg of the stand) by turning the screwdriver counterclockwise.
-
-
이 단계는 번역되지 않았습니다. 번역을 도와주십시오
-
Lift the stand up and away from the rest of the device so the legs separate from the mounting plate.
-
-
이 단계는 번역되지 않았습니다. 번역을 도와주십시오
-
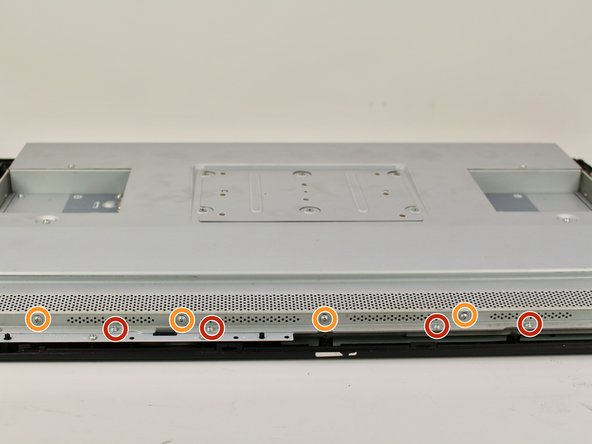
Remove eighteen 10.2mm Phillips #1 screws from the perimeter of the back panel by turning the screwdriver counterclockwise.
-
Remove one 11.9mm Phillips #1 screw from the center of the back panel.
-
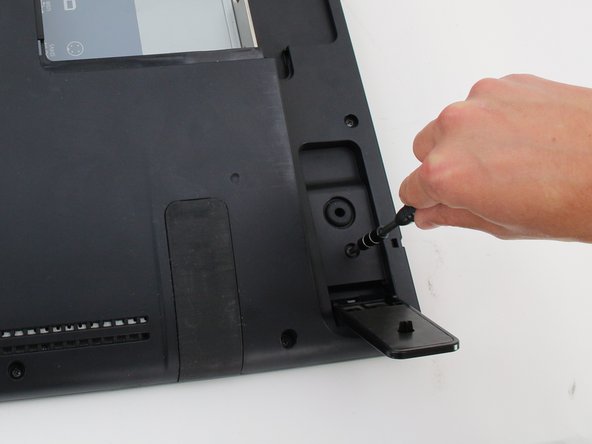
Remove two 10.2mm Phillips #1 screws from underneath hinged panels in the bottom right and left corners.
-
-
이 단계는 번역되지 않았습니다. 번역을 도와주십시오
-
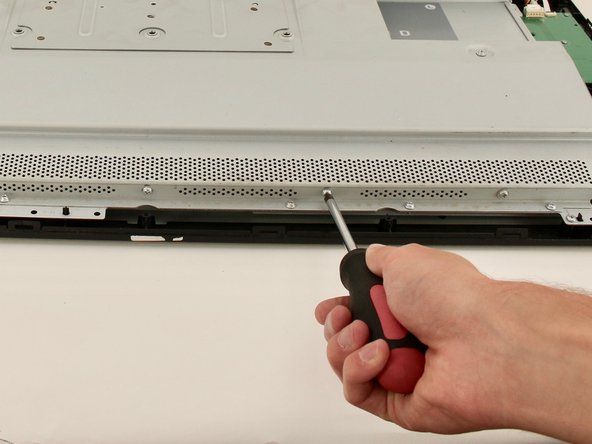
Lift the back panel up by a corner and insert a plastic opening tool in the gap.
-
Slide the tool along the gap around the perimeter of the device while lifting to unlatch the back panel.
-
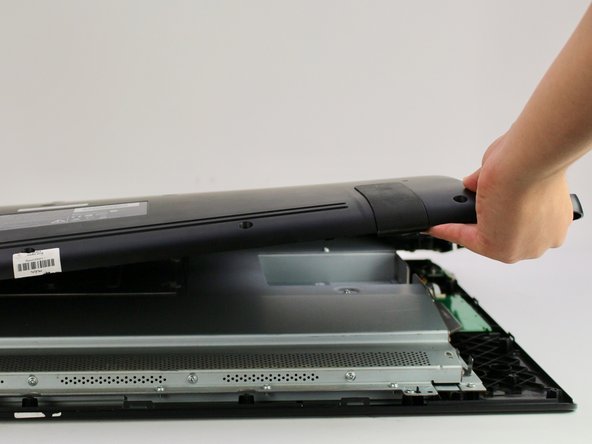
Remove the panel by lifting it up and off of the device.
-
-
-
이 단계는 번역되지 않았습니다. 번역을 도와주십시오
-
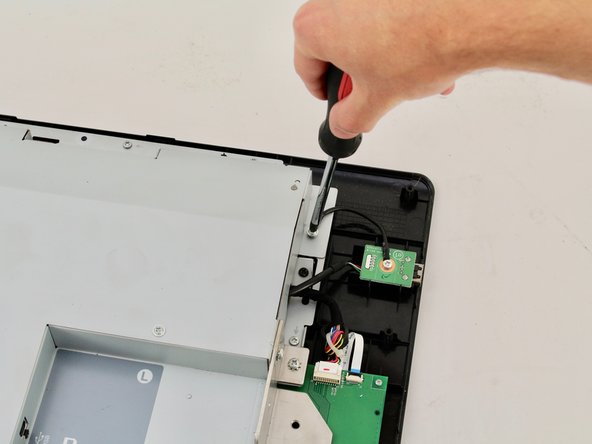
Detach the small black wire connecting the back metal plate to the USB video port by removing the one 8 mm Phillips #2 screw from the back metal plate and turning the screwdriver counterclockwise.
-
-
이 단계는 번역되지 않았습니다. 번역을 도와주십시오
-
Remove the two 8 mm Phillips #2 screws from the metal button plate by rotating the screwdriver counterclockwise.
-
Remove the metal button plate from the back metal plate.
-
-
이 단계는 번역되지 않았습니다. 번역을 도와주십시오
-
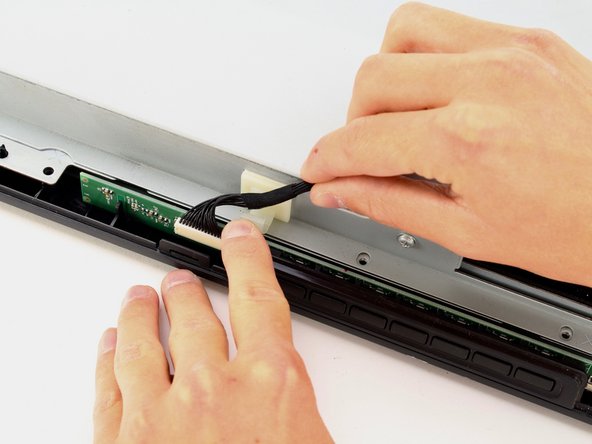
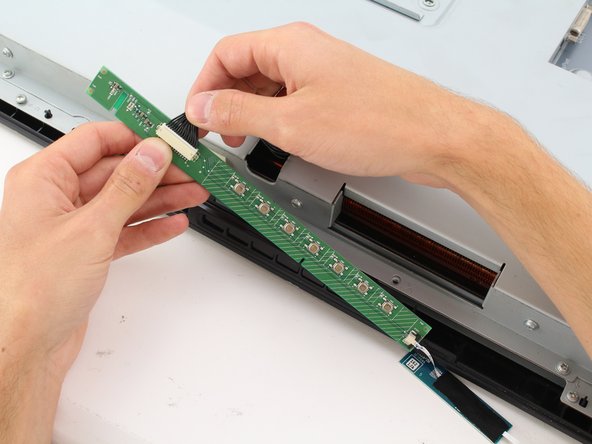
Remove the button wires from the support clip by pushing down on the clip.
-
Detach the button wires from the button board by pulling the button wires away from the board.
-
Place the button board back in to the device.
-
-
이 단계는 번역되지 않았습니다. 번역을 도와주십시오
-
Remove the eight (four on each plate) 10.2mm Phillips #2 screws with locking washers from the metal mounting plates by rotating the screwdriver counterclockwise.
-
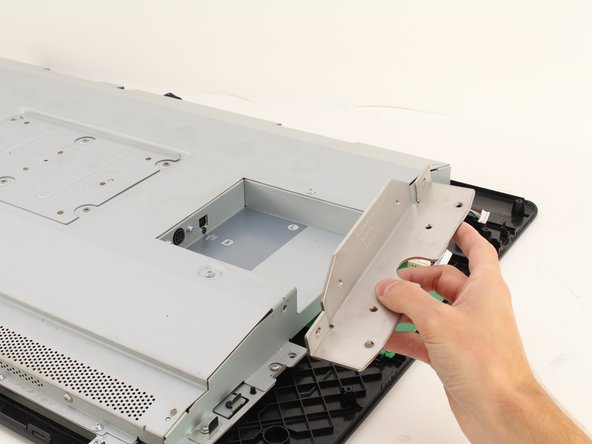
Remove the two metal mounting plates.
-
-
이 단계는 번역되지 않았습니다. 번역을 도와주십시오
-
Remove the sixteen 8 mm Phillips #2 screws with flanges from the horizontal side of the plate by turning the screwdriver counterclockwise.
-
Remove the ten 8 mm Phillips #2 screws with flanges from the vertical sides of the plate by turning the screwdriver counterclockwise.
-
-
이 단계는 번역되지 않았습니다. 번역을 도와주십시오
-
Remove the back metal plate by lifting up along one edge , then lifting the plate off and away from the device.
-
-
이 단계는 번역되지 않았습니다. 번역을 도와주십시오
-
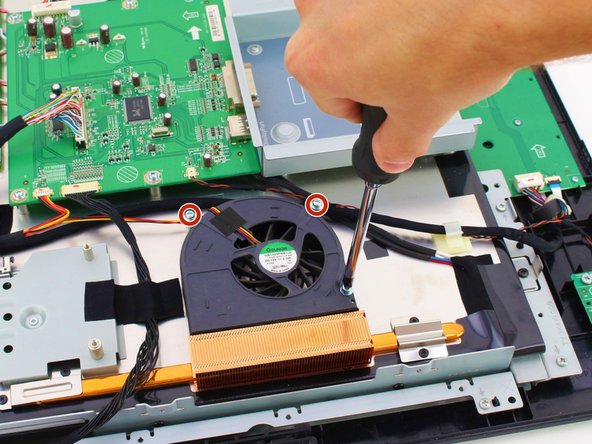
Remove three 8 mm Phillips #2 screws by turning screwdriver counterclockwise.
-
-
이 단계는 번역되지 않았습니다. 번역을 도와주십시오
-
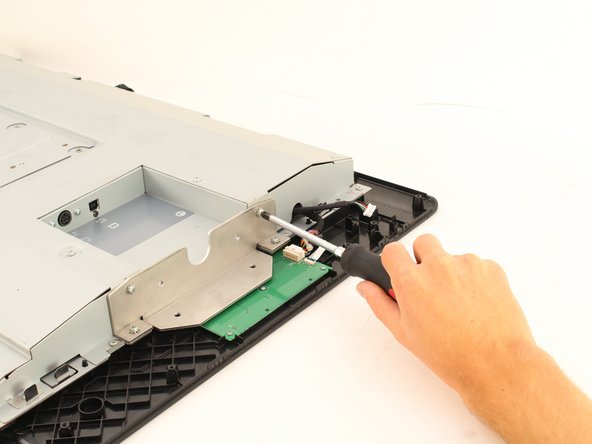
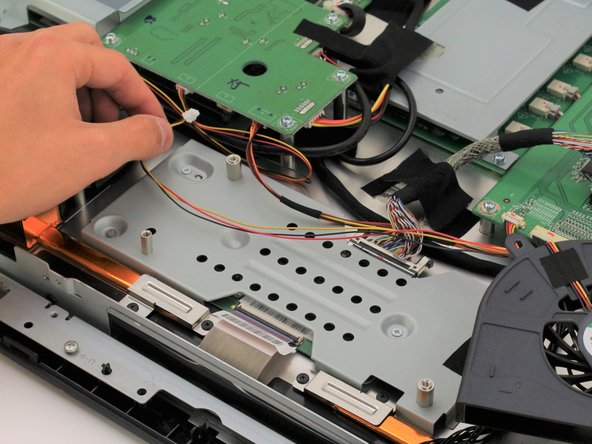
Remove the fan wiring from the motherboard by gently pinching close to the connector and pulling outwards.
-
Untangle the fan wiring by pulling it towards the fan and under, over, or around other wiring .
-


다른 2명이 해당 안내서를 완성하였습니다.
팀

Cal Poly, Team S15-G3, White Fall 2018 Cal Poly, Team S15-G3, White Fall 2018 회원
CPSU-WHITE-F18S15G3
4 회원들
안내서 18개 작성하였습니다
댓글 5개
so i was only able to find the exact fans only at one place. and it's overseas (china), so the delivery time is about 2 weeks minimum even with expedited shipping.
Fan ID-- SUNON GB1209PKB1-A 12V 2W 4wires Cooling Fan
website i found them : elecok.com
good luck. these instructions were close enough for the pro model of the 27" wacom cintiq.
don't attempt to open this without the Opening Tool or you risk cracking the screen. learned from experience.
Do any fans exist that can replace these very noisy fans and still do a competent job of keeping the equipment cool?
Lovely breakdown, thank you.
Looks like there's a big steel casing over everything. I wonder if you could run it without the plastic back cover?. Seems to me the metal inner case would make a nice heat sink but the plastic outer cover traps all the heat...
Cole Blotcky: Your pro 27 must have been within warranty at that point as they were only just out?. Wondered why you fixed it yourself, rather than sending it in? (just interested - thanks)