주요 콘텐츠로 건너뛰기

이 버전에는 잘못된 편집 사항이 있을 수 있습니다. 최신 확인된 스냅샷으로 전환하십시오.

의료 장비
iFixit과 이 수리 안내서는 의료 기기 제조업체가 보증하지 않으며 제휴 관계가 없습니다.

필요한 것

  1. 이 단계는 번역되지 않았습니다. 번역을 도와주십시오

    : 1 단계, 이미지 1/2 : 1 단계, 이미지 2/2
    • Unplug the AC power connection cable.

  2. 이 단계는 번역되지 않았습니다. 번역을 도와주십시오

    : 2 단계, 이미지 1/3 : 2 단계, 이미지 2/3 : 2 단계, 이미지 3/3
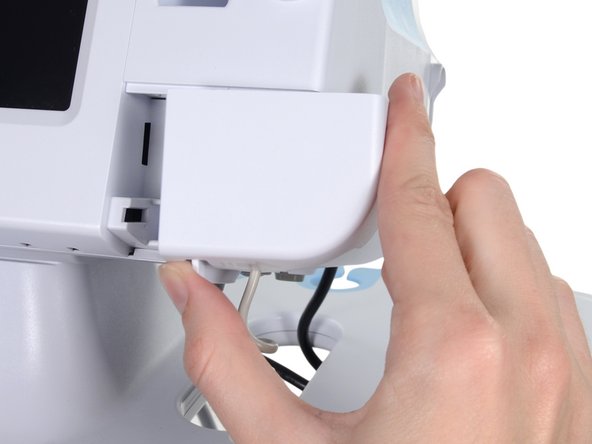
    • Place your thumb and forefinger on the blood pressure (NIBP) hose connector. Squeeze the side tabs until the connector releases.

    • Always grasp the hose by the connector. Do not pull on the hose itself.

    • Pull the connector away from the connector port.

  3. 이 단계는 번역되지 않았습니다. 번역을 도와주십시오

    : 3 단계, 이미지 1/3 : 3 단계, 이미지 2/3 : 3 단계, 이미지 3/3
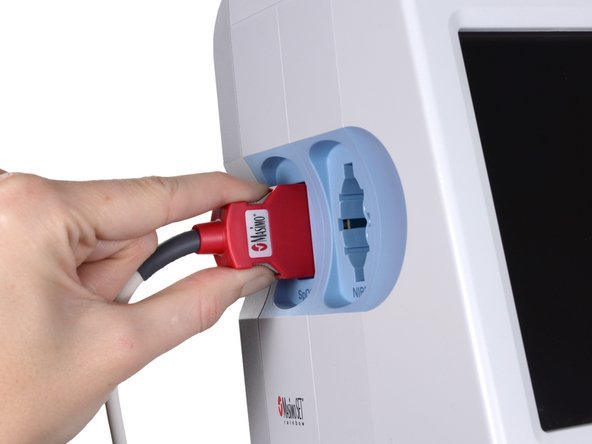
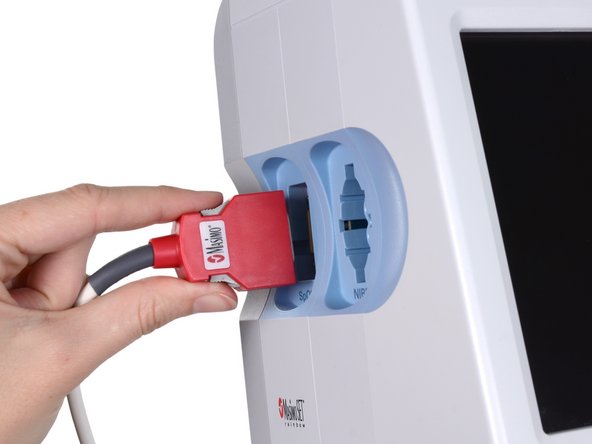
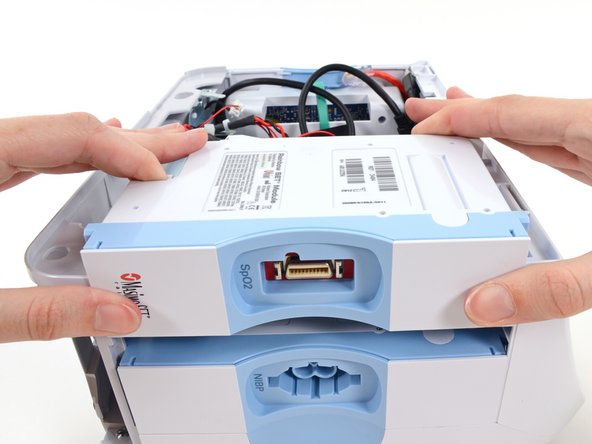
    • Place your thumb and forefinger on the Pulse oximetry (SpO2 or combined SpO2/SpHb) cable connector. Squeeze the side tabs until the connector releases.

    • Always grasp the cable by the connector. Do not pull on the cable itself.

    • Pull the connector away from the connector port.

  4. 이 단계는 번역되지 않았습니다. 번역을 도와주십시오

    : 4 단계, 이미지 1/2 : 4 단계, 이미지 2/2
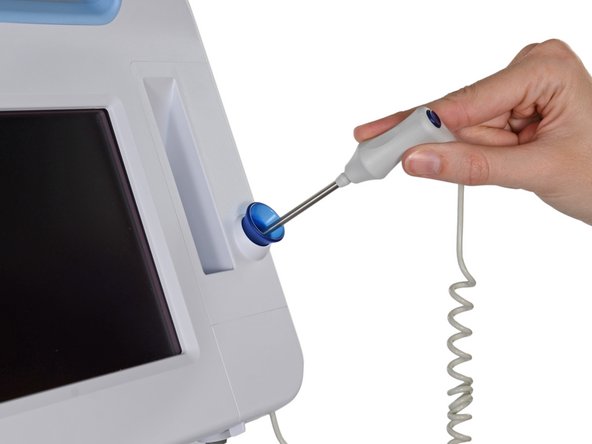
    • Grasp the temperature probe and pull it up to remove it from the monitor.

  5. 이 단계는 번역되지 않았습니다. 번역을 도와주십시오

    : 5 단계, 이미지 1/3 : 5 단계, 이미지 2/3 : 5 단계, 이미지 3/3
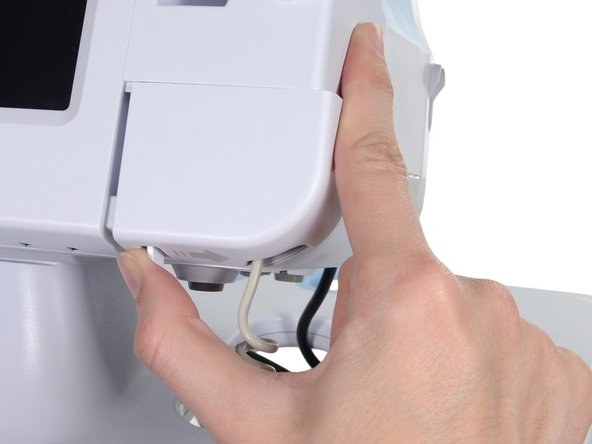
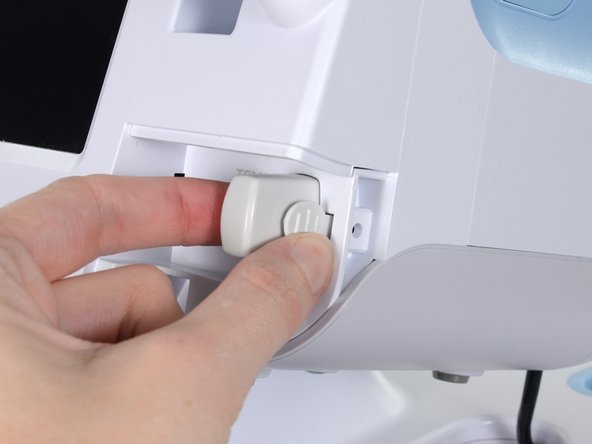
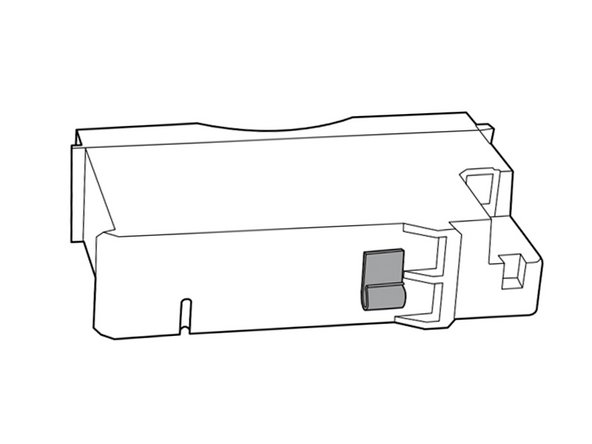
    • Remove the cover of the temperature module by pressing the tab and sliding the cover to the right.

  6. 이 단계는 번역되지 않았습니다. 번역을 도와주십시오

    : 6 단계, 이미지 1/3 : 6 단계, 이미지 2/3 : 6 단계, 이미지 3/3
    • Depress the spring tab on the temperature probe cable connector and withdraw it from the probe port.

  7. 이 단계는 번역되지 않았습니다. 번역을 도와주십시오

    : 7 단계, 이미지 1/1
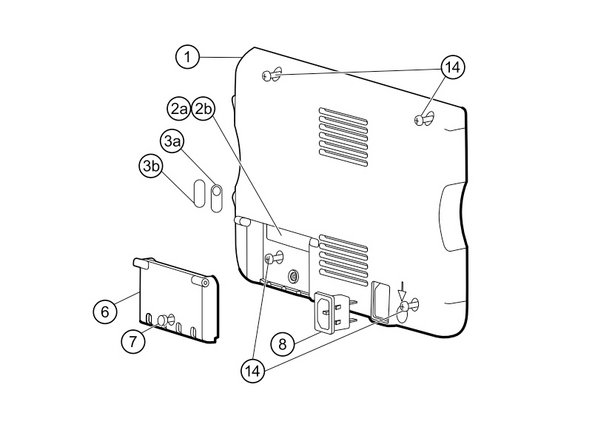
    • Remove the flathead screw on the USB networking door.

    • Loosen the captive Phillips #2 screw securing the monitor to the stand.

  8. 이 단계는 번역되지 않았습니다. 번역을 도와주십시오

    : 8 단계, 이미지 1/1
    • Holding the monitor securely, open the USB networking door.

    • You may have to lift the monitor slightly to allow the door to swing out from the stand mount.

  9. 이 단계는 번역되지 않았습니다. 번역을 도와주십시오

    : 9 단계, 이미지 1/2 : 9 단계, 이미지 2/2
    • Detach any accessory USB cables from USB ports on the monitor.

  10. 이 단계는 번역되지 않았습니다. 번역을 도와주십시오

    : 10 단계, 이미지 1/3 : 10 단계, 이미지 2/3 : 10 단계, 이미지 3/3
    • Slide the monitor off of the stand tray.

  11. 이 단계는 번역되지 않았습니다. 번역을 도와주십시오

    : 11 단계, 이미지 1/3 : 11 단계, 이미지 2/3 : 11 단계, 이미지 3/3
    • Place the monitor upside down on a clean surface.

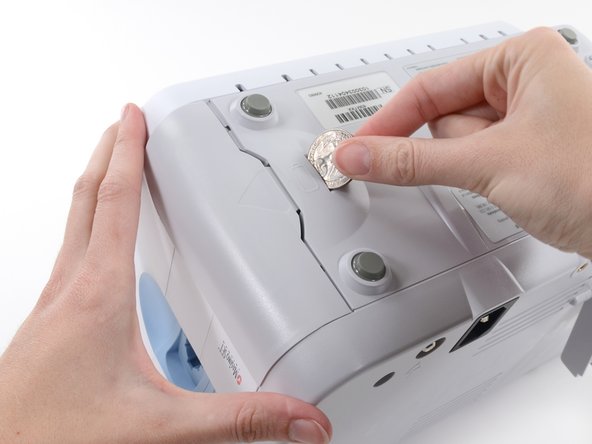
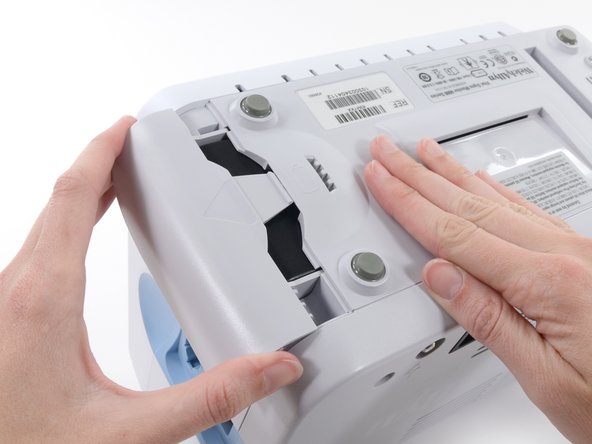
    • Insert a coin into the slot and push to open.

    • Choose a coin that fits comfortably into the slot.

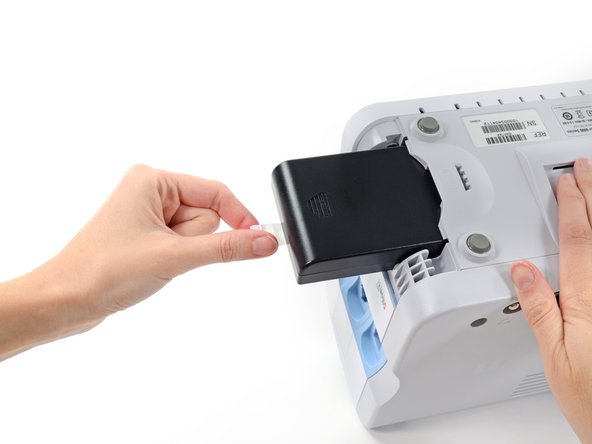
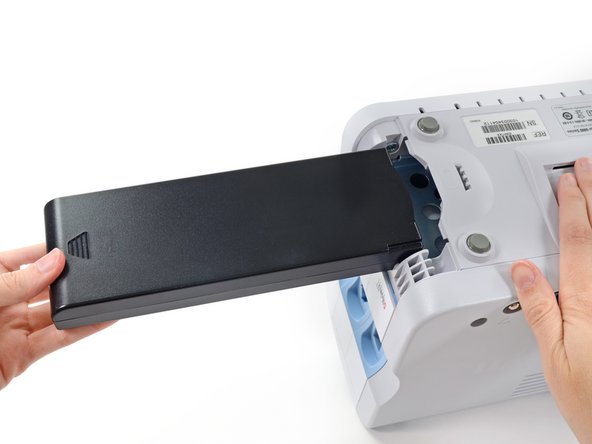
    • Remove the battery cover.

  12. 이 단계는 번역되지 않았습니다. 번역을 도와주십시오

    : 12 단계, 이미지 1/3 : 12 단계, 이미지 2/3 : 12 단계, 이미지 3/3
    • Use the plastic label to remove the battery from its recess.

  13. 이 단계는 번역되지 않았습니다. 번역을 도와주십시오

    : 13 단계, 이미지 1/2 : 13 단계, 이미지 2/2
    • Open the communications door to access the lower left-hand rear housing screw.

    • Remove the four Phillips #2 screws (labeled 14 in the service manual) from the rear housing.

  14. 이 단계는 번역되지 않았습니다. 번역을 도와주십시오

    : 14 단계, 이미지 1/2 : 14 단계, 이미지 2/2
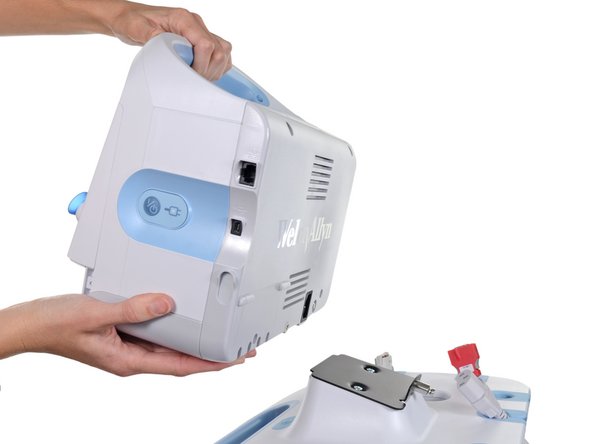
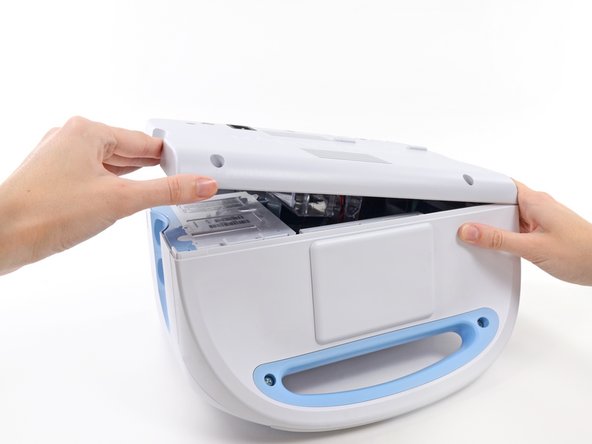
    • With the handle/alert bar facing you, begin to lift the rear housing from the left side, holding the right side securely.

    • Do not attempt to separate the rear housing from the monitor, it is still attached with several cables.

  15. 이 단계는 번역되지 않았습니다. 번역을 도와주십시오

    : 15 단계, 이미지 1/1
    • Support the rear housing while you disconnect the cables in the following steps.

  16. 이 단계는 번역되지 않았습니다. 번역을 도와주십시오

    : 16 단계, 이미지 1/3 : 16 단계, 이미지 2/3 : 16 단계, 이미지 3/3
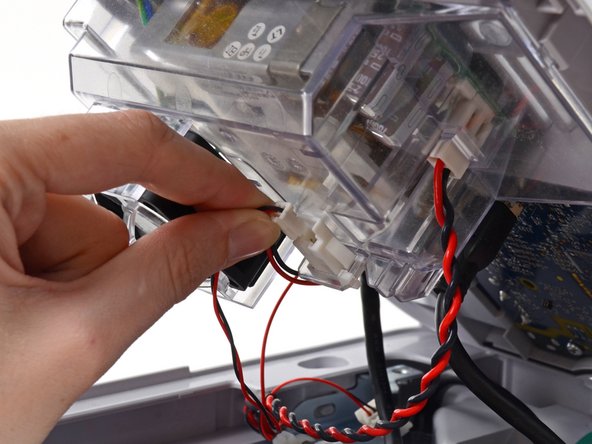
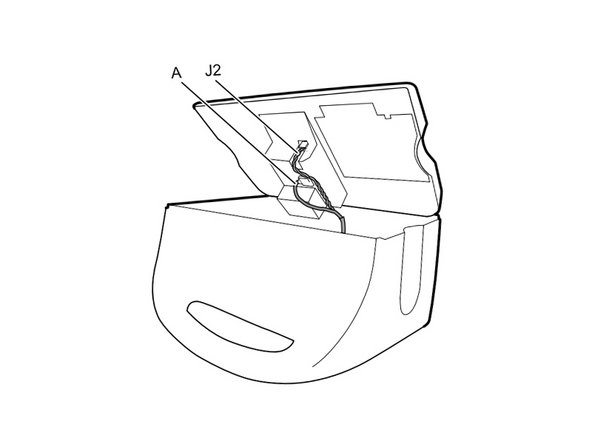
    • Disconnect the fan cable (labeled connector A in the service manual) from its socket in the power supply.

  17. 이 단계는 번역되지 않았습니다. 번역을 도와주십시오

    : 17 단계, 이미지 1/3 : 17 단계, 이미지 2/3 : 17 단계, 이미지 3/3
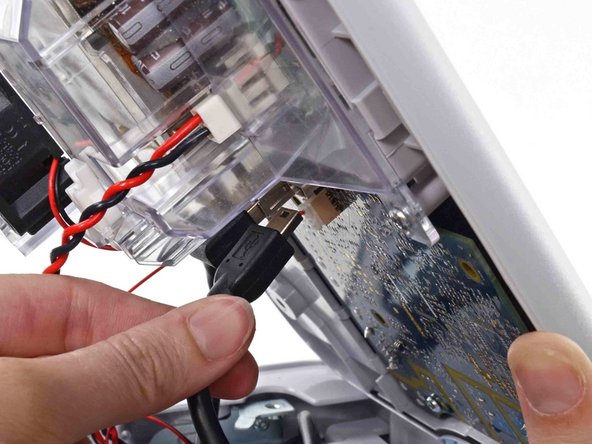
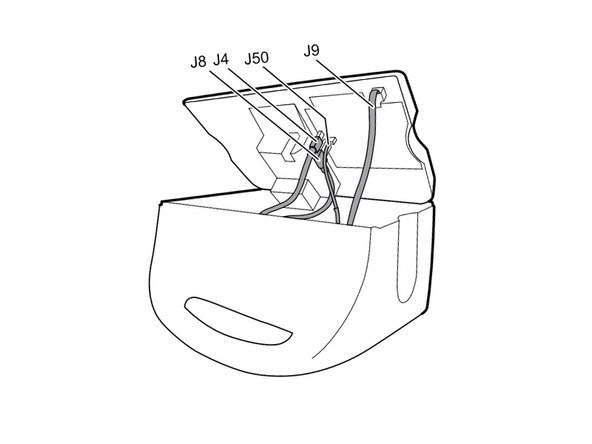
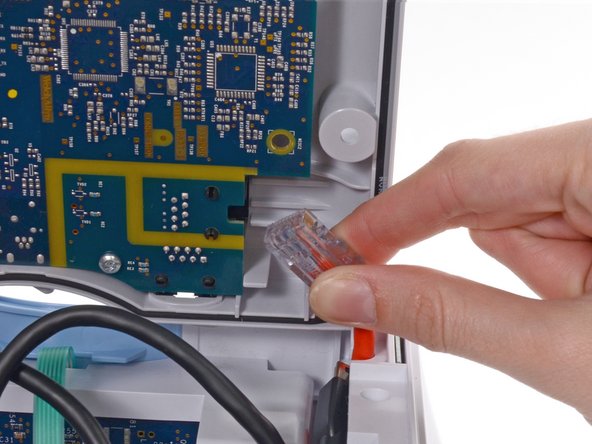
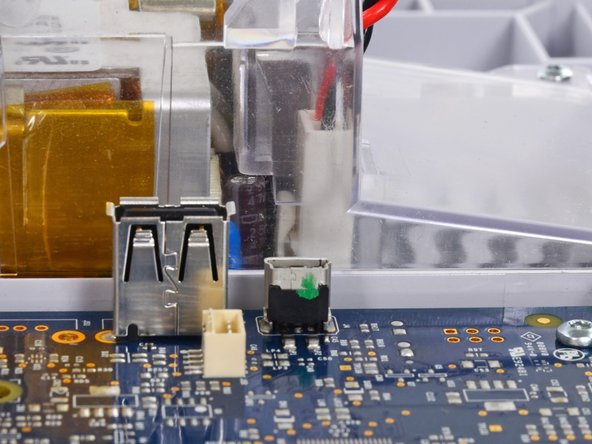
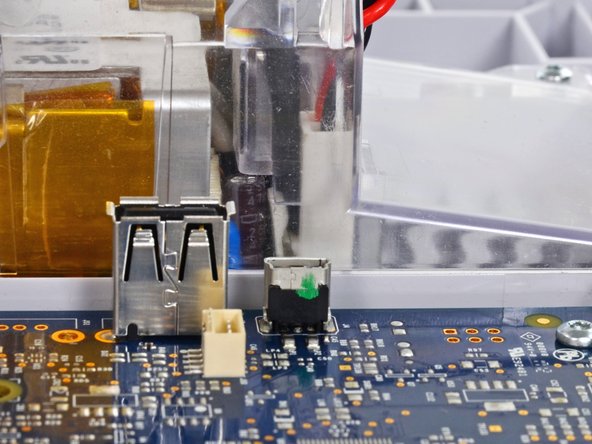
    • Unplug the small USB connector from its socket (labeled J4 in the service manual).

  18. 이 단계는 번역되지 않았습니다. 번역을 도와주십시오

    : 18 단계, 이미지 1/3 : 18 단계, 이미지 2/3 : 18 단계, 이미지 3/3
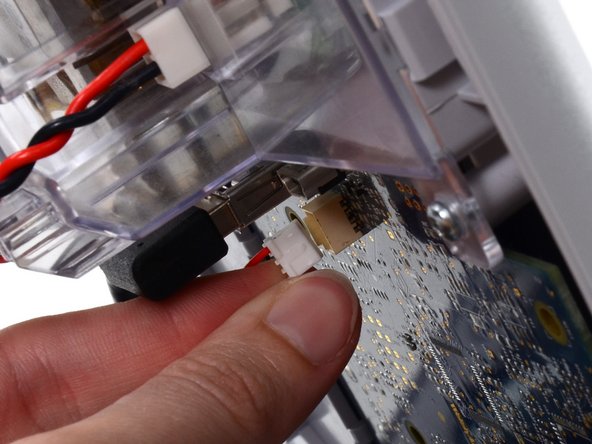
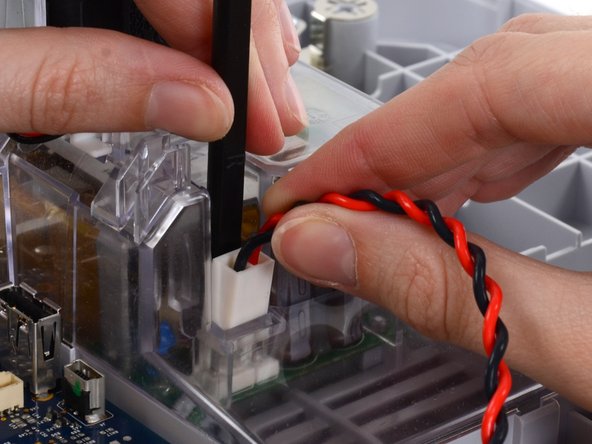
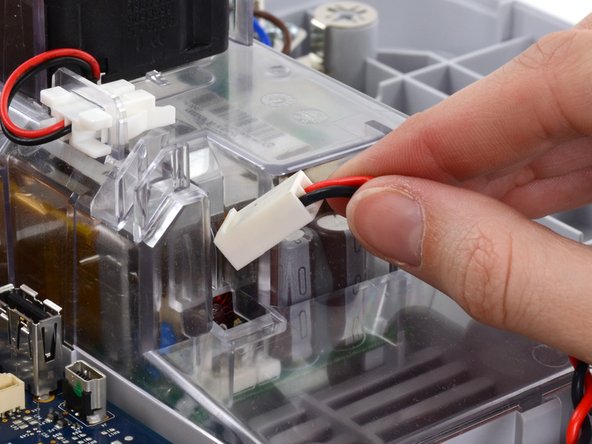
    • Disconnect the communications power cable from its socket (labeled J50 in the service manual).

    • Only pull on the connector itself and not the socket. This connection is very tight, work the connector slowly and gently.

  19. 이 단계는 번역되지 않았습니다. 번역을 도와주십시오

    : 19 단계, 이미지 1/3 : 19 단계, 이미지 2/3 : 19 단계, 이미지 3/3
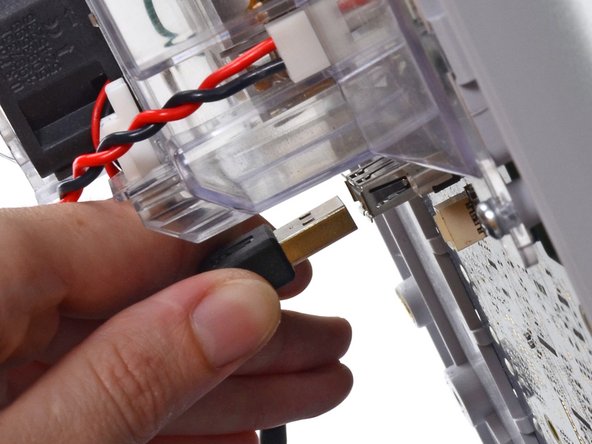
    • Unplug the large USB connector from its socket (labeled J8 in the service manual).

  20. 이 단계는 번역되지 않았습니다. 번역을 도와주십시오

    : 20 단계, 이미지 1/3 : 20 단계, 이미지 2/3 : 20 단계, 이미지 3/3
    • Press the tab on the ethernet cable and unplug it from its socket (labeled J9 in the service manual).

  21. 이 단계는 번역되지 않았습니다. 번역을 도와주십시오

    : 21 단계, 이미지 1/1
    • The following connector requires two hands to disconnect. Flip the rear case over, and lay it on its back to gain access to the power supply cable.

  22. 이 단계는 번역되지 않았습니다. 번역을 도와주십시오

    : 22 단계, 이미지 1/3 : 22 단계, 이미지 2/3 : 22 단계, 이미지 3/3
    • The power supply cable is secured by an interlocking connector that must be held open to unplug the connector.

    • Insert the flat end of a spudger down into the power supply cover between the socket clip and the power supply connector.

  23. 이 단계는 번역되지 않았습니다. 번역을 도와주십시오

    : 23 단계, 이미지 1/3 : 23 단계, 이미지 2/3 : 23 단계, 이미지 3/3
    • Grasp the power supply cable firmly and lift both it and the spudger from the channel in the power supply housing to unplug the connector.

  24. 이 단계는 번역되지 않았습니다. 번역을 도와주십시오

    : 24 단계, 이미지 1/3 : 24 단계, 이미지 2/3 : 24 단계, 이미지 3/3
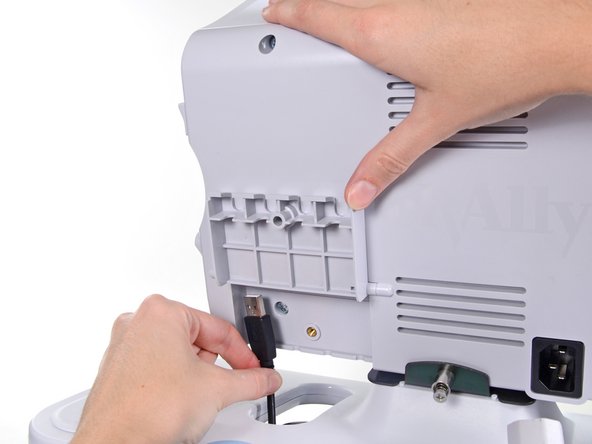
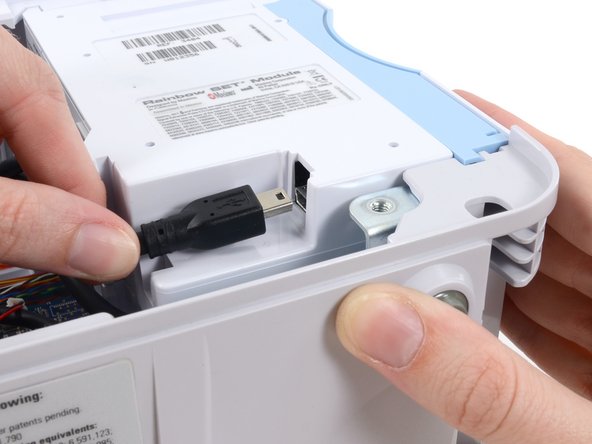
    • Disconnect the USB cable from the module.

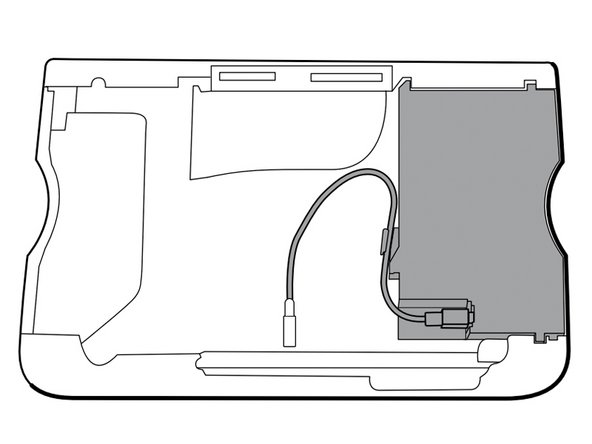
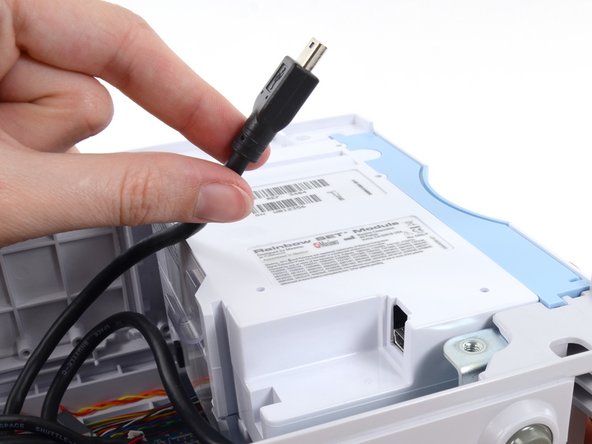
    • For the extended chassis: Disconnect the two USB cables from the module.

  25. 이 단계는 번역되지 않았습니다. 번역을 도와주십시오

    : 25 단계, 이미지 1/3 : 25 단계, 이미지 2/3 : 25 단계, 이미지 3/3
    • Remove the USB cable from the retaining clip on the module.

  26. 이 단계는 번역되지 않았습니다. 번역을 도와주십시오

    : 26 단계, 이미지 1/3 : 26 단계, 이미지 2/3 : 26 단계, 이미지 3/3
    • Slide the module out of the case.

    • Repeat the above procedure to remove any additional modules from the chassis.

    • During reassembly, install the module closest to the display first.

    • Reinsert modules into the housing with the serial number label facing up.

결승점

다른 3명이 해당 안내서를 완성하였습니다.

Sam Goldheart

회원 가입일: 10/18/12

465,870 평판

안내서 538개 작성하였습니다

iFixit iFixit 회원

Staff

135 회원들

안내서 17,225개 작성하였습니다

댓글 0개

댓글 쓰기

조회 통계:

24 시간 전: 0

7일 전: 3

30일 전: 10

전체 시간: 955