주요 콘텐츠로 건너뛰기

이 안내서에는 최근 변경 사항이 더 있습니다. 최신 비검증 버전으로 전환하십시오.

Welch Allyn Connex Vital Signs Monitor 6000 Stand Replacement

필요한 것

  1. Welch Allyn Connex Vital Signs Monitor 6000 Stand Replacement, Stand: 1 단계, 이미지 1/2 Welch Allyn Connex Vital Signs Monitor 6000 Stand Replacement, Stand: 1 단계, 이미지 2/2
    • Unplug the AC power connection cable.

  2. Welch Allyn Connex Vital Signs Monitor 6000 Stand Replacement: 2 단계, 이미지 1/3 Welch Allyn Connex Vital Signs Monitor 6000 Stand Replacement: 2 단계, 이미지 2/3 Welch Allyn Connex Vital Signs Monitor 6000 Stand Replacement: 2 단계, 이미지 3/3
    • Place your thumb and forefinger on the blood pressure (NIBP) hose connector. Squeeze the side tabs until the connector releases.

    • Always grasp the hose by the connector. Do not pull on the hose itself.

    • Pull the connector away from the connector port.

  3. Welch Allyn Connex Vital Signs Monitor 6000 Stand Replacement: 3 단계, 이미지 1/3 Welch Allyn Connex Vital Signs Monitor 6000 Stand Replacement: 3 단계, 이미지 2/3 Welch Allyn Connex Vital Signs Monitor 6000 Stand Replacement: 3 단계, 이미지 3/3
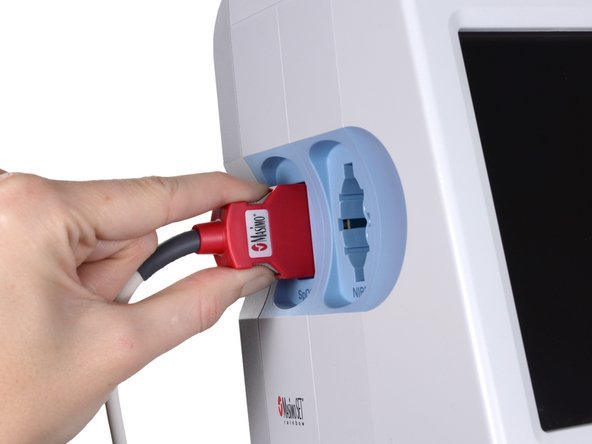
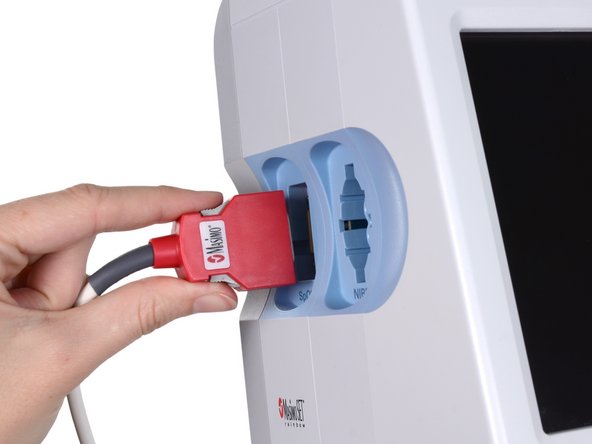
    • Place your thumb and forefinger on the Pulse oximetry (SpO2 or combined SpO2/SpHb) cable connector. Squeeze the side tabs until the connector releases.

    • Always grasp the cable by the connector. Do not pull on the cable itself.

    • Pull the connector away from the connector port.

  4. Welch Allyn Connex Vital Signs Monitor 6000 Stand Replacement: 4 단계, 이미지 1/2 Welch Allyn Connex Vital Signs Monitor 6000 Stand Replacement: 4 단계, 이미지 2/2
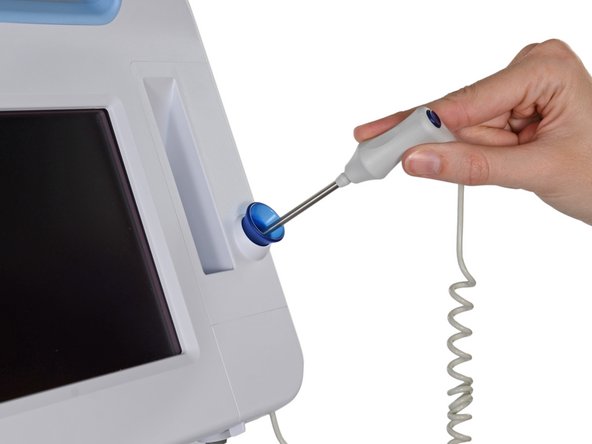
    • Grasp the temperature probe and pull it up to remove it from the monitor.

  5. Welch Allyn Connex Vital Signs Monitor 6000 Stand Replacement: 5 단계, 이미지 1/3 Welch Allyn Connex Vital Signs Monitor 6000 Stand Replacement: 5 단계, 이미지 2/3 Welch Allyn Connex Vital Signs Monitor 6000 Stand Replacement: 5 단계, 이미지 3/3
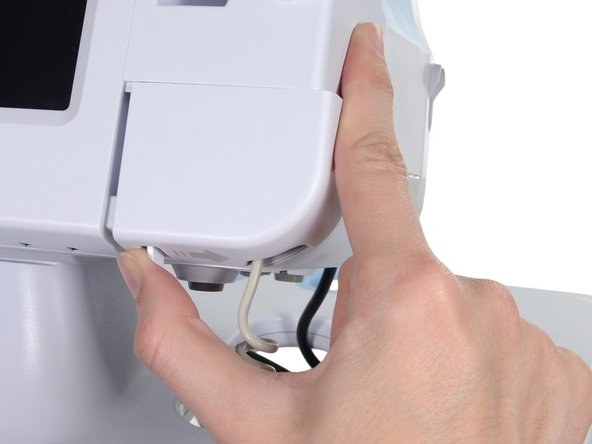
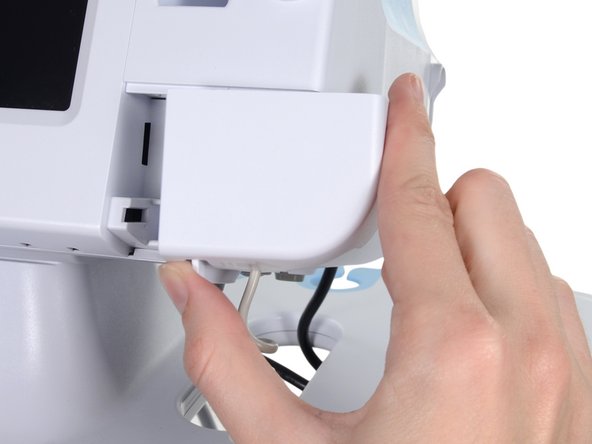
    • Remove the cover of the temperature module by pressing the tab and sliding the cover to the right.

  6. Welch Allyn Connex Vital Signs Monitor 6000 Stand Replacement: 6 단계, 이미지 1/3 Welch Allyn Connex Vital Signs Monitor 6000 Stand Replacement: 6 단계, 이미지 2/3 Welch Allyn Connex Vital Signs Monitor 6000 Stand Replacement: 6 단계, 이미지 3/3
    • Depress the spring tab on the temperature probe cable connector and withdraw it from the probe port.

  7. Welch Allyn Connex Vital Signs Monitor 6000 Stand Replacement: 7 단계, 이미지 1/1
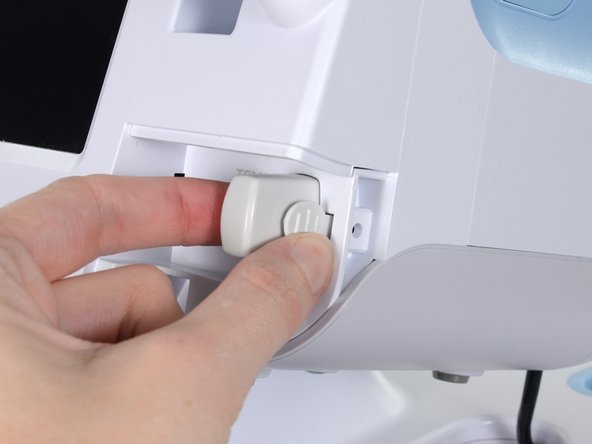
    • Remove the flathead screw on the USB networking door.

    • Loosen the captive Phillips #2 screw securing the monitor to the stand.

  8. Welch Allyn Connex Vital Signs Monitor 6000 Stand Replacement: 8 단계, 이미지 1/1
    • Holding the monitor securely, open the USB networking door.

    • You may have to lift the monitor slightly to allow the door to swing out from the stand mount.

  9. Welch Allyn Connex Vital Signs Monitor 6000 Stand Replacement: 9 단계, 이미지 1/2 Welch Allyn Connex Vital Signs Monitor 6000 Stand Replacement: 9 단계, 이미지 2/2
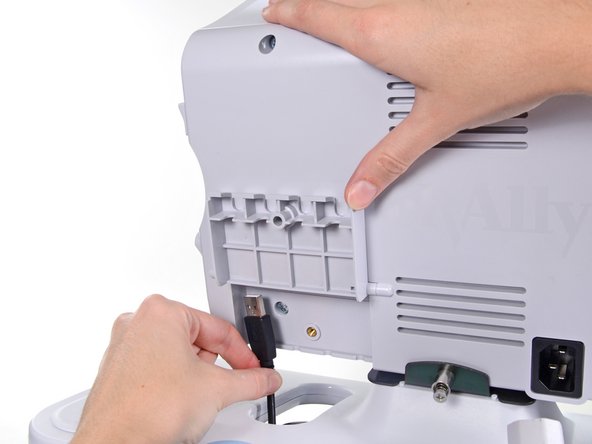
    • Detach any accessory USB cables from USB ports on the monitor.

  10. Welch Allyn Connex Vital Signs Monitor 6000 Stand Replacement: 10 단계, 이미지 1/3 Welch Allyn Connex Vital Signs Monitor 6000 Stand Replacement: 10 단계, 이미지 2/3 Welch Allyn Connex Vital Signs Monitor 6000 Stand Replacement: 10 단계, 이미지 3/3
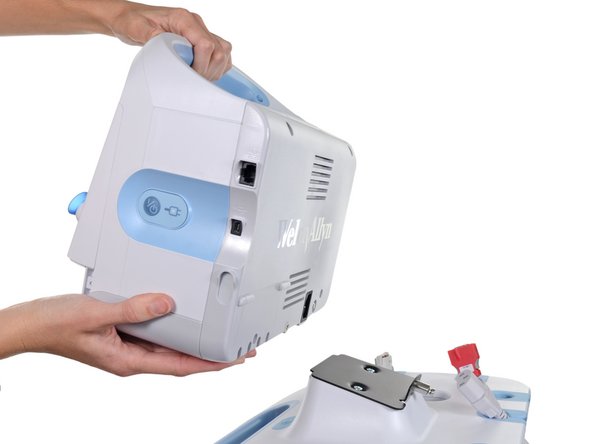
    • Slide the monitor off of the stand tray.

결론

To reassemble your device, follow these instructions in reverse order.

Sam Goldheart

회원 가입일: 10/18/12

465,647 평판

안내서 538개 작성하였습니다

iFixit iFixit 회원

Staff

135 회원들

안내서 16,732개 작성하였습니다

댓글 0개

댓글 쓰기

조회 통계:

24 시간 전: 0

7일 전: 1

30일 전: 2

전체 시간: 861