주요 콘텐츠로 건너뛰기

Whirlpool WED87HED Dryer Main Board Replacement

필요한 것

  1. Whirlpool WED87HED Dryer Main Board Replacement, Safety Precautions: 1 단계, 이미지 1개 중 1개
    • Before you begin your repair, unplug your dryer.

    • Your power cord may have four prongs rather than three. The additional prong is a ground connection.

  2. Whirlpool WED87HED Dryer Main Board Replacement, Unfasten the top panel: 2 단계, 이미지 3개 중 1개 Whirlpool WED87HED Dryer Main Board Replacement, Unfasten the top panel: 2 단계, 이미지 3개 중 2개 Whirlpool WED87HED Dryer Main Board Replacement, Unfasten the top panel: 2 단계, 이미지 3개 중 3개
    이 단계에 사용된 도구:
    FixMat
    $31.41
    • Throughout this guide, keep track of each screw and reinstall it exactly where it came from.

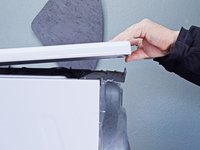
    • Use a 5/16 inch nut driver to remove the two 15.7 mm-long screws securing the top panel to the rear panel bracket.

  3. Whirlpool WED87HED Dryer Main Board Replacement, Remove the top panel: 3 단계, 이미지 2개 중 1개 Whirlpool WED87HED Dryer Main Board Replacement, Remove the top panel: 3 단계, 이미지 2개 중 2개
    • Grasp the top and slide it 1/2 to 1 inch toward the rear of the machine.

  4. Whirlpool WED87HED Dryer Main Board Replacement: 4 단계, 이미지 2개 중 1개 Whirlpool WED87HED Dryer Main Board Replacement: 4 단계, 이미지 2개 중 2개
    • Lift the top panel upward to separate it from the chassis.

    • Remove the top panel from the machine.

  5. Whirlpool WED87HED Dryer Main Board Replacement, Disconnect the Main Board: 5 단계, 이미지 2개 중 1개 Whirlpool WED87HED Dryer Main Board Replacement, Disconnect the Main Board: 5 단계, 이미지 2개 중 2개
    • Disconnect all the wires from the main board.

  6. Whirlpool WED87HED Dryer Main Board Replacement: 6 단계, 이미지 3개 중 1개 Whirlpool WED87HED Dryer Main Board Replacement: 6 단계, 이미지 3개 중 2개 Whirlpool WED87HED Dryer Main Board Replacement: 6 단계, 이미지 3개 중 3개
    • Continue disconnecting the main board.

  7. Whirlpool WED87HED Dryer Main Board Replacement: 7 단계, 이미지 3개 중 1개 Whirlpool WED87HED Dryer Main Board Replacement: 7 단계, 이미지 3개 중 2개 Whirlpool WED87HED Dryer Main Board Replacement: 7 단계, 이미지 3개 중 3개
    • Finish disconnecting the wires from the main board.

  8. Whirlpool WED87HED Dryer Main Board Replacement, Remove the main board cover: 8 단계, 이미지 3개 중 1개 Whirlpool WED87HED Dryer Main Board Replacement, Remove the main board cover: 8 단계, 이미지 3개 중 2개 Whirlpool WED87HED Dryer Main Board Replacement, Remove the main board cover: 8 단계, 이미지 3개 중 3개
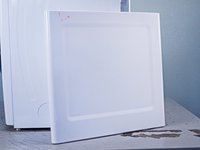
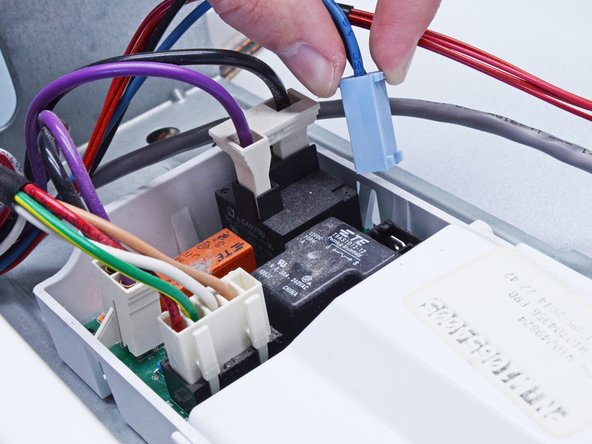
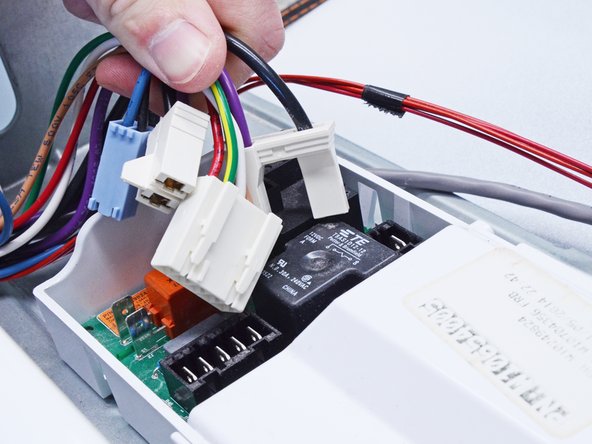
    • Using a flat head screwdriver or a spudger, release the cover clips.

  9. Whirlpool WED87HED Dryer Main Board Replacement: 9 단계, 이미지 3개 중 1개 Whirlpool WED87HED Dryer Main Board Replacement: 9 단계, 이미지 3개 중 2개 Whirlpool WED87HED Dryer Main Board Replacement: 9 단계, 이미지 3개 중 3개
    • Lift the cover to release the tabs on the opposite side of the main board housing.

    • Remove the cover.

  10. Whirlpool WED87HED Dryer Main Board Replacement, Release the main board: 10 단계, 이미지 3개 중 1개 Whirlpool WED87HED Dryer Main Board Replacement, Release the main board: 10 단계, 이미지 3개 중 2개 Whirlpool WED87HED Dryer Main Board Replacement, Release the main board: 10 단계, 이미지 3개 중 3개
    이 단계에 사용된 도구:
    Anti-Static Wrist Strap
    $7.16
    • There are six retaining clips securing the main board. Start at one end and work towards the other.

    • When you're handling the main board, wear an anti-static strap if possible, or regularly touch the exposed metal parts of the dryer to prevent electrostatic damage to the board.

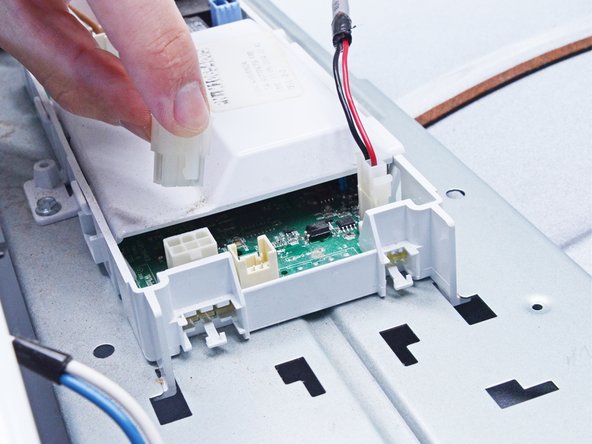
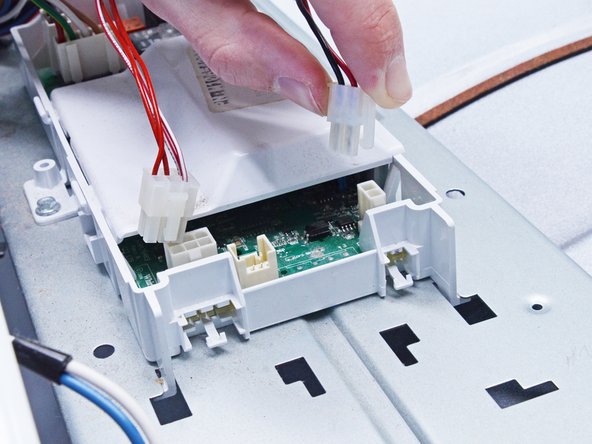
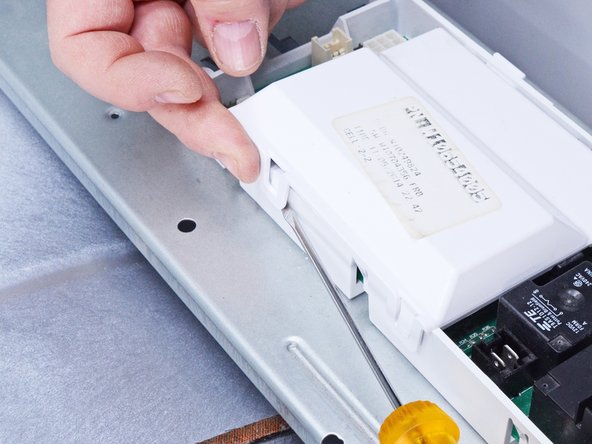
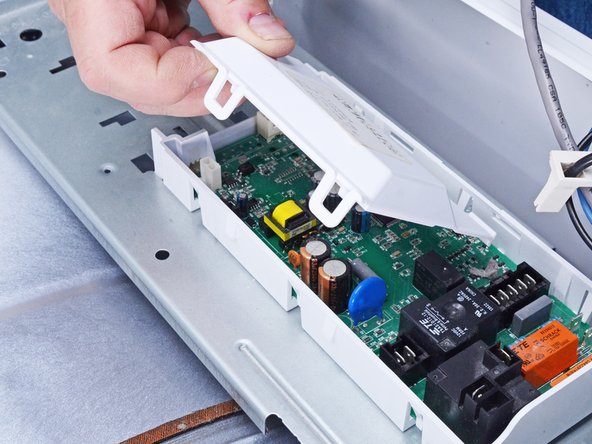
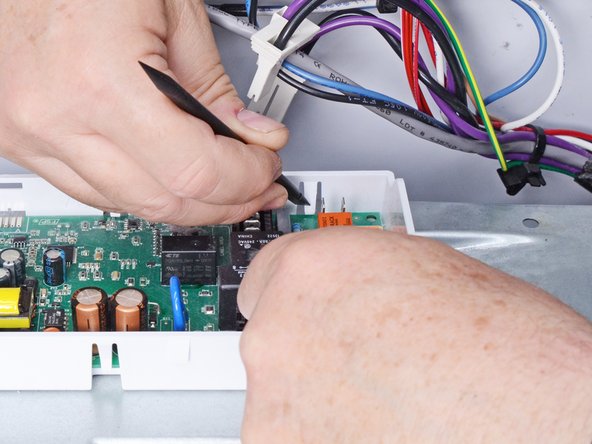
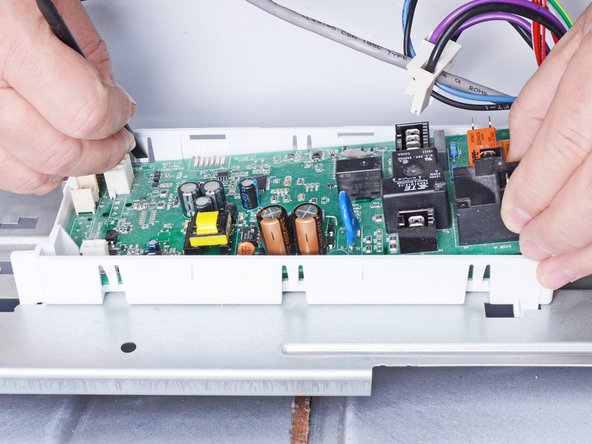
    • Lift the board with one hand and use the other to release each clip with a spudger.

    • As you go, keep a gentle upward pull on the board so that the released clips don't snap back into place as you work.

    • Alternate sides of the board when releasing the clips.

  11. Whirlpool WED87HED Dryer Main Board Replacement: 11 단계, 이미지 2개 중 1개 Whirlpool WED87HED Dryer Main Board Replacement: 11 단계, 이미지 2개 중 2개
    • Release the remaining clips until the board is completely separated from its housing.

  12. Whirlpool WED87HED Dryer Main Board Replacement, Remove the main board: 12 단계, 이미지 1개 중 1개
    • Remove the main board from its housing.

결론

To reassemble your device, follow these instructions in reverse order.

Take your e-waste to an R2 or e-Stewards certified recycler.

Repair didn’t go as planned? Ask our Answers community for help.

작성자

4다른 기여자 명과 함께

Bill Gilbert

회원 가입일: 06/30/22

38,497 평판

안내서 261개를 작성함

iFixit iFixit 회원

Staff

123 회원들

안내서 23,611개를 작성함

0가이드 댓글

댓글 쓰기

조회 통계:

지난 24시간: 0

지난 7일: 1

지난 30일: 13

전체 시간: 345