소개
Third Guide in this series covering various aspects of this device. This one on M.2 SSD replacement.
필요한 것
-
-
Remove the two screws holding the battery in place.
-
Slip your finger into the finger hole provided at the top of the battery.
-
...and lift to remove it
-
-
-
Remove the five Phillips screws securing the bottom to the case.
-
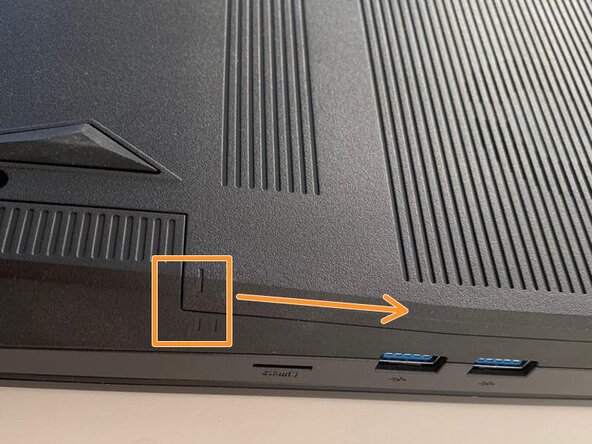
Slide the cover up slightly to release the clips holding it in place. This is the view on the right. The mark on the cover should now line up with the second mark on the case of the computer.
-
-
-
-
This is the view on the left before and after sliding the cover. The mark on the cover should now line up with the second mark on the case of the computer.
-
Slide the bottom cover to remove it.
-
-
-
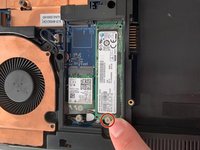
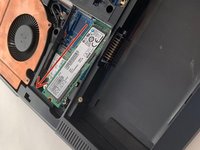
Remove the Phillips screw securing the M.2 SSD drive in place. The end of the drive will pop up by a small amount.
-
Slide the drive out from the connector in a straight line. If you feel resistance, try raising it slightly.
-


To reassemble your device, follow the instructions in reverse order.
다음 번역가들에게 특별히 감사 드립니다:
100%


이 번역인들은 저희가 세상을 수리하는 데 도움을 주고 있어요! 기여하시겠습니까?
번역 시작하기 ›