주요 콘텐츠로 건너뛰기

Wiko Rainbow Jam 4G Display Replacement

필요한 것

  1. Wiko Rainbow Jam 4G Display Replacement, Display: 1 단계, 이미지 1/2 Wiko Rainbow Jam 4G Display Replacement, Display: 1 단계, 이미지 2/2
    • Remove the back cover and the battery

  2. Wiko Rainbow Jam 4G Display Replacement: 2 단계, 이미지 1/3 Wiko Rainbow Jam 4G Display Replacement: 2 단계, 이미지 2/3 Wiko Rainbow Jam 4G Display Replacement: 2 단계, 이미지 3/3
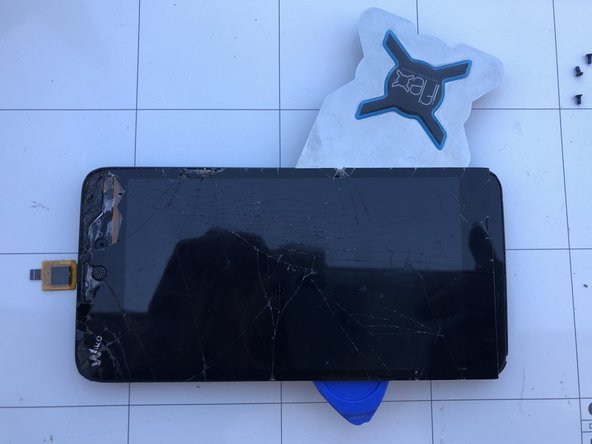
    • Using a Phillips scredriver, remove the screws

    • Using a thin tool or a blade detach the midframe from the the display assembly

  3. Wiko Rainbow Jam 4G Display Replacement: 3 단계, 이미지 1/3 Wiko Rainbow Jam 4G Display Replacement: 3 단계, 이미지 2/3 Wiko Rainbow Jam 4G Display Replacement: 3 단계, 이미지 3/3
    • Remove the sticker with a heat source, for example using a hair dryer

    • Unplug the marked connector on the motherboard

    • Remove the stickers that holds the flat under the big sticker you removed earlier. Now remove the marked screw that keeps the motherboard in place

  4. Wiko Rainbow Jam 4G Display Replacement: 4 단계, 이미지 1/3 Wiko Rainbow Jam 4G Display Replacement: 4 단계, 이미지 2/3 Wiko Rainbow Jam 4G Display Replacement: 4 단계, 이미지 3/3
    • Lift the motherboard and unplug the antenna cable

    • Using heat and a blade, remove the adesive holding the volume/power button

    • Remove the motherboard

  5. Wiko Rainbow Jam 4G Display Replacement: 5 단계, 이미지 1/1
    • Remove the flat cable interconnecting the display and the motherboard. It's glued on the back of the frame.

  6. Wiko Rainbow Jam 4G Display Replacement: 6 단계, 이미지 1/3 Wiko Rainbow Jam 4G Display Replacement: 6 단계, 이미지 2/3 Wiko Rainbow Jam 4G Display Replacement: 6 단계, 이미지 3/3
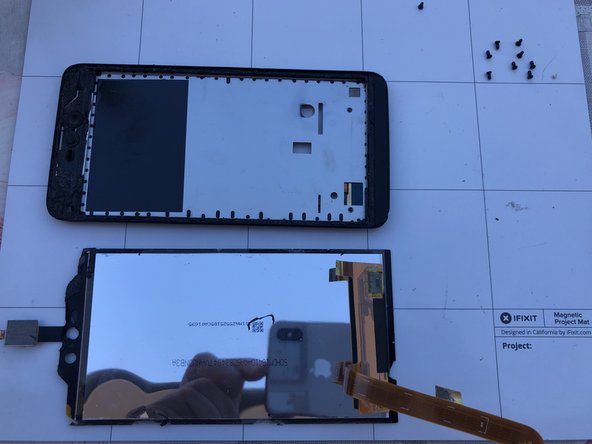
    • Heat the display edges to soften the glue. Gradually insert a thin blade to remove the faulty display.

    • Remove the old adhesive and clean carefully the surface before you apply the new adhesive.

  7. Wiko Rainbow Jam 4G Display Replacement: 7 단계, 이미지 1/3 Wiko Rainbow Jam 4G Display Replacement: 7 단계, 이미지 2/3 Wiko Rainbow Jam 4G Display Replacement: 7 단계, 이미지 3/3
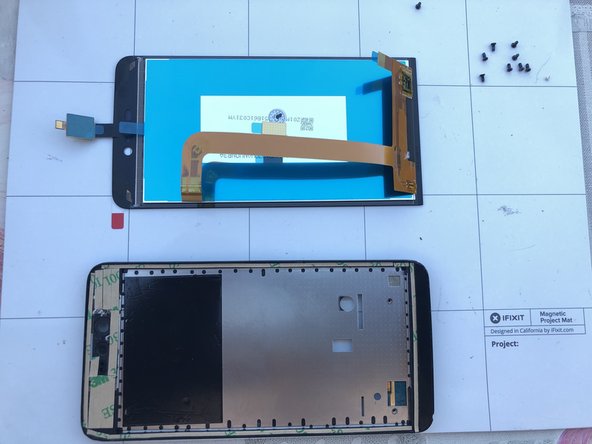
    • Apply the double sided tape on the edges of the frame so the enclosure is ready for a new display.

결론

To reassemble your device, follow these instructions in reverse order.

다음 번역가들에게 특별히 감사 드립니다:

it en

100%

이 번역자 분들은 저희가 세상을 수리하는데 동참해 주시는 분입니다! 기여하시겠습니까?
번역 시작하기 ›

Smilzo

회원 가입일: 11/09/13

11,447 평판

안내서 39개 작성하였습니다

댓글 0개

댓글 쓰기

조회 통계:

24 시간 전: 0

7일 전: 2

30일 전: 10

전체 시간: 516