이 버전에는 잘못된 편집 사항이 있을 수 있습니다. 최신 확인된 스냅샷으로 전환하십시오.
필요한 것
-
이 단계는 번역되지 않았습니다. 번역을 도와주십시오
-
Remove the air intake cover by placing your hands at the top of the air intake cover and gently pulling away from the device.
-
-
이 단계는 번역되지 않았습니다. 번역을 도와주십시오
-
Detach the air intake screen by placing your fingers on the top two hinges.
-
Gently press the two hinges down and pull away from the device.
-
Using your vacuum, clean the other side of the air intake screen.
-
-
-
이 단계는 번역되지 않았습니다. 번역을 도와주십시오
-
Remove the Activated Carbon Pre-Filter by pulling it away from the device.
-
-
이 단계는 번역되지 않았습니다. 번역을 도와주십시오
-
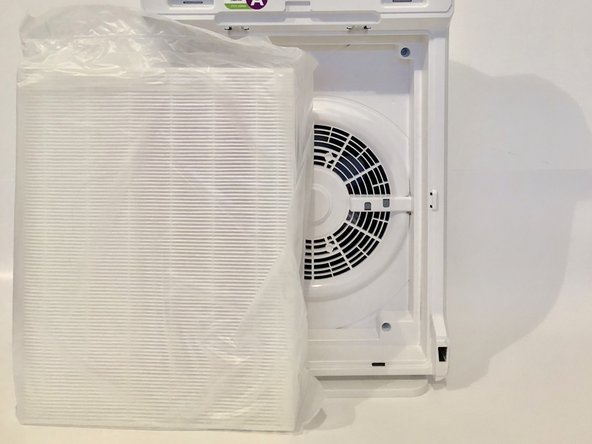
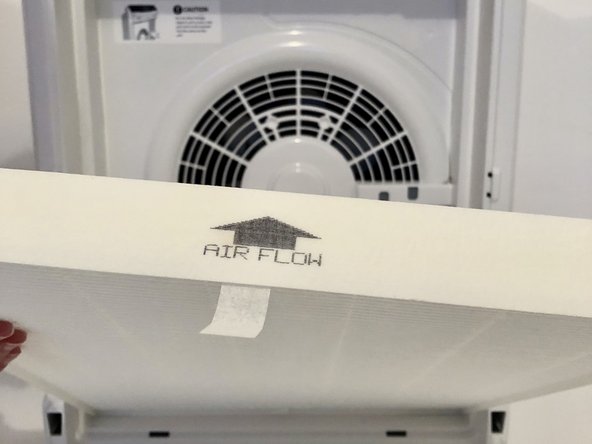
Replace the True HEPA Filter by inserting it into the empty space in the device.
-
-
이 단계는 번역되지 않았습니다. 번역을 도와주십시오
-
Replace the Activated Carbon Pre-Filter by inserting it into the space in front of the True HEPA Filter.
-
-
이 단계는 번역되지 않았습니다. 번역을 도와주십시오
-
Attach the air intake screen by placing the bottom two hinges in the bottom two holes of the device.
-
Using your fingers, gently press down on the top two hinges while placing them in the top two holes of the device.
-
-
이 단계는 번역되지 않았습니다. 번역을 도와주십시오
-
Attach the air intake cover by gently pressing the top of the cover against the device.
-


다른 7명이 해당 안내서를 완성하였습니다.
댓글 5개
Very easy to replace. Breeze.
@tackerman Where can I get a replacement air intake screen (the mesh ‘Pre-Filter’?) Mine has a tear in it and I can't find a replacement anywhere online. Thanks!
Aftab Khan - 답글
You can just scotch tape the tear (from two sides) if it is not too big
My Winix C535 came with two air filters. This video should only shows one. So is it supposed to have two filters inserted?
No, it's likely yours came with an extra replacement filter with the purchase. Their should only be one HEPA filter followed by one carbon filter and then lastly the mesh pre filter screen that locks into place.