주요 콘텐츠로 건너뛰기

이 버전에는 잘못된 편집 사항이 있을 수 있습니다. 최신 확인된 스냅샷으로 전환하십시오.

필요한 것

  1. 이 단계는 번역되지 않았습니다. 번역을 도와주십시오

    : 1 단계, 이미지 1/2 : 1 단계, 이미지 2/2
    • Use a metal spudger to carefully pry off the hubcap without marring the plastic wheel or hubcap.

    • This plastic material is not replaceable. Any damage will be noticeable.

  2. 이 단계는 번역되지 않았습니다. 번역을 도와주십시오

    : 2 단계, 이미지 1/2 : 2 단계, 이미지 2/2
    • Remove the 12.0 mm Phillips #2 screw.

    • Hold the wheel in place, or it will rotate as you attempt to remove the screw.

  3. 이 단계는 번역되지 않았습니다. 번역을 도와주십시오

    : 3 단계, 이미지 1/1
    • Pull the wheel off of the square axle.

    • Do not use excessive force while removing the wheel. Pulling too hard on the wheel can damage the axle.

  4. 이 단계는 번역되지 않았습니다. 번역을 도와주십시오

    : 4 단계, 이미지 1/2 : 4 단계, 이미지 2/2
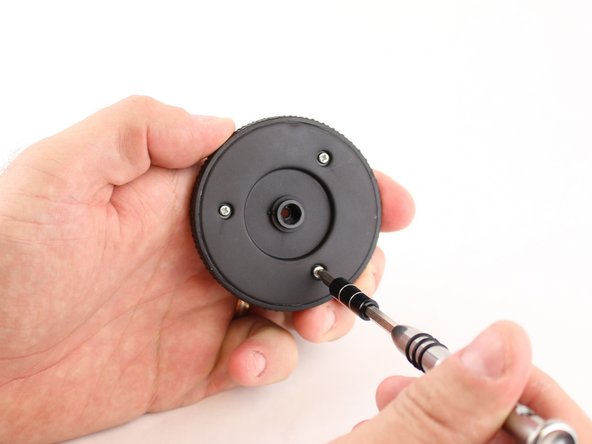
    • Remove the three 7.7 mm Phillips #1 screws.

  5. 이 단계는 번역되지 않았습니다. 번역을 도와주십시오

    : 5 단계, 이미지 1/3 : 5 단계, 이미지 2/3 : 5 단계, 이미지 3/3
    • Separate the rubber tire from the rim.

    • Push the collar out to separate the plastic layers of the wheel.

    • When reassembling, align the groove and the key of the two wheels' halves together.

결승점

다른 5명이 해당 안내서를 완성하였습니다.

Moira Keahon

회원 가입일: 09/24/14

257 평판

안내서 3개 작성하였습니다

University of Maine, Team 1-50, Diaz Fall 2014 University of Maine, Team 1-50, Diaz Fall 2014 회원

UMAINE-DIAZ-F14S1G50

3 회원들

안내서 6개 작성하였습니다

댓글 한 개

my MiP has plastic over his wheels

Clarrie O'HARE - 답글

댓글 쓰기

조회 통계:

24 시간 전: 1

7일 전: 9

30일 전: 23

전체 시간: 6,048