소개
If your XBOX 360 power supply sounds like a little dragon's trapped inside, it's probably high time you change the fan.
필요한 것
-
-
This is how my power brick sounded when I decided I couldn't bear it anymore
-
-
-
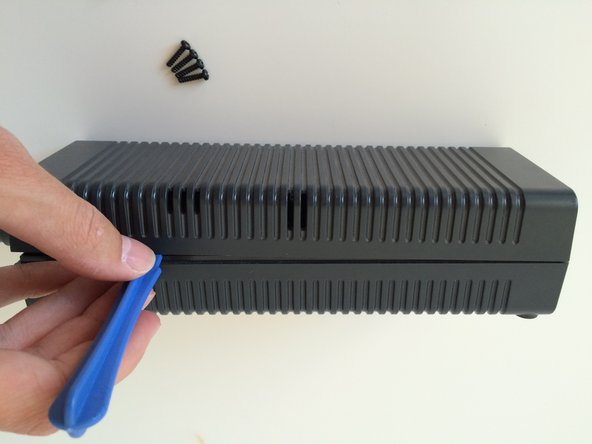
To take off the 4 screws, you need to pry off the rubber feet
-
Most of the time, the rubber part will become detached from the plastic one
-
Use pliers if necessary
-
-
-
After removing the 4 screws, pry along the edge to get the two halves separated
-
-
-
Lift up the light diffuser
-
Lift up the power-connector & DC out wire
-
The main board should come out relatively easily now.
-
-
-
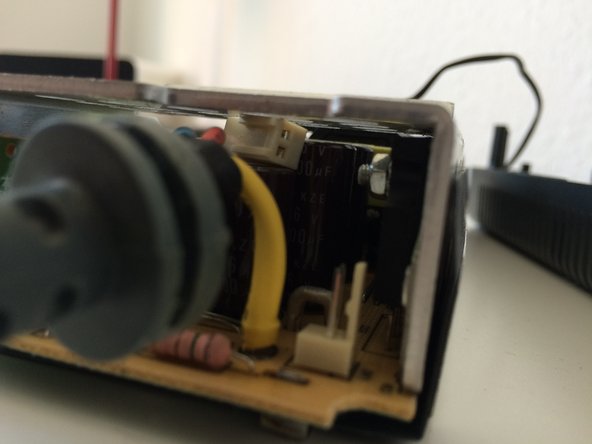
Disconnect the fan from under the main heatsink.
-
Be careful when pulling the wire out, as it usually gets stuck between the heatsink and capacitors - patience is, as always, key
-
-
-
-
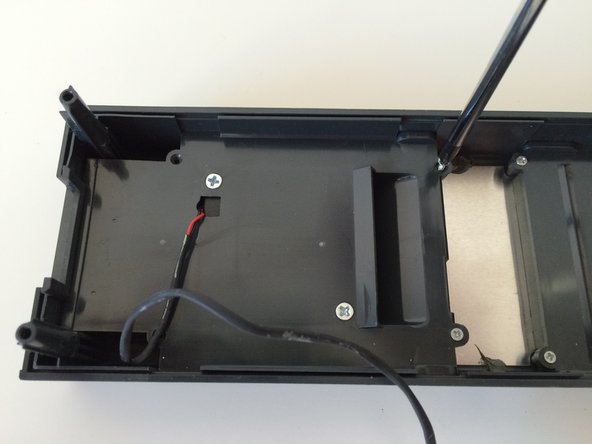
First - just take out the two smaller screws, whilst leaving in the two bigger ones
-
After that's done, only a few clamps hold the assembly in
-
-
-
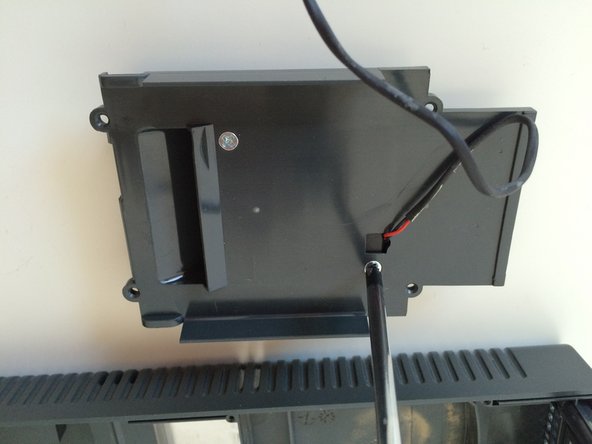
There is yet another sub-assembly holding the fan in - I tip my hat to whoever designed this
-
-
-
The dimension of the fan-holder in my unit might differ from yours, as Microsoft seems to use different suppliers each day for good reasons (such as probably getting more air-flow related complications packed in)
-
-
-
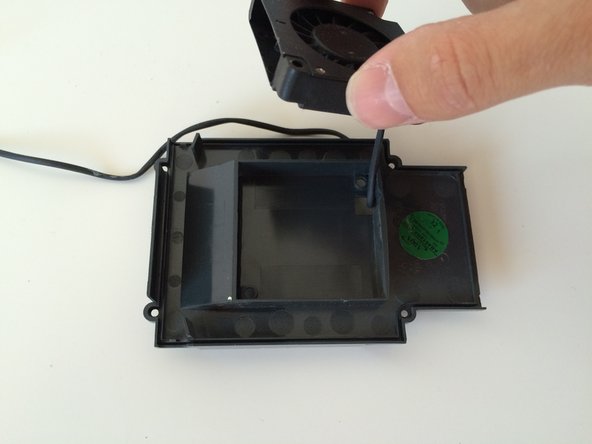
To actually get to the fan, the faceplate needs removing as well
-
Once that's done, there's a pin holding the wire down
-
As you probably won't be reusing the piece of junk fan that brought you to this guide, I suggest you go medieval prying it out - works a treat
-
-
-
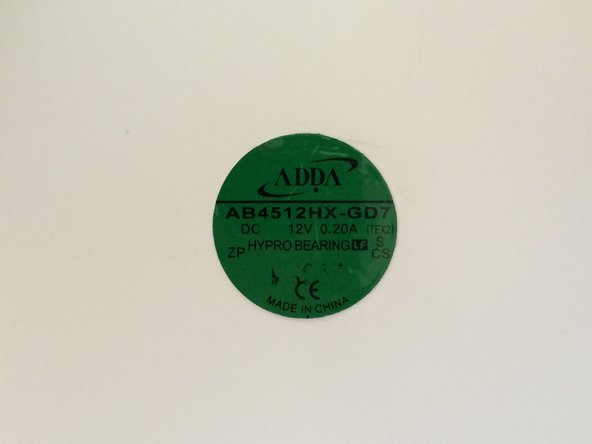
With the fan out, the next step is fitting in a replacement
-
!!! Make sure to get a 12V fan, of correct dimensions
-
I got mine from an old laptop cooler
-
-
-
I first sanded down the little protrusion which held the old fan in place
-
Then used some epoxy resin (Poxipol) to glue down the new fan
-
To maximize airflow, mount it skewed to the right (from 2nd picture's point of view)
-
-
-
Before the resin sets - make sure your fan can spin freely
-
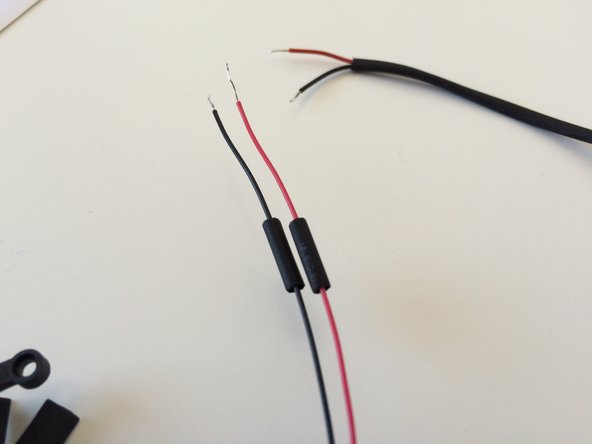
Prep the wire ends by applying solder to them
-
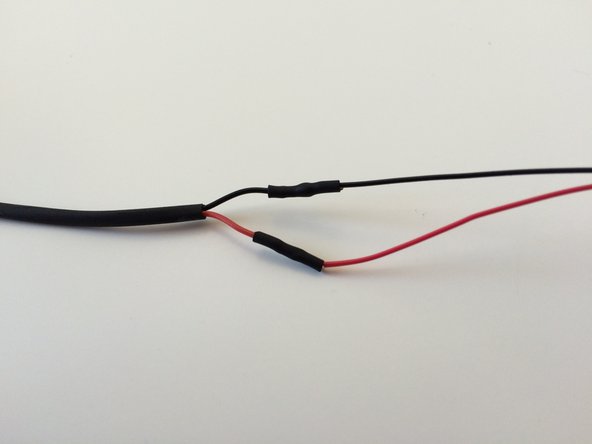
Next, feed some tiny shrink wrap over the cable, THEN solder them together (somehow I always end up having to desolder stuff ...:)
-
-
-
Just put everything back together, and hopefully you found the right fan that's weak enough to not be louder than your XBOX
-


다른 17명이 해당 안내서를 완성하였습니다.

댓글 6개
This is a well written guide. I stopped at step 7 as I only wanted to open the power supply in order to clean it out. I was quite surprised to see how much dirt/dust was trapped inside. Using a can of air duster in the vent holes is not even close to being sufficient to clean out the inside alone. I highly suggest that anyone who owns this system disassemble and clean their power supply, and console, at least every couple of years to increase longevity of your Xbox. Remember, dust and dirt build up is one of the biggest killers of these devices. I had a different variation of the Xbox 360 power supply then what is shown in this guide. Nonetheless, the process is simple. After I got the rubber boots off, which isn't hard, it only took me 1hr 7min 4.5sec to disassemble, clean and reassemble the power supply. I didn't start timing until the boots were off, don't ask why. It's now just as clean as the day I bought it. Thanks for the guide!
where can i get another fan?
Hello so my power brick looks just like this one however it looks different on the inside. I can’t get to the fan part. There are no screws and it’s all covered with plastic. I don’t know how to open it up without breaking the plastic.
Ha mine is well beyond that point it hasn’t made a sound in years and it hotter than the surface of the sun. Still works though. Might give this a try