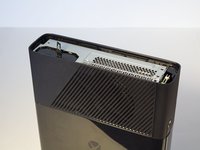
주요 콘텐츠로 건너뛰기

Xbox 360 E Motherboard Replacement

필요한 것

  1. Xbox 360 E Motherboard Replacement, Top Panel: 1 단계, 이미지 1/1
    이 단계에 사용된 도구:
    Spudger
    $2.99
    구매
    • Push the Spudger into the crevice between the grated top panel of the Xbox and the bottom body with the rubber feet.

    • Pull back on the spudger like a lever, keeping it pressed firmly into the crevice.

  2. Xbox 360 E Motherboard Replacement: 2 단계, 이미지 1/1
    • Slide the spudger along the separation you have created between the grated panel and the bottom body of the Xbox.

    • Periodically pull back on the spudger like a lever, keeping it pressed firmly into the crevice.

  3. Xbox 360 E Motherboard Replacement: 3 단계, 이미지 1/3 Xbox 360 E Motherboard Replacement: 3 단계, 이미지 2/3 Xbox 360 E Motherboard Replacement: 3 단계, 이미지 3/3
    • Continue sliding the spudger along the perimeter of the left grated face of the Xbox.

    • Pull the top panel off.

  4. Xbox 360 E Motherboard Replacement, Bottom Panel: 4 단계, 이미지 1/1
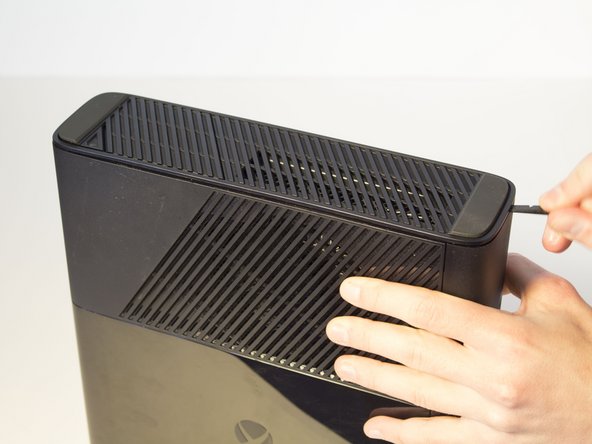
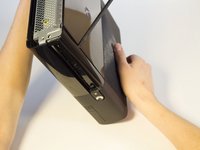
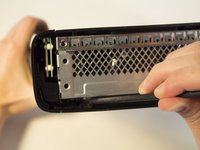
    • Push the spudger into the crevice between the right grated face and the top body of the Xbox. It's easier to begin away from the vent.

    • Pull up on the spudger like a lever, keeping it pressed firmly into the crevice.

  5. Xbox 360 E Motherboard Replacement: 5 단계, 이미지 1/2 Xbox 360 E Motherboard Replacement: 5 단계, 이미지 2/2
    • Slide the spudger along the crevice to separate the grated face and the top body.

  6. Xbox 360 E Motherboard Replacement: 6 단계, 이미지 1/3 Xbox 360 E Motherboard Replacement: 6 단계, 이미지 2/3 Xbox 360 E Motherboard Replacement: 6 단계, 이미지 3/3
    • Wiggle the spudger in the crevice as you slide the spudger to loosen the bottom plate.

    • Slide the spudger along the crevice, going completely about the perimeter of the bottom panel.

    • Pull the bottom panel off.

  7. Xbox 360 E Motherboard Replacement, Front Panel: 7 단계, 이미지 1/3 Xbox 360 E Motherboard Replacement, Front Panel: 7 단계, 이미지 2/3 Xbox 360 E Motherboard Replacement, Front Panel: 7 단계, 이미지 3/3
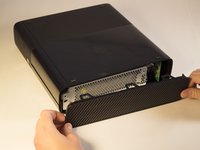
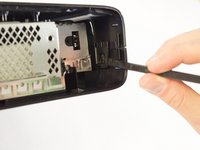
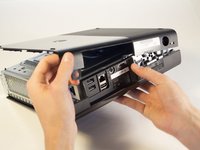
    • In front of the CD drive you will find the Xbox logo. Press on the area left of the Xbox logo, and the disk tray panel will pop off.

  8. Xbox 360 E Motherboard Replacement: 8 단계, 이미지 1/3 Xbox 360 E Motherboard Replacement: 8 단계, 이미지 2/3 Xbox 360 E Motherboard Replacement: 8 단계, 이미지 3/3
    • Beginning on the left side without the grate, run the spudger along the crevice until you've reached the grated part, while holding the part that's being separated as you go.

  9. Xbox 360 E Motherboard Replacement: 9 단계, 이미지 1/3 Xbox 360 E Motherboard Replacement: 9 단계, 이미지 2/3 Xbox 360 E Motherboard Replacement: 9 단계, 이미지 3/3
    • Keep holding the partially separated panel open. It's easiest to do this by wedging a spudger into the opening but can also be held open by your hands.

    • Rotate the Xbox to the left to locate the clip connecting the front panel to the body. Insert the spudger inside the gap to release the clip. This may require wiggling the spudger. The clip will pop off, making the front panel looser.

  10. Xbox 360 E Motherboard Replacement: 10 단계, 이미지 1/3 Xbox 360 E Motherboard Replacement: 10 단계, 이미지 2/3 Xbox 360 E Motherboard Replacement: 10 단계, 이미지 3/3
    • Flip the Xbox so the opposite side is towards you. Make sure to keep the separation open.

    • Locate the other clip and insert the spudger to remove it.

  11. Xbox 360 E Motherboard Replacement: 11 단계, 이미지 1/2 Xbox 360 E Motherboard Replacement: 11 단계, 이미지 2/2
    • Continue to run the spudger along the crease to release any further clips that may still be attatched.

    • Do not pull off the panel too fast because you don't want to damage the ribbon cable. Slowly pull away the panel.

    • Now that the front panel has been released from its clips you can pull off the front panel.

  12. Xbox 360 E Motherboard Replacement: 12 단계, 이미지 1/3 Xbox 360 E Motherboard Replacement: 12 단계, 이미지 2/3 Xbox 360 E Motherboard Replacement: 12 단계, 이미지 3/3
    • Find the brown section where the ribbon cable enters the green board. Flip the brown part up and pull out the plastic tab at the end of the ribbon.

  13. Xbox 360 E Motherboard Replacement, RF Module: 13 단계, 이미지 1/3 Xbox 360 E Motherboard Replacement, RF Module: 13 단계, 이미지 2/3 Xbox 360 E Motherboard Replacement, RF Module: 13 단계, 이미지 3/3
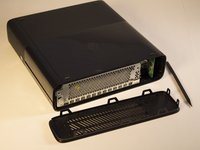
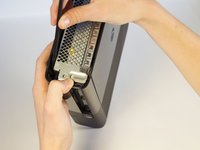
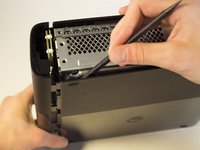
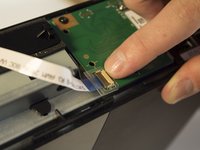
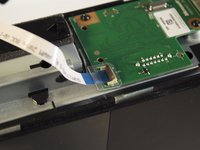
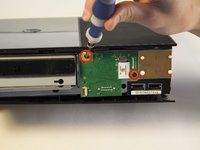
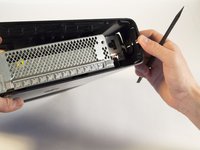
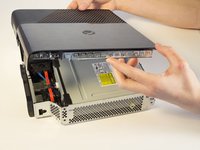
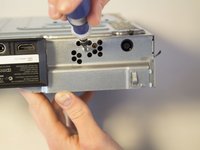
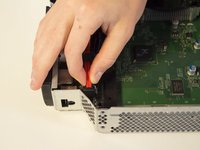
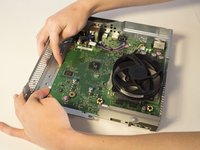
    • Looking at the body of the device, locate the green panel to the right of the CD drive.

    • Remove the two 6 mm screws located on the top left and middle right with a T8 Torx screwdriver.

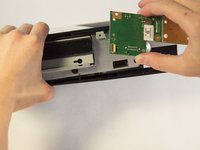
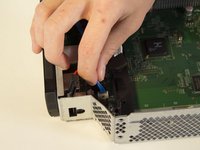
    • Grip the middle of the green board and gently pull it out.

  14. Xbox 360 E Motherboard Replacement, Wi-Fi Card: 14 단계, 이미지 1/1
    • Remove the 11 mm screw left of the green wifi-card using the T9 Torx screw bit.

  15. Xbox 360 E Motherboard Replacement: 15 단계, 이미지 1/2 Xbox 360 E Motherboard Replacement: 15 단계, 이미지 2/2
    • Firmly grip the green Wi-Fi card and pull it out of the Xbox.

  16. Xbox 360 E Motherboard Replacement, Bottom Body: 16 단계, 이미지 1/3 Xbox 360 E Motherboard Replacement, Bottom Body: 16 단계, 이미지 2/3 Xbox 360 E Motherboard Replacement, Bottom Body: 16 단계, 이미지 3/3
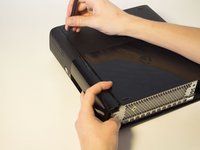
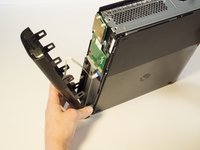
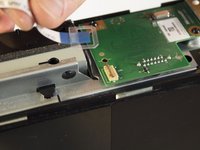
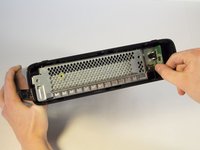
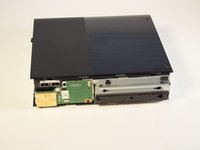
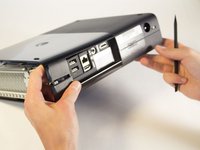
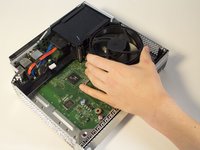
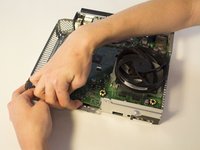
    • Orient the Xbox so the bottom body is facing upwards. Make sure you see the rubber feet to know you have the correct side of the device.

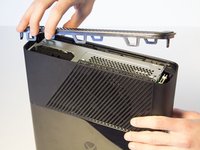
    • Lift the bottom body slightly away from the core at a 45 degree angle.

  17. Xbox 360 E Motherboard Replacement: 17 단계, 이미지 1/2 Xbox 360 E Motherboard Replacement: 17 단계, 이미지 2/2
    • Rotate the Xbox so you are now looking at the back of the device.

    • This step of disassembly requires the removal of the warranty sticker. This will void your warranty. Check the main page for a link to warranty information from Microsoft.

    • Remove the sticker from the back of the Xbox.

    • The sticker is not needed for reassembly.

  18. Xbox 360 E Motherboard Replacement: 18 단계, 이미지 1/3 Xbox 360 E Motherboard Replacement: 18 단계, 이미지 2/3 Xbox 360 E Motherboard Replacement: 18 단계, 이미지 3/3
    • Turn the Xbox to the left to locate the clip holding the body together.

    • With a spudger, press up on the clip like a latch. Move to the far end to undo the other clip the same way.

  19. Xbox 360 E Motherboard Replacement: 19 단계, 이미지 1/2 Xbox 360 E Motherboard Replacement: 19 단계, 이미지 2/2
    • Push the spudger into the crevice. Slide the spudger along the vertical crevice to detach the last clip. The bottom body should slide off after this.

  20. Xbox 360 E Motherboard Replacement, Top Body: 20 단계, 이미지 1/2 Xbox 360 E Motherboard Replacement, Top Body: 20 단계, 이미지 2/2
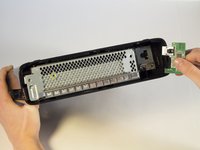
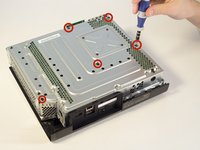
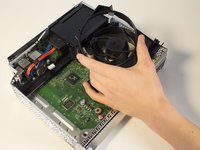
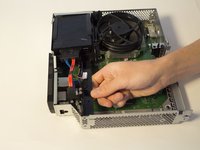
    • Remove the five long black 55 mm screws labeled C2-5 and C7 with a T9 Torx screwdriver.

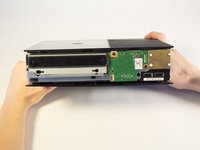
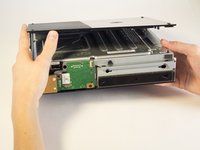
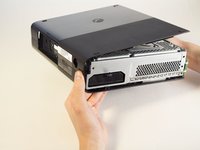
    • Carefully flip the device and pull off the body by lifting from the metal section that is attached to the plastic exterior.

  21. Xbox 360 E Motherboard Replacement, CD Drive: 21 단계, 이미지 1/2 Xbox 360 E Motherboard Replacement, CD Drive: 21 단계, 이미지 2/2
    • Use your fingers to unplug the blue ribbon cable from the CD drive.

  22. Xbox 360 E Motherboard Replacement: 22 단계, 이미지 1/1
    • Use tweezers to unplug the blue and pink wires.

  23. Xbox 360 E Motherboard Replacement: 23 단계, 이미지 1/1
    • Lift the front end of the CD drive and take it out.

  24. Xbox 360 E Motherboard Replacement, Motherboard: 24 단계, 이미지 1/2 Xbox 360 E Motherboard Replacement, Motherboard: 24 단계, 이미지 2/2
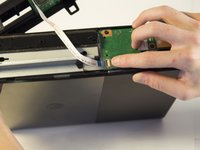
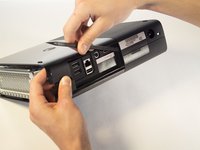
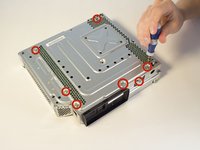
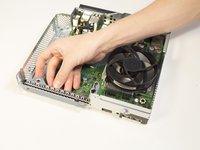
    • From the bottom of your Xbox, take your T9 torx screwdriver and take out all of the 11 mm screws labelled B1-7

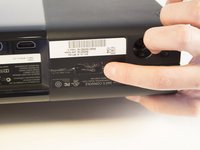
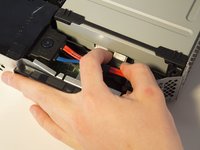
    • Don't forget a screw on the side of the Xbox next to the power plug.

  25. Xbox 360 E Motherboard Replacement: 25 단계, 이미지 1/2 Xbox 360 E Motherboard Replacement: 25 단계, 이미지 2/2
    • Flip the Xbox over and take out the heat sink plastic shield.

  26. Xbox 360 E Motherboard Replacement: 26 단계, 이미지 1/3 Xbox 360 E Motherboard Replacement: 26 단계, 이미지 2/3 Xbox 360 E Motherboard Replacement: 26 단계, 이미지 3/3
    • Unplug the red cable.

    • Unplug the blue cable.

    • Take the hard drive assembly by the long plastic arm and lift the entire thing out.

  27. Xbox 360 E Motherboard Replacement: 27 단계, 이미지 1/1
    • Flip the Xbox to the back and take your T10 torx screwdriver and take out the last four 6 mm screws labelled A1-4.

  28. Xbox 360 E Motherboard Replacement: 28 단계, 이미지 1/3 Xbox 360 E Motherboard Replacement: 28 단계, 이미지 2/3 Xbox 360 E Motherboard Replacement: 28 단계, 이미지 3/3
    • Back to the top of the Xbox, take out the metal and plastic insert.

    • Place two fingers in between the grooves in the metal body and the motherboard and pull up slightly. Do not pull up from the side with the plugs like the HDMI and internet.

    • As the motherboard comes up, switch to the left side and continue pulling the motherboard up.

    • Once that side of the motherboard is out, lift the rest of the motherboard away from the metal body.

결론

To reassemble your device, follow these instructions in reverse order.

다른 36명이 해당 안내서를 완성하였습니다.

Bryce

회원 가입일: 01/31/14

1,331 평판

안내서 2개 작성하였습니다

Cal Poly, Team 2-11, Amido Winter 2014 Cal Poly, Team 2-11, Amido Winter 2014 회원

CPSU-AMIDO-W14S2G11

4 회원들

안내서 43개 작성하였습니다

댓글 4개

Where can I get the motherboard?

Derek Bullard - 답글

Need a motherboard.....

supergametime - 답글

How did you go finding one ? , I gotta get one I think , any chance u could get hold of me by email or I'm on fb ? , just wanna ask you about something with xbox memory n error cap

Daniel Leach -

Would have been nice to include the heatsink removal procedure even if it is similar to the original 360. Also I have never had extra screws left over, yet I have 2 phillips screws left over which are mentioned nowhere in this guide. From no point of the teardown process could I find where they came from.

dot s - 답글

댓글 쓰기

조회 통계:

24 시간 전: 16

7일 전: 71

30일 전: 228

전체 시간: 26,049