이 버전에는 잘못된 편집 사항이 있을 수 있습니다. 최신 확인된 스냅샷으로 전환하십시오.
필요한 것
-
이 단계는 번역되지 않았습니다. 번역을 도와주십시오
-
Depress the battery release button on the top of the controller.
-
Remove the battery holder from the controller.
-
-
이 단계는 번역되지 않았습니다. 번역을 도와주십시오
-
Use a pair of tweezers to peel the barcode sticker from the battery compartment.
-
-
이 단계는 번역되지 않았습니다. 번역을 도와주십시오
-
Remove the seven 9.3 mm T8 Security Torx screws securing the rear case to the front case.
-
-
이 단계는 번역되지 않았습니다. 번역을 도와주십시오
-
Insert a Spudger between the front and rear cases along the left edge of the controller.
-
Rotate the spudger toward the front of the controller, prying the two cases apart.
-
-
이 단계는 번역되지 않았습니다. 번역을 도와주십시오
-
Insert a spudger between the front and rear cases, near the headphone jack.
-
Rotate the spudger toward the front of the controller to pry the two cases apart.
-
-
-
이 단계는 번역되지 않았습니다. 번역을 도와주십시오
-
Grasp the controller by the battery compartment and the headphone jack.
-
Lift the battery compartment away from the headphone jack, separating the rear case from the front case and logic board.
-
-
이 단계는 번역되지 않았습니다. 번역을 도와주십시오
-
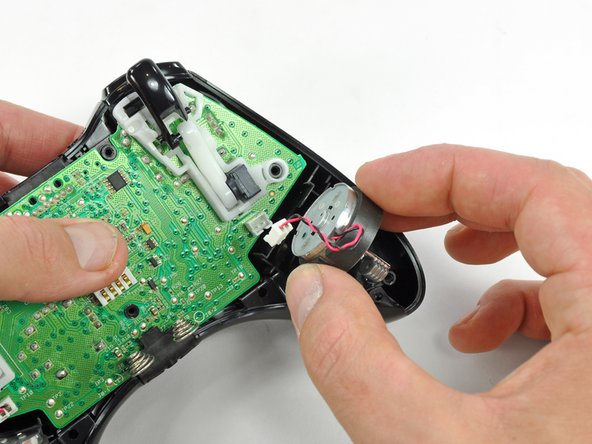
Use the flat end of a spudger to remove the vibration motor cable, moving it upward from its socket on the logic board.
-
Lift the vibration motor out of the front case.
-
-
이 단계는 번역되지 않았습니다. 번역을 도와주십시오
-
Remove the vibration motor from the other side of the controller using the same method previously described.
-
-
이 단계는 번역되지 않았습니다. 번역을 도와주십시오
-
Lifting from the headphone jack and power plug, remove the logic board from the front case.
-
-
이 단계는 번역되지 않았습니다. 번역을 도와주십시오
-
Remove the two 7.0 mm silver Phillips screws from the back of the D-pad.
-
-
이 단계는 번역되지 않았습니다. 번역을 도와주십시오
-
Use a pair of tweezers and squeeze the clips together to release the D-pad from its backing.
-
-
이 단계는 번역되지 않았습니다. 번역을 도와주십시오
-
Lift the D-pad backing out of its compartment on the front case.
-
The D-pad remains below the front case.
-
다른 23명이 해당 안내서를 완성하였습니다.


