주요 콘텐츠로 건너뛰기

Xbox One X Project Scorpio Edition HDD to SSD Replacement

필요한 것

  1. Xbox One X Project Scorpio Edition HDD to SSD Replacement, Outer Case: 1 단계, 이미지 1/2 Xbox One X Project Scorpio Edition HDD to SSD Replacement, Outer Case: 1 단계, 이미지 2/2
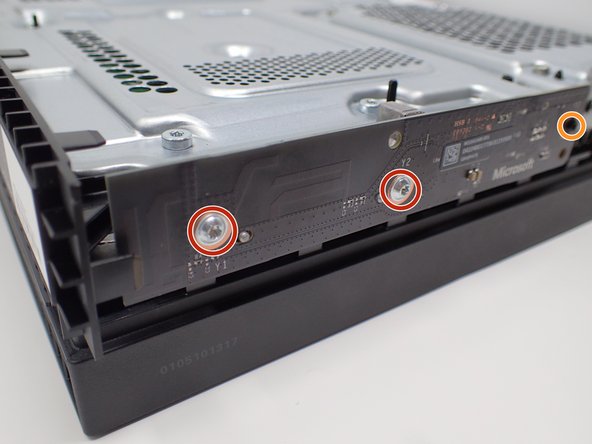
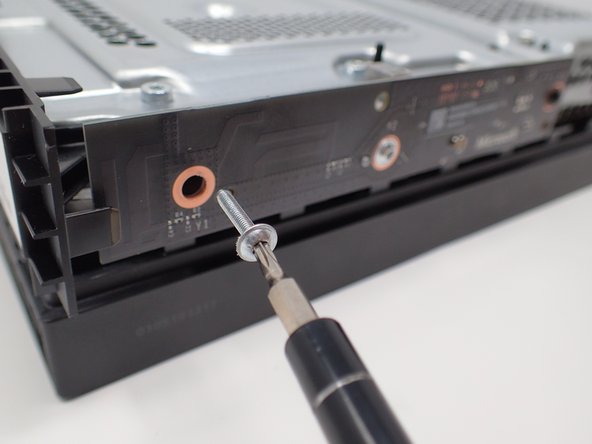
    • Use a T10 Torx screwdriver to remove the 13mm screw which is under and to the left of the power input.

  2. Xbox One X Project Scorpio Edition HDD to SSD Replacement: 2 단계, 이미지 1/3 Xbox One X Project Scorpio Edition HDD to SSD Replacement: 2 단계, 이미지 2/3 Xbox One X Project Scorpio Edition HDD to SSD Replacement: 2 단계, 이미지 3/3
    • Using precision tweezers, remove the screw tab located on the opposite side of the box.

    • Use a T10 Torx screwdriver to remove the 13mm screw revealed underneath the tab.

  3. Xbox One X Project Scorpio Edition HDD to SSD Replacement: 3 단계, 이미지 1/3 Xbox One X Project Scorpio Edition HDD to SSD Replacement: 3 단계, 이미지 2/3 Xbox One X Project Scorpio Edition HDD to SSD Replacement: 3 단계, 이미지 3/3
    • Orient the case so that the front of the Xbox (the side with the power button) is facing you.

    • Remove the top of the case by sliding the case towards you.

  4. Xbox One X Project Scorpio Edition HDD to SSD Replacement: 4 단계, 이미지 1/3 Xbox One X Project Scorpio Edition HDD to SSD Replacement: 4 단계, 이미지 2/3 Xbox One X Project Scorpio Edition HDD to SSD Replacement: 4 단계, 이미지 3/3
    • Using a T9 or T8 Torx screwdriver, remove the two 15mm silver screws that are holding a circuit board/panel to the side of the interior metal casing.

    • Using the same screwdriver, remove the 9mm black screw located farther to the right on the same circuit board/panel.

  5. Xbox One X Project Scorpio Edition HDD to SSD Replacement: 5 단계, 이미지 1/2 Xbox One X Project Scorpio Edition HDD to SSD Replacement: 5 단계, 이미지 2/2
    • Remove the unscrewed panel from the side of the device by pulling it toward you.

    • Be mindful of the connector, as it is fragile.

  6. Xbox One X Project Scorpio Edition HDD to SSD Replacement: 6 단계, 이미지 1/2 Xbox One X Project Scorpio Edition HDD to SSD Replacement: 6 단계, 이미지 2/2
    • Above the black slot is a white switch, fold it over with your fingernail, and fold it over to the front. Then the cable can be easily removed without any problems.

    • Do not force the connector out, as it is fragile. Wiggling may be necessary.

  7. Xbox One X Project Scorpio Edition HDD to SSD Replacement: 7 단계, 이미지 1/3 Xbox One X Project Scorpio Edition HDD to SSD Replacement: 7 단계, 이미지 2/3 Xbox One X Project Scorpio Edition HDD to SSD Replacement: 7 단계, 이미지 3/3
    • On the top of the device in the corner directly above the white connector, there is an oval plate held in place by two screws.

    • Remove both of these 7mm screws with a Torx T8 screwdriver.

    • Lift the detached plate off to the side.

    • The plate is still connected to the device.

  8. Xbox One X Project Scorpio Edition HDD to SSD Replacement: 8 단계, 이미지 1/2 Xbox One X Project Scorpio Edition HDD to SSD Replacement: 8 단계, 이미지 2/2
    • Use a Torx T10 screwdriver to remove the six 47mm long screws, which attach to the bottom side of the outer case.

  9. Xbox One X Project Scorpio Edition HDD to SSD Replacement: 9 단계, 이미지 1/3 Xbox One X Project Scorpio Edition HDD to SSD Replacement: 9 단계, 이미지 2/3 Xbox One X Project Scorpio Edition HDD to SSD Replacement: 9 단계, 이미지 3/3
    • Turn the Xbox over, so that the bottom of the case is on top.

    • Lift the bottom of the case off of the Xbox by pulling it up and toward you.

  10. Xbox One X Project Scorpio Edition HDD to SSD Replacement, BD-ROM Drive: 10 단계, 이미지 1/1
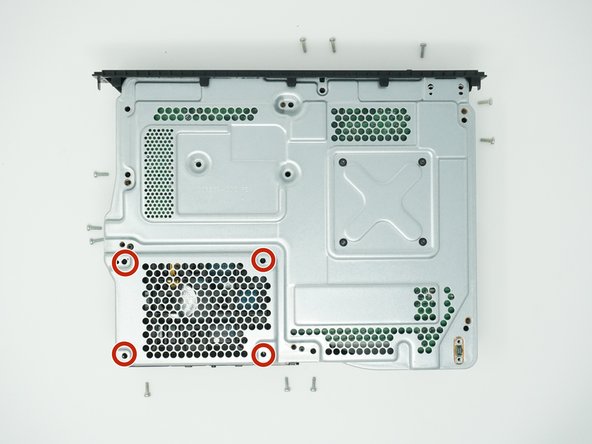
    • Flip over the device again, so that the top is facing upwards.

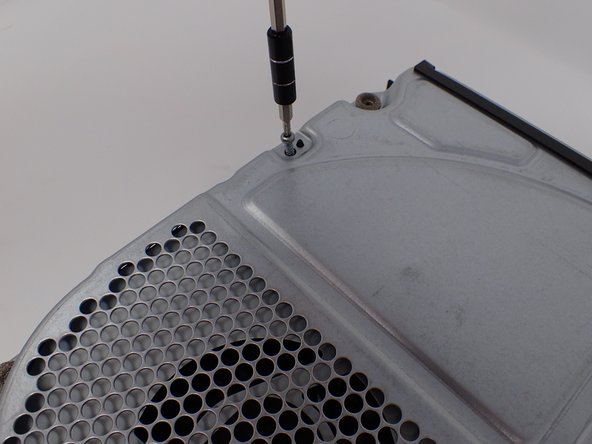
    • Remove the 4 smaller 11mm screws in the lower left corner of the metal casing using a Torx T10 screwdriver.

  11. Xbox One X Project Scorpio Edition HDD to SSD Replacement: 11 단계, 이미지 1/2 Xbox One X Project Scorpio Edition HDD to SSD Replacement: 11 단계, 이미지 2/2
    • Flip over the device again, so that the bottom is facing upwards.

    • Using a Torx T10 screwdriver, remove the two screws located on opposite sides of the metal casing. One is near the fan vent, and the other is near the power supply vent.

    • The left screw is 11mm and the right screw is 7.5 mm.

  12. Xbox One X Project Scorpio Edition HDD to SSD Replacement: 12 단계, 이미지 1/3 Xbox One X Project Scorpio Edition HDD to SSD Replacement: 12 단계, 이미지 2/3 Xbox One X Project Scorpio Edition HDD to SSD Replacement: 12 단계, 이미지 3/3
    • Remove the metal casing by pulling it upward, revealing the interior components of the device.

  13. Xbox One X Project Scorpio Edition HDD to SSD Replacement: 13 단계, 이미지 1/3 Xbox One X Project Scorpio Edition HDD to SSD Replacement: 13 단계, 이미지 2/3 Xbox One X Project Scorpio Edition HDD to SSD Replacement: 13 단계, 이미지 3/3
    • Lift and rotate the BD drive to reveal the wires that connect it to the motherboard.

  14. Xbox One X Project Scorpio Edition HDD to SSD Replacement: 14 단계, 이미지 1/3 Xbox One X Project Scorpio Edition HDD to SSD Replacement: 14 단계, 이미지 2/3 Xbox One X Project Scorpio Edition HDD to SSD Replacement: 14 단계, 이미지 3/3
    • Using your fingers, gently unplug the two sets of wires connecting the drive to the motherboard.

    • Alternatively, you can disconnect the wires from the drive-side sockets. This is much easier if you have not removed the power supply.

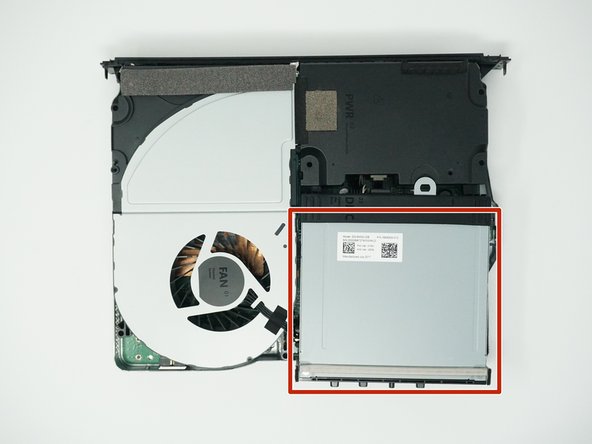
    • The BD drive should now be completely detached from the rest of the device, and it can be set aside.

  15. Xbox One X Project Scorpio Edition HDD to SSD Replacement, Unplug the bundled cable connector: 15 단계, 이미지 1/2 Xbox One X Project Scorpio Edition HDD to SSD Replacement, Unplug the bundled cable connector: 15 단계, 이미지 2/2
    • Unplug the bundled cable connector connecting the hard drive to the motherboard by pulling directly upward.

  16. Xbox One X Project Scorpio Edition HDD to SSD Replacement, Unplug the SATA cable: 16 단계, 이미지 1/2 Xbox One X Project Scorpio Edition HDD to SSD Replacement, Unplug the SATA cable: 16 단계, 이미지 2/2
    • Unplug the SATA cable connecting the hard drive to the motherboard by pulling directly upward.

  17. Xbox One X Project Scorpio Edition HDD to SSD Replacement, Remove the hard drive: 17 단계, 이미지 1/2 Xbox One X Project Scorpio Edition HDD to SSD Replacement, Remove the hard drive: 17 단계, 이미지 2/2
    • Lift the hard drive assembly up out of the upper metal case.

    • When moving the hard drive, hold it by the sides to prevent damage.

  18. Xbox One X Project Scorpio Edition HDD to SSD Replacement, Remove the mounting bracket: 18 단계, 이미지 1/1
    • Flip the hard drive over so that the plastic mounting bracket is facing upward.

    • Use a T10 Torx screwdriver to remove the four 8.6 mm screws attaching the hard drive to the mounting bracket.

  19. Xbox One X Project Scorpio Edition HDD to SSD Replacement: 19 단계, 이미지 1/2 Xbox One X Project Scorpio Edition HDD to SSD Replacement: 19 단계, 이미지 2/2
    • Lift the mounting bracket off the hard drive.

  20. Xbox One X Project Scorpio Edition HDD to SSD Replacement, Unplug the hard drive connector: 20 단계, 이미지 1/2 Xbox One X Project Scorpio Edition HDD to SSD Replacement, Unplug the hard drive connector: 20 단계, 이미지 2/2
    • Unplug the hard drive connector from the hard drive by pulling parallel to the length of the drive.

  21. Xbox One X Project Scorpio Edition HDD to SSD Replacement, New Drive: 21 단계, 이미지 1/2 Xbox One X Project Scorpio Edition HDD to SSD Replacement, New Drive: 21 단계, 이미지 2/2
    • Plug in the new drive.

  22. Xbox One X Project Scorpio Edition HDD to SSD Replacement, Put It All Back Together: 22 단계, 이미지 1/1
    • Put the Console back together.

    • Here's a joke for you Fixers. Why do they not allow you to fart in an Apple Store?

    • Because they don't have Windows!

    • Download the Offline Update on a flash drive.

    • Flash drive should be more than 6GB

결론

Now It's Game Time! Of course after the updates though.

다른 2명이 해당 안내서를 완성하였습니다.

NR26

회원 가입일: 01/26/22

2,295 평판

안내서 1개 작성함

Kid fixers Kid fixers 회원

Community

158 회원들

안내서 296개 작성하였습니다

댓글 0개

댓글 쓰기

조회 통계:

24 시간 전: 6

7일 전: 33

30일 전: 231

전체 시간: 5,407