이 버전에는 잘못된 편집 사항이 있을 수 있습니다. 최신 확인된 스냅샷으로 전환하십시오.
필요한 것
-
이 단계는 번역되지 않았습니다. 번역을 도와주십시오
-
You can either remove the labels or simply feel for the screw holes through the labels and then cut or punch a hole through them.
-
-
이 단계는 번역되지 않았습니다. 번역을 도와주십시오
-
Remove the six T20 Torx screws securing the top cover to the bottom cover.
-
-
이 단계는 번역되지 않았습니다. 번역을 도와주십시오
-
Once the bottom and top shells are no longer attached, carefully turn the Xbox right-side-up, lift and remove the top cover.
-
-
-
이 단계는 번역되지 않았습니다. 번역을 도와주십시오
-
Free the hard drive power cable from the carrier for sufficient slack to lift the hard drive out.
-
Lift the plastic hard drive carrier out of the Xbox case.
-
-
이 단계는 번역되지 않았습니다. 번역을 도와주십시오
-
Remove the four 3.4 mm T15 Torx screws from the plastic hard drive carrier (two screws per side).
-
Carefully remove the hard drive from the plastic carrier. Gentle rocking will see the hard drive come out quite easily.
-
-
이 단계는 번역되지 않았습니다. 번역을 도와주십시오
-
Pull both the hard drive data ribbon cable and the power cable straight up from the hard drive.
-
-
이 단계는 번역되지 않았습니다. 번역을 도와주십시오
-
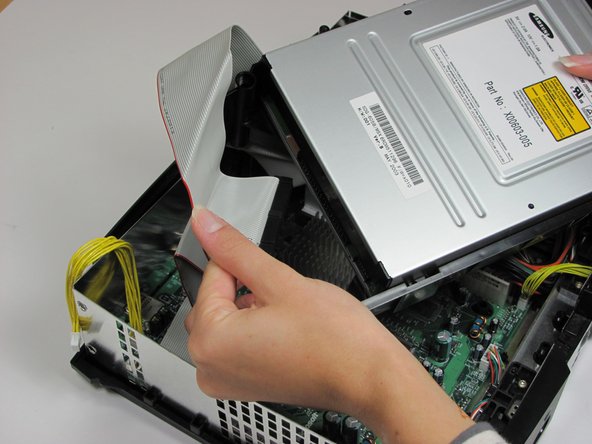
Remove the disk drive. It should come right out.
-
Unplug the ribbon cable and yellow cables from back of disk drive.
-
-
이 단계는 번역되지 않았습니다. 번역을 도와주십시오
-
Pry back the black plastic tabs around the disk drive in order to remove it from its housing. Once removed, set the drive aside.
-
ONLY REMOVE IF DEAD!
-
-
이 단계는 번역되지 않았습니다. 번역을 도와주십시오
-
Unplug the multi-colored power cord from the motherboard. It is in there pretty tightly, so it may take some effort.
-
-
이 단계는 번역되지 않았습니다. 번역을 도와주십시오
-
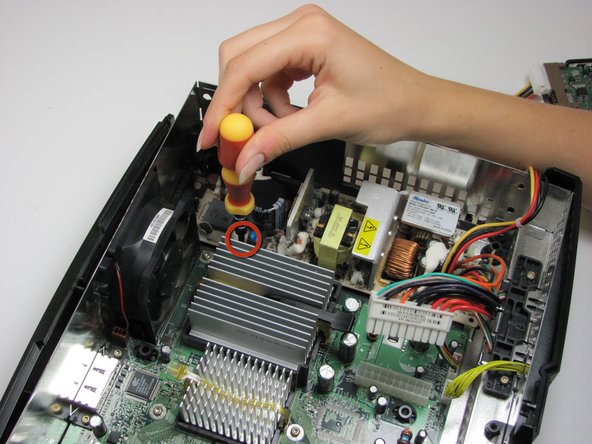
Using T10 Torx screwdriver, remove two 3mm screws from the tan power supply board.
-


다른 34명이 해당 안내서를 완성하였습니다.
팀

Cal Poly, Team 18-2, Maness Fall 2009 Cal Poly, Team 18-2, Maness Fall 2009 회원
CPSU-MANESS-F09S18G2
3 회원들
안내서 24개 작성하였습니다
댓글 한 개
http://www.ebay.com/gds/How-To-Determine...
Utilize the information on this website to determine what Xbox version you have so you know what replacement parts to look for.