주요 콘텐츠로 건너뛰기

Xbox Series X Accessory Antenna Board Replacement

필요한 것

  1. Xbox Series X Accessory Antenna Board Replacement, Uncover the back panel screws: 1 단계, 이미지 1/2 Xbox Series X Accessory Antenna Board Replacement, Uncover the back panel screws: 1 단계, 이미지 2/2
    • Before you begin, completely power down and unplug all cables from your console.

    • Use a pair of tweezers to remove the sticker hiding the first screw on the back panel, near the base.

  2. Xbox Series X Accessory Antenna Board Replacement: 2 단계, 이미지 1/3 Xbox Series X Accessory Antenna Board Replacement: 2 단계, 이미지 2/3 Xbox Series X Accessory Antenna Board Replacement: 2 단계, 이미지 3/3
    • Use a pair of blunt tweezers to peel back the large sticker on the back panel to reveal the second screw.

    • You only need to peel this sticker to where you can access the hidden screw. You don't need to pull it completely off.

    • Technically, these are tamper-evident stickers, but don't worry—Microsoft can't legally void your warranty, as long as you don't damage anything. Have fun!

  3. Xbox Series X Accessory Antenna Board Replacement, Remove the back panel screws: 3 단계, 이미지 1/1
    이 단계에 사용된 도구:
    Magnetic Project Mat
    $19.95
    구매
    • Use a T8 Torx driver to remove the two 7.4 mm-long screws securing the back panel.

    • Throughout this repair, keep track of each screw and make sure it goes back exactly where it came from to avoid damaging your console.

  4. Xbox Series X Accessory Antenna Board Replacement, Unclip the back panel: 4 단계, 이미지 1/3 Xbox Series X Accessory Antenna Board Replacement, Unclip the back panel: 4 단계, 이미지 2/3 Xbox Series X Accessory Antenna Board Replacement, Unclip the back panel: 4 단계, 이미지 3/3
    • Insert the flat end of a spudger into the gap between the back panel and the shell, near the left side of the base.

    • Pry up the back panel to release it from the locking clips.

  5. Xbox Series X Accessory Antenna Board Replacement: 5 단계, 이미지 1/2 Xbox Series X Accessory Antenna Board Replacement: 5 단계, 이미지 2/2
    • Insert the flat end of a spudger into the gap between the back panel and the shell, near the right side of the base.

    • Pry up the back panel to release it from the locking clips.

  6. Xbox Series X Accessory Antenna Board Replacement, Remove the back panel: 6 단계, 이미지 1/3 Xbox Series X Accessory Antenna Board Replacement, Remove the back panel: 6 단계, 이미지 2/3 Xbox Series X Accessory Antenna Board Replacement, Remove the back panel: 6 단계, 이미지 3/3
    • Grip the back panel at the opening you just created and pull it up and away from the shell to unclip the long edges.

    • During reassembly, press along the edges of the back panel to snap it into place.

  7. Xbox Series X Accessory Antenna Board Replacement: 7 단계, 이미지 1/3 Xbox Series X Accessory Antenna Board Replacement: 7 단계, 이미지 2/3 Xbox Series X Accessory Antenna Board Replacement: 7 단계, 이미지 3/3
    • The back panel slots into a gap at the top of the shell.

    • Tilt the back panel up and pull it away from the top edge of the shell to release it from the gap.

    • Remove the back panel.

  8. Xbox Series X Accessory Antenna Board Replacement, Remove the fan screws: 8 단계, 이미지 1/1
    • Use a T8 Torx driver to remove the three screws securing the fan to the center chassis:

    • One 10.5 mm pancake screw

    • Two 8.8 mm screws

  9. Xbox Series X Accessory Antenna Board Replacement, Disconnect the fan cable: 9 단계, 이미지 1/3 Xbox Series X Accessory Antenna Board Replacement, Disconnect the fan cable: 9 단계, 이미지 2/3 Xbox Series X Accessory Antenna Board Replacement, Disconnect the fan cable: 9 단계, 이미지 3/3
    • Use your fingers or a pair of blunt tweezers to grip the edges of the fan cable connector, and pull up to disconnect it from the center chassis.

    • Always pull cables by their connectors and not the wires themselves.

    • During reassembly, route the fan cable underneath its small cable guide on the fan housing so it doesn't interfere with the back panel.

  10. Xbox Series X Accessory Antenna Board Replacement, Remove the fan: 10 단계, 이미지 1/2 Xbox Series X Accessory Antenna Board Replacement, Remove the fan: 10 단계, 이미지 2/2
    • Slide the fan out of its slot to remove it.

    • During reinstallation, note that the fan can only be installed one way—make sure Master Chief is facing you.

    • If you are replacing the fan, a new fan will probably not include the plastic installation bracket. The bracket is attached to the fan with four T10 Torx screws. This is not pictured in this guide.

  11. Xbox Series X Accessory Antenna Board Replacement, Unlatch the base: 11 단계, 이미지 1/3 Xbox Series X Accessory Antenna Board Replacement, Unlatch the base: 11 단계, 이미지 2/3 Xbox Series X Accessory Antenna Board Replacement, Unlatch the base: 11 단계, 이미지 3/3
    • Use the flat end of a spudger to lift up on the locking tab holding the base to the shell.

  12. Xbox Series X Accessory Antenna Board Replacement, Twist and remove the base: 12 단계, 이미지 1/3 Xbox Series X Accessory Antenna Board Replacement, Twist and remove the base: 12 단계, 이미지 2/3 Xbox Series X Accessory Antenna Board Replacement, Twist and remove the base: 12 단계, 이미지 3/3
    • Grip the base and rotate it counterclockwise to unlock it from the shell.

    • You may need to hold the locking tab open while you get the base started.

    • Remove the base.

    • During reassembly, drop the base tabs into their holes on the shell and twist clockwise until the base snaps into the interior locking tab.

    • When locked in place, the "Hello from Seattle" line will be parallel with the device's sides.

  13. Xbox Series X Accessory Antenna Board Replacement, Remove the optical drive screws: 13 단계, 이미지 1/2 Xbox Series X Accessory Antenna Board Replacement, Remove the optical drive screws: 13 단계, 이미지 2/2
    • Use a T8 Torx driver to remove the two 8.8 mm screws securing the optical drive's vibration isolator to the shell: one on the base and one on the top of the isolator.

  14. Xbox Series X Accessory Antenna Board Replacement, Remove the vibration isolator: 14 단계, 이미지 1/3 Xbox Series X Accessory Antenna Board Replacement, Remove the vibration isolator: 14 단계, 이미지 2/3 Xbox Series X Accessory Antenna Board Replacement, Remove the vibration isolator: 14 단계, 이미지 3/3
    • Lift up the optical drive's vibration isolator to remove it.

    • The vibration isolator grips the sides of the optical drive with silicone pads, so you may need to "walk" the isolator off of the drive to slip it off each side.

    • During reassembly, ensure the vibration isolator is pushed down and around both edges of the optical drive, so it sits flush with the rest of the center chassis.

  15. Xbox Series X Accessory Antenna Board Replacement, Disconnect the power and data cables: 15 단계, 이미지 1/3 Xbox Series X Accessory Antenna Board Replacement, Disconnect the power and data cables: 15 단계, 이미지 2/3 Xbox Series X Accessory Antenna Board Replacement, Disconnect the power and data cables: 15 단계, 이미지 3/3
    • Use a pair of blunt tweezers to grip the edges of the optical drive power connector and pull up to disconnect it from the optical drive.

    • Always pull cables by their connectors and not the wires themselves.

    • Use your fingers to pull up and disconnect the data cable from the optical drive.

  16. Xbox Series X Accessory Antenna Board Replacement, Remove the optical drive: 16 단계, 이미지 1/2 Xbox Series X Accessory Antenna Board Replacement, Remove the optical drive: 16 단계, 이미지 2/2
    • Grip the top edge of the optical drive and pull it out of its slot in the shell to remove it.

    • During reassembly, align the pegs on the bottom edge of the optical drive with the guide holes on the bottom of the shell.

    • If the drive is misaligned, the top vibration isolator will not be able to be installed correctly, and the disc reader will be misaligned with the front of the console.

  17. Xbox Series X Accessory Antenna Board Replacement, Disconnect the USB port cable: 17 단계, 이미지 1/3 Xbox Series X Accessory Antenna Board Replacement, Disconnect the USB port cable: 17 단계, 이미지 2/3 Xbox Series X Accessory Antenna Board Replacement, Disconnect the USB port cable: 17 단계, 이미지 3/3
    • The ribbon cables and their connectors are extremely fragile, so always open locking tabs gently and pull cables slowly.

    • Use the flat end of a spudger to flip open the metal locking tab on the USB port ribbon cable.

    • During reassembly, gently snap the metal locking tab back into place once the cable has been inserted.

  18. Xbox Series X Accessory Antenna Board Replacement: 18 단계, 이미지 1/2 Xbox Series X Accessory Antenna Board Replacement: 18 단계, 이미지 2/2
    • Use a pair of tweezers to pull up on the black plastic pull tab to disconnect the USB port cable.

    • Pull only on the pull tab, not the cable itself.

    • If the USB port cable feels adhered to the metal chassis, apply an iOpener or carefully heat it with a hair dryer to soften the adhesive.

  19. Xbox Series X Accessory Antenna Board Replacement, Disconnect the power button cable: 19 단계, 이미지 1/3 Xbox Series X Accessory Antenna Board Replacement, Disconnect the power button cable: 19 단계, 이미지 2/3 Xbox Series X Accessory Antenna Board Replacement, Disconnect the power button cable: 19 단계, 이미지 3/3
    • Use the pointed end of a spudger to depress the metal tab on the side of the power button cable's board connector.

    • With the metal tab depressed, use a pair of tweezers to pull up on the pull tab to disconnect the power button cable from the center chassis.

    • Pull only on the pull tab, not the cable itself.

    • Don't pull on the cable without depressing the metal tab, otherwise you risk damaging either the cable or the connector.

    • During reassembly, the cable should lightly "snap" into place when inserted.

  20. Xbox Series X Accessory Antenna Board Replacement, Remove the chassis screws: 20 단계, 이미지 1/1
    • Use a T8 Torx driver to remove the three 7.4 mm screws securing the center chassis assembly to the shell.

  21. Xbox Series X Accessory Antenna Board Replacement, Peel up the USB port cable: 21 단계, 이미지 1/2 Xbox Series X Accessory Antenna Board Replacement, Peel up the USB port cable: 21 단계, 이미지 2/2
    • Gently peel the taped USB port ribbon cable off of the heatsink.

  22. Xbox Series X Accessory Antenna Board Replacement, Remove the center chassis assembly: 22 단계, 이미지 1/3 Xbox Series X Accessory Antenna Board Replacement, Remove the center chassis assembly: 22 단계, 이미지 2/3 Xbox Series X Accessory Antenna Board Replacement, Remove the center chassis assembly: 22 단계, 이미지 3/3
    • The center chassis is aligned to the shell with guide pegs. These pegs will need to slide out of their slots to allow the chassis to be lifted out.

    • Grip the center chassis and pull it towards the green fan grille at the top of the shell, uncoupling the guide pegs from the shell.

    • Lift out the center chassis assembly to remove it from the shell.

    • During reassembly, make sure neither of the ribbon cables get pinched as you lower the center chassis into the shell.

  23. Xbox Series X Accessory Antenna Board Replacement, Remove the antenna board screws: 23 단계, 이미지 1/1
    • Use a T8 Torx driver to remove the three 9.6 mm screws securing the antenna board to the center chassis.

  24. Xbox Series X Accessory Antenna Board Replacement, Remove the accessory antenna board: 24 단계, 이미지 1/3 Xbox Series X Accessory Antenna Board Replacement, Remove the accessory antenna board: 24 단계, 이미지 2/3 Xbox Series X Accessory Antenna Board Replacement, Remove the accessory antenna board: 24 단계, 이미지 3/3
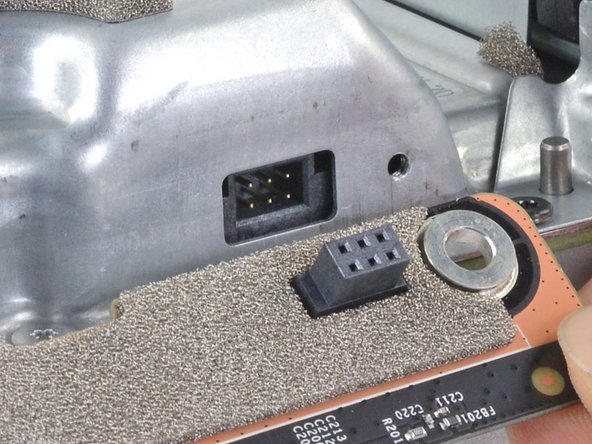
    • Grip the antenna board and pull it directly away from the center chassis to disconnect it.

    • During reassembly, align the board's connector with the port on the center chassis and press to reconnect.

결론

To reassemble your device, follow these instructions in reverse order.

Take your e-waste to an R2 or e-Stewards certified recycler.

Repair didn’t go as planned? Try some basic troubleshooting, or ask our Xbox Series X Answers community for help.

다른 5명이 해당 안내서를 완성하였습니다.

Carsten Frauenheim

회원 가입일: 03/10/20

113,672 평판

안내서 338개 작성하였습니다

iFixit iFixit 회원

Staff

135 회원들

안내서 16,817개 작성하였습니다

댓글 2개

Had a Xbox Series X with a completely non-functional sync button, xbox light did not blink upon pressing it. Controllers or other Xbox wireless accessories did not work either. Replacing this board fixed that issue! In case anyone else runs into the same problem.

Nicolas Sloan - 답글

This was extremely well described. For me, however it did not solve my problem. I solved my controller connectivity and wifi issue simply by plugging in a powered external hard drive into the front USB of my Xbox Series X. It appears that possibly the power supply was not generating enough power and this little boost has sorted it. It only worked after I connected the external powered drive and then rebooted.

Rikki - 답글

댓글 쓰기

조회 통계:

24 시간 전: 11

7일 전: 65

30일 전: 279

전체 시간: 5,458