소개
As the tablet ages, the battery pack’s charging ability degrades from constant discharging and recharging. Breakage of the battery pack will soon lead to a replacement. Replacing the battery pack is a straightforward task, but it is important to handle it carefully. The pack is made of a lithium-ion compound in a flexible mylar jacket, allowing internal battery components to come in contact with each other, causing a potentially dangerous chemical reaction. Also, the mylar jacket is vulnerable to damage. Failure to handle with care throughout these steps can cause internal chemicals to leak out.
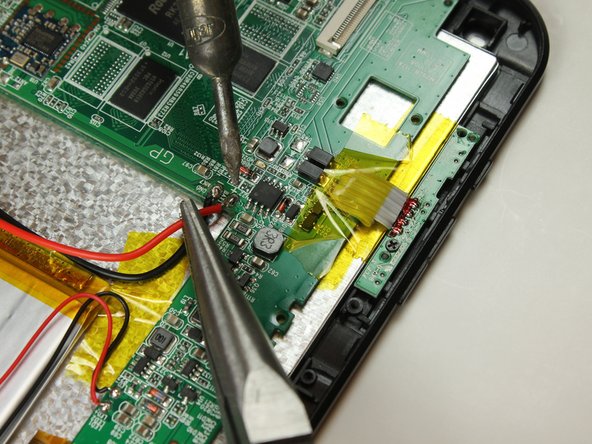
With the motherboard exposed, take precautionary measures to prevent the battery’s power leads from short-circuiting or allowing static electricity to damage the motherboard. If available, use an antistatic mat.
필요한 것
-
-
Remove the two 3 mm retaining screws from the side of the tablet with a Phillips #0 screwdriver.
-
-
-
De-solder the two wires that connect the battery pack to the motherboard using a needle-nose plier and a soldering iron.
-
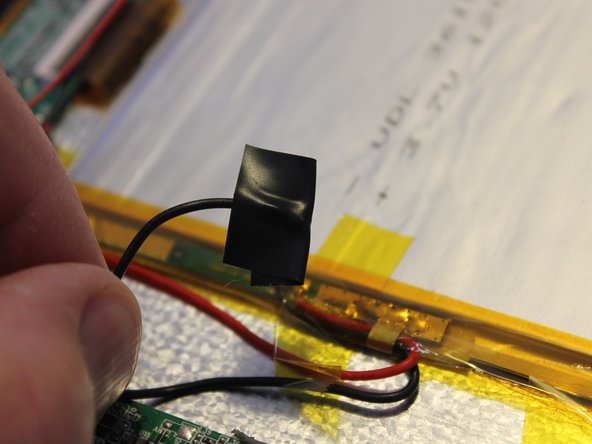
Wrap the exposed end of the black negative wire with electrical tape.
-
-


To reassemble your device, follow these instructions in reverse order.
To reassemble your device, follow these instructions in reverse order.
팀

Colorado Springs, Team 4-2, Panko Spring 2015 Colorado Springs, Team 4-2, Panko Spring 2015 회원
UCCS-PANKO-S15S4G2
3 회원들
안내서 12개 작성하였습니다