주요 콘텐츠로 건너뛰기

Xiaomi Redmi Note Screen Replacement

필요한 것

  1. Xiaomi Redmi Note Screen Replacement, Battery: 1 단계, 이미지 1/1
    • Make sure the Xiaomi Redmi Note is powered off before removing the battery.

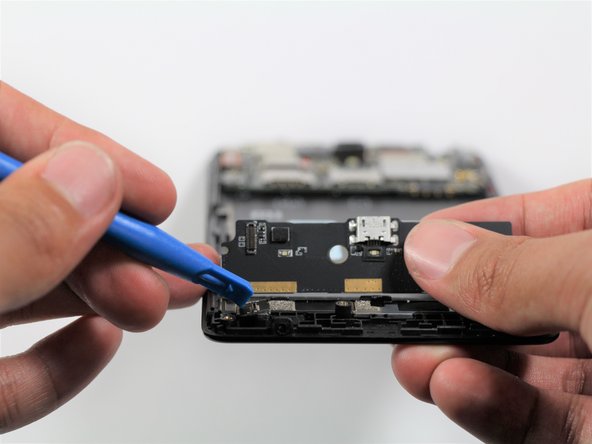
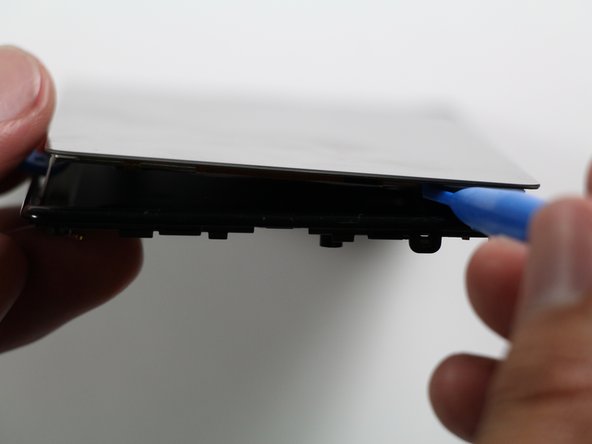
    • Insert the plastic opening tool between the charging port and the rear case.

    • Pry the end of the rear case up from the charging port.

  2. Xiaomi Redmi Note Screen Replacement: 2 단계, 이미지 1/2 Xiaomi Redmi Note Screen Replacement: 2 단계, 이미지 2/2
    • Run the plastic opening tool along the seam on the side of the phone to remove the rear casing.

  3. Xiaomi Redmi Note Screen Replacement: 3 단계, 이미지 1/2 Xiaomi Redmi Note Screen Replacement: 3 단계, 이미지 2/2
    • Locate the indentation at the bottom of the battery.

    • Place a finger in the indentation and lift up to remove the battery.

  4. Xiaomi Redmi Note Screen Replacement, Midframe: 4 단계, 이미지 1/2 Xiaomi Redmi Note Screen Replacement, Midframe: 4 단계, 이미지 2/2
    • Remove twelve 3.5mm Phillips #00 screws from the midframe.

  5. Xiaomi Redmi Note Screen Replacement: 5 단계, 이미지 1/2 Xiaomi Redmi Note Screen Replacement: 5 단계, 이미지 2/2
    • Insert a plastic opening into the seam between the midframe and the bottom frame of the phone.

    • Run the plastic opening tool along the seam.

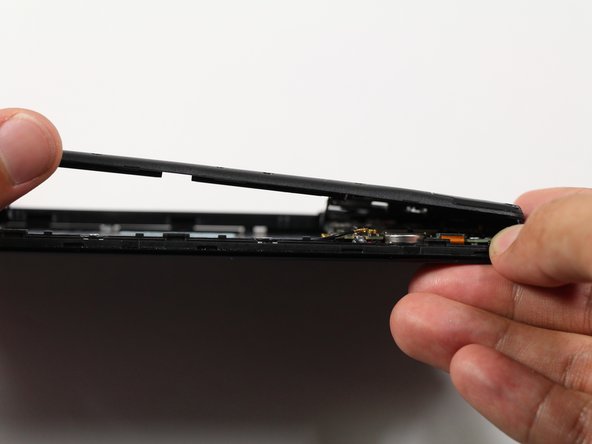
    • Pry up the midframe with the plastic opening tool.

    • Once the midframe has been sufficiently lifted with the tool, place a hand underneath the edge to lift the entire component out of the frame.

    • There will be snapping sounds as the clips on the midframe disconnect from the phone.

  6. Xiaomi Redmi Note Screen Replacement, Charging Port: 6 단계, 이미지 1/2 Xiaomi Redmi Note Screen Replacement, Charging Port: 6 단계, 이미지 2/2
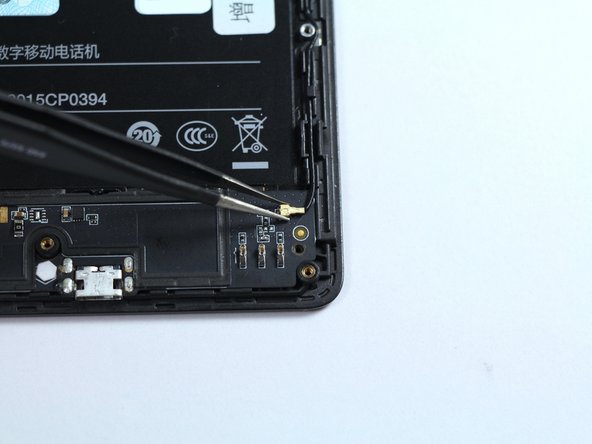
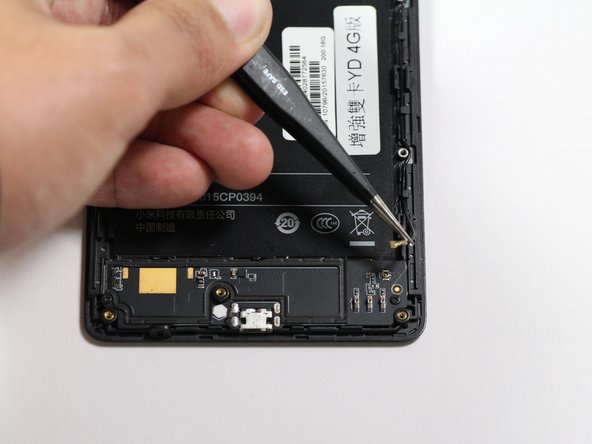
    • Locate the charging port panel at the bottom of the device.

    • Remove the 2.9 mm Phillips #00 screws on the sides of the panel.

  7. Xiaomi Redmi Note Screen Replacement: 7 단계, 이미지 1/3 Xiaomi Redmi Note Screen Replacement: 7 단계, 이미지 2/3 Xiaomi Redmi Note Screen Replacement: 7 단계, 이미지 3/3
    • Locate the antenna cable at the top right corner of the charging port.

    • Lift the antenna cable off of the panel with tweezers.

  8. Xiaomi Redmi Note Screen Replacement: 8 단계, 이미지 1/3 Xiaomi Redmi Note Screen Replacement: 8 단계, 이미지 2/3 Xiaomi Redmi Note Screen Replacement: 8 단계, 이미지 3/3
    • Flip the panel to its back side, but do not fully lift it off of the phone yet.

    • Use a plastic opening tool to gently pry off the press fit connector attached to the back side of the panel.

  9. Xiaomi Redmi Note Screen Replacement: 9 단계, 이미지 1/1
    • Lift the charging port up to remove it from the frame.

  10. Xiaomi Redmi Note Screen Replacement, Front-Facing Camera: 10 단계, 이미지 1/3 Xiaomi Redmi Note Screen Replacement, Front-Facing Camera: 10 단계, 이미지 2/3 Xiaomi Redmi Note Screen Replacement, Front-Facing Camera: 10 단계, 이미지 3/3
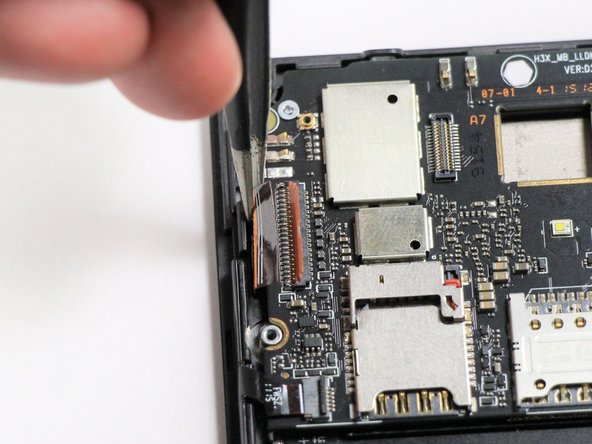
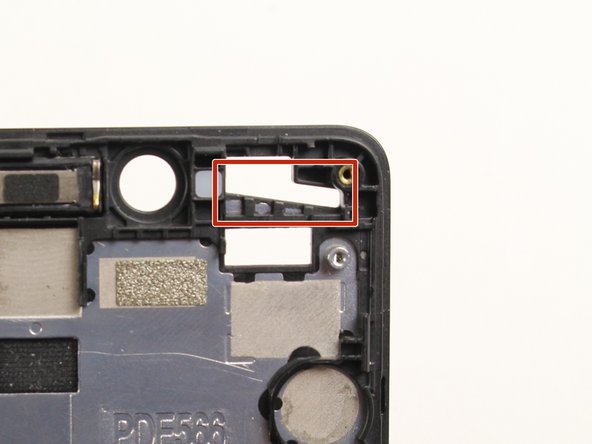
    • Use tweezers to lift the retaining flap of the zero insertion force (ZIF) connector to the upright position.

    • Use tweezers to pull the ribbon cable out of the ZIF connector.

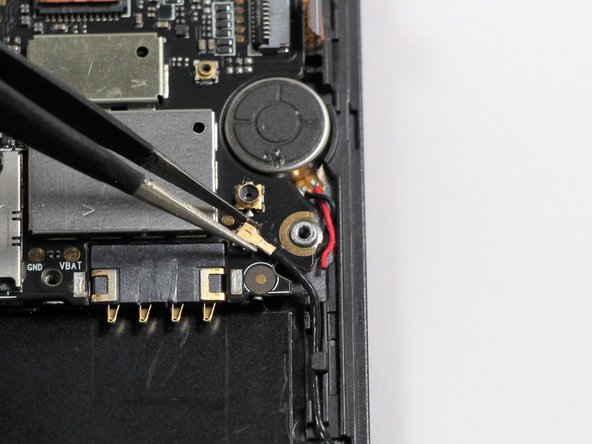
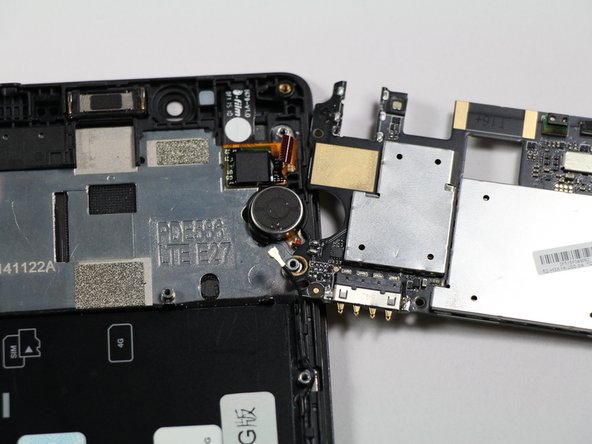
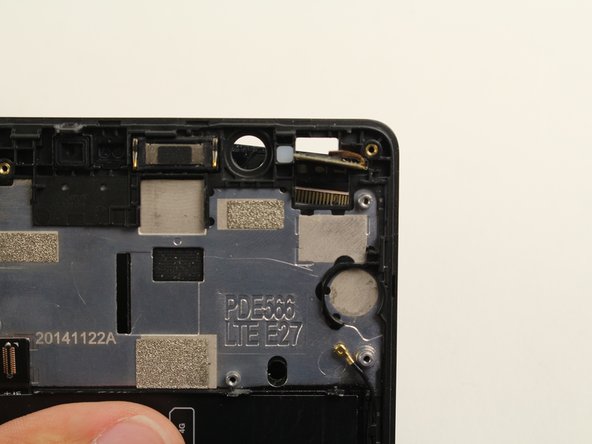
    • Remove the front-facing camera from the motherboard.

  11. Xiaomi Redmi Note Screen Replacement, Rear Camera: 11 단계, 이미지 1/2 Xiaomi Redmi Note Screen Replacement, Rear Camera: 11 단계, 이미지 2/2
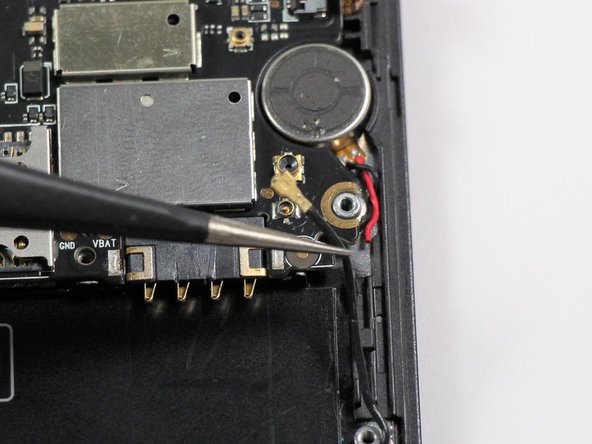
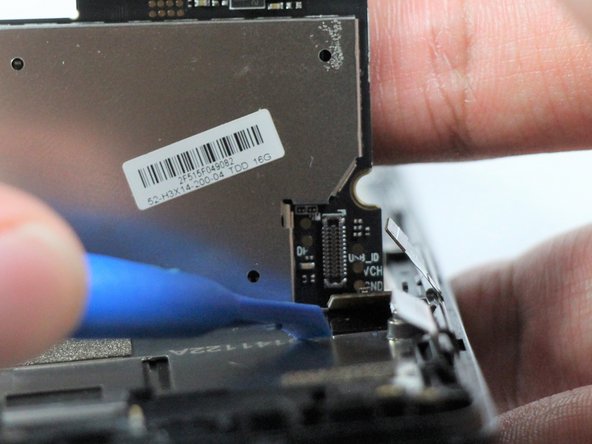
    • Disconnect the rear-facing camera from the motherboard by pulling out the press-fit connector to its left.

  12. Xiaomi Redmi Note Screen Replacement, Motherboard: 12 단계, 이미지 1/1
    • Locate the three ZIF connectors on the motherboard.

  13. Xiaomi Redmi Note Screen Replacement: 13 단계, 이미지 1/3 Xiaomi Redmi Note Screen Replacement: 13 단계, 이미지 2/3 Xiaomi Redmi Note Screen Replacement: 13 단계, 이미지 3/3
    • Use tweezers to lift the retaining flap on the ZIF connector to the upright position.

    • Pull the ribbon cable out of the connector by pulling to the left.

    • Repeat these steps for the other two ZIF connectors.

  14. Xiaomi Redmi Note Screen Replacement: 14 단계, 이미지 1/3 Xiaomi Redmi Note Screen Replacement: 14 단계, 이미지 2/3 Xiaomi Redmi Note Screen Replacement: 14 단계, 이미지 3/3
    • Locate the antenna cable on the bottom right of the motherboard and use tweezers to lift the cable off of the motherboard.

  15. Xiaomi Redmi Note Screen Replacement: 15 단계, 이미지 1/2 Xiaomi Redmi Note Screen Replacement: 15 단계, 이미지 2/2
    • Remove the two 2.9mm Philips #00 screws.

  16. Xiaomi Redmi Note Screen Replacement: 16 단계, 이미지 1/3 Xiaomi Redmi Note Screen Replacement: 16 단계, 이미지 2/3 Xiaomi Redmi Note Screen Replacement: 16 단계, 이미지 3/3
    • Flip over the motherboard to reveal the back.

    • Use a plastic opening tool to pry off the snap fit connector, located on the bottom right off of the motherboard.

  17. Xiaomi Redmi Note Screen Replacement: 17 단계, 이미지 1/2 Xiaomi Redmi Note Screen Replacement: 17 단계, 이미지 2/2
    • Lift up the motherboard and turn it over to place it by the side of the phone.

    • Do not attempt to remove the motherboard at this stage. Pulling on the board can damage its connection to the vibrating motor.

  18. Xiaomi Redmi Note Screen Replacement: 18 단계, 이미지 1/3 Xiaomi Redmi Note Screen Replacement: 18 단계, 이미지 2/3 Xiaomi Redmi Note Screen Replacement: 18 단계, 이미지 3/3
    • Use tweezers to peel the vibrating motor off the frame of the phone.

    • The vibrating motor is glued to the frame, so do not be afraid to use force to dislodge it.

    Can we buy spare motherboard online, what's the price

    sai teja - 답글

  19. Xiaomi Redmi Note Screen Replacement, Screen: 19 단계, 이미지 1/3 Xiaomi Redmi Note Screen Replacement, Screen: 19 단계, 이미지 2/3 Xiaomi Redmi Note Screen Replacement, Screen: 19 단계, 이미지 3/3
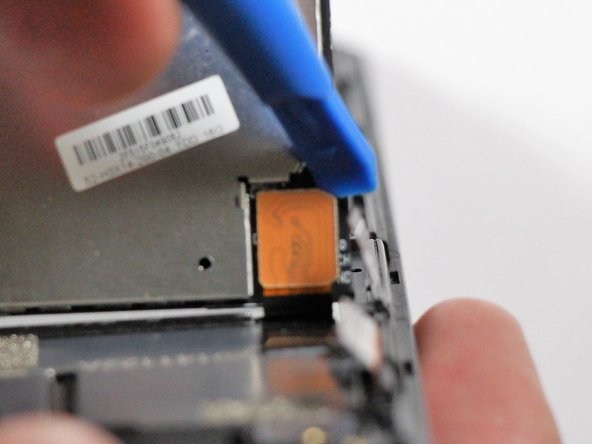
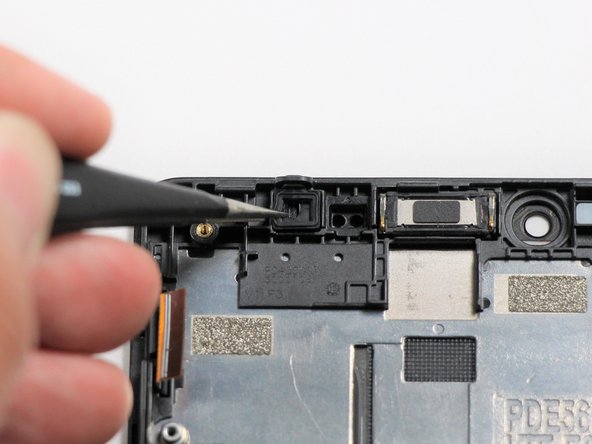
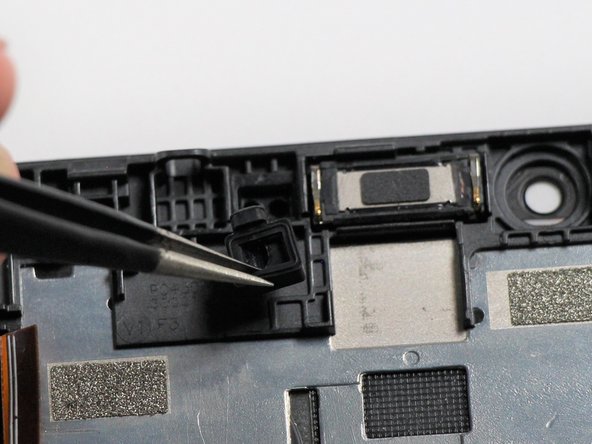
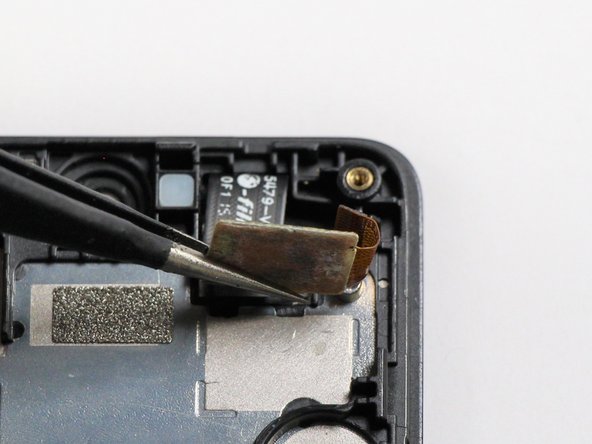
    • Use tweezers to pull out the rubber proximity sensor from the top left of the frame

  20. Xiaomi Redmi Note Screen Replacement: 20 단계, 이미지 1/2 Xiaomi Redmi Note Screen Replacement: 20 단계, 이미지 2/2
    • Use tweezers to peel off the screen ribbon cable from the frame.

    • Do not be afraid to use a bit of force as the ribbon cable is glued onto the frame.

  21. Xiaomi Redmi Note Screen Replacement: 21 단계, 이미지 1/1
    • Heat up the surface of the screen using a heat gun or hair dryer for 20 minutes.

    • It is better to put the heat gun at a lower temperature and heat the screen up for a longer time to avoid damaging the frame.

  22. Xiaomi Redmi Note Screen Replacement: 22 단계, 이미지 1/1
    • Slightly flex the frame to insert a plastic prying tool between the screen and the frame.

  23. Xiaomi Redmi Note Screen Replacement: 23 단계, 이미지 1/2 Xiaomi Redmi Note Screen Replacement: 23 단계, 이미지 2/2
    • Run the plastic opening tool around the seam between the screen and the frame until an opening can be seen.

  24. Xiaomi Redmi Note Screen Replacement: 24 단계, 이미지 1/3 Xiaomi Redmi Note Screen Replacement: 24 단계, 이미지 2/3 Xiaomi Redmi Note Screen Replacement: 24 단계, 이미지 3/3
    • Place a finger into the opening and continue peeling away the screen from the frame.

    • If the screen is cracked, avoid touching it. Instead, peel up from the metal underside of the screen to avoid getting cut.

    • Watch out for the ribbon cable that is fed through an opening in the top right corner of the frame. The screen will not come out unless the cable fits through the opening.

결론

To reassemble your device, follow these instructions in reverse order.

다른 6명이 해당 안내서를 완성하였습니다.

Zongyi Li

회원 가입일: 04/26/17

1,560 평판

안내서 3개 작성하였습니다

Cal Poly, Team S22-G4, Livingston Spring 2017 Cal Poly, Team S22-G4, Livingston Spring 2017 회원

CPSU-LIVINGSTON-S17S22G4

4 회원들

안내서 16개 작성하였습니다

댓글 한 개

I followed this guide which helped me replace my screen for my Xiaomi Redmi Note 3. The Redmi note 3 is very similar and and the screen is attached in almost an identical manner.

Alexander - 답글

댓글 쓰기

조회 통계:

24 시간 전: 2

7일 전: 25

30일 전: 94

전체 시간: 14,143