주요 콘텐츠로 건너뛰기

Xiaomi Yi Motherboard Replacement

필요한 것

  1. Xiaomi Yi Motherboard Replacement, Battery: 1 단계, 이미지 1/2 Xiaomi Yi Motherboard Replacement, Battery: 1 단계, 이미지 2/2
    • Push the battery door switch to the left.

    • Lift the battery door up.

  2. Xiaomi Yi Motherboard Replacement: 2 단계, 이미지 1/3 Xiaomi Yi Motherboard Replacement: 2 단계, 이미지 2/3 Xiaomi Yi Motherboard Replacement: 2 단계, 이미지 3/3
    • Lift the battery tab up.

    • Remove the battery by pulling the removal tab.

  3. Xiaomi Yi Motherboard Replacement, Front Panel: 3 단계, 이미지 1/2 Xiaomi Yi Motherboard Replacement, Front Panel: 3 단계, 이미지 2/2
    • Introduce the plastic opening tool into any of the sides of the camera.

    • Pry with the plastic opening tool at the seam between the front and the back panel.

  4. Xiaomi Yi Motherboard Replacement: 4 단계, 이미지 1/3 Xiaomi Yi Motherboard Replacement: 4 단계, 이미지 2/3 Xiaomi Yi Motherboard Replacement: 4 단계, 이미지 3/3
    • Slide prying tool along the seam until front panel is fully separated from the back panel.

  5. Xiaomi Yi Motherboard Replacement, Back Panel: 5 단계, 이미지 1/2 Xiaomi Yi Motherboard Replacement, Back Panel: 5 단계, 이미지 2/2
    • Remove the four 3.8 mm Phillips #000 screws located in the outer corners of the motherboard.

  6. Xiaomi Yi Motherboard Replacement: 6 단계, 이미지 1/3 Xiaomi Yi Motherboard Replacement: 6 단계, 이미지 2/3 Xiaomi Yi Motherboard Replacement: 6 단계, 이미지 3/3
    • Pull on and remove the black spacer located at the top inside of the camera body using the tweezers and set the part aside.

  7. Xiaomi Yi Motherboard Replacement: 7 단계, 이미지 1/2 Xiaomi Yi Motherboard Replacement: 7 단계, 이미지 2/2
    • Remove the motherboard from from the back case by gently pulling on the lens housing.

    • Back panel remains.

  8. Xiaomi Yi Motherboard Replacement, Motherboard: 8 단계, 이미지 1/2 Xiaomi Yi Motherboard Replacement, Motherboard: 8 단계, 이미지 2/2
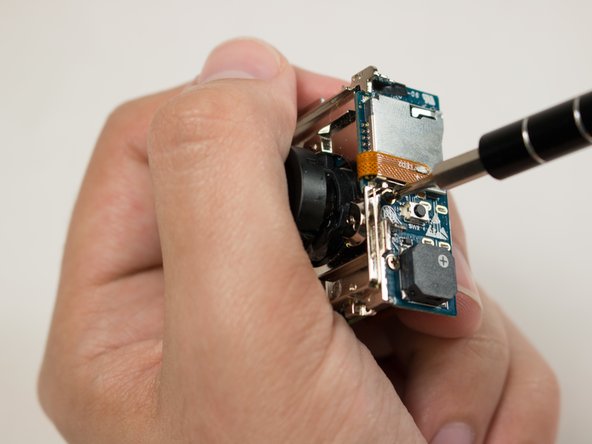
    • Remove the two 3.1 mm Phillips #000 screws securing the motherboard to the chassis.

    • Be sure to support the motherboard, the ribbon cable connection can easily be damaged.

  9. Xiaomi Yi Motherboard Replacement: 9 단계, 이미지 1/3 Xiaomi Yi Motherboard Replacement: 9 단계, 이미지 2/3 Xiaomi Yi Motherboard Replacement: 9 단계, 이미지 3/3
    • Locate the rubber spacer between the image sensor and the ribbon connection for the motherboard.

    • Using the tweezers gently remove the spacer block and set aside.

  10. Xiaomi Yi Motherboard Replacement: 10 단계, 이미지 1/2 Xiaomi Yi Motherboard Replacement: 10 단계, 이미지 2/2
    • Pry gently using the flat end of the black spudger to remove the ribbon connector.

    • Lift the lens assembly up and away from the motherboard.

    • Motherboard remains.

결론

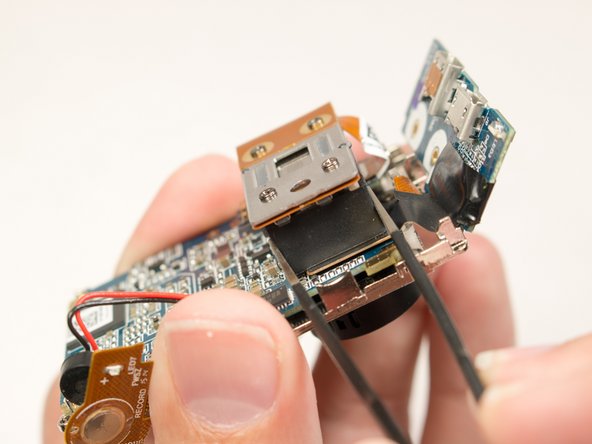
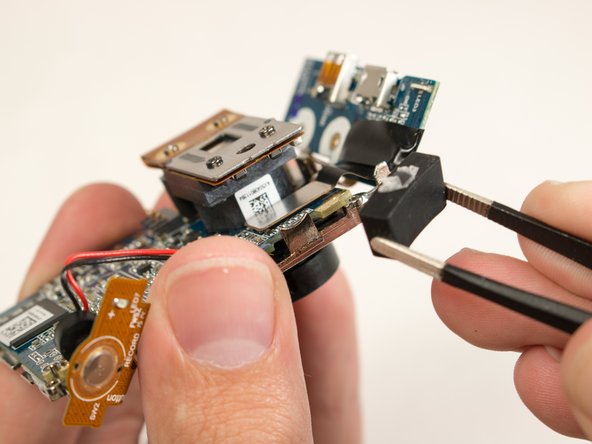
To reassemble your device, follow these instructions in reverse order.

다른 11명이 해당 안내서를 완성하였습니다.

William Zipperer

회원 가입일: 09/03/15

711 평판

안내서 3개 작성하였습니다

USF Tampa, Team 15-5, Blackwell Fall 2015 USF Tampa, Team 15-5, Blackwell Fall 2015 회원

USFT-BLACKWELL-F15S15G5

3 회원들

안내서 10개 작성하였습니다

댓글 8개

Where you buy motherboard for xiaomi yi ?

diamond1981 - 답글

I wonder where I can buy this part ribbon connector to buy.

viilelaa - 답글

Link for buying it waaaaaaaay cheaper:http://bit.ly/XiaoMiYi1080P

tozilen - 답글

Great guide but useless, there is no spare parts on the market for this camera

Nebojsa Rosic - 답글

IC repair is always possible

AdamA -

댓글 쓰기

조회 통계:

24 시간 전: 0

7일 전: 4

30일 전: 20

전체 시간: 12,231