주요 콘텐츠로 건너뛰기

XtremeMac Luna Dock Circuit Board Replacement

필요한 것

  1. XtremeMac Luna Dock Circuit Board Replacement, Bottom Panel: 1 단계, 이미지 1/3 XtremeMac Luna Dock Circuit Board Replacement, Bottom Panel: 1 단계, 이미지 2/3 XtremeMac Luna Dock Circuit Board Replacement, Bottom Panel: 1 단계, 이미지 3/3
    • Flip the device over so that the batteries are closest to you.

    • Remove the battery lid by pressing the battery cover's tab and pulling it away from the device.

    • Push the battery against the spring and lift it out of the casing.

    • Repeat with the other battery.

  2. XtremeMac Luna Dock Circuit Board Replacement: 2 단계, 이미지 1/1
    • Unscrew all eight 12mm Phillips head screws with a Philips #1 screwdriver.

    • The iFixit 26 bit screwdriver kit will not reach the screws. Make sure to use a screwdriver that is thin enough to not get stuck in the screw holes.

  3. XtremeMac Luna Dock Circuit Board Replacement: 3 단계, 이미지 1/2 XtremeMac Luna Dock Circuit Board Replacement: 3 단계, 이미지 2/2
    • Flip the Luna back over so that the buttons are facing upward and the LCD screen is facing you.

    • Gently tilt the lid back 45 degrees so that the inside is exposed.

    • Be mindful of the wires inside of the Luna. It is easy to break a connection if a wire gets caught.

  4. XtremeMac Luna Dock Circuit Board Replacement, Dock Circuit Board: 4 단계, 이미지 1/3 XtremeMac Luna Dock Circuit Board Replacement, Dock Circuit Board: 4 단계, 이미지 2/3 XtremeMac Luna Dock Circuit Board Replacement, Dock Circuit Board: 4 단계, 이미지 3/3
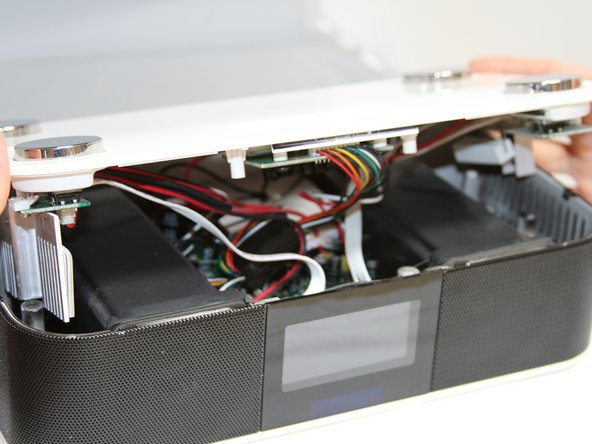
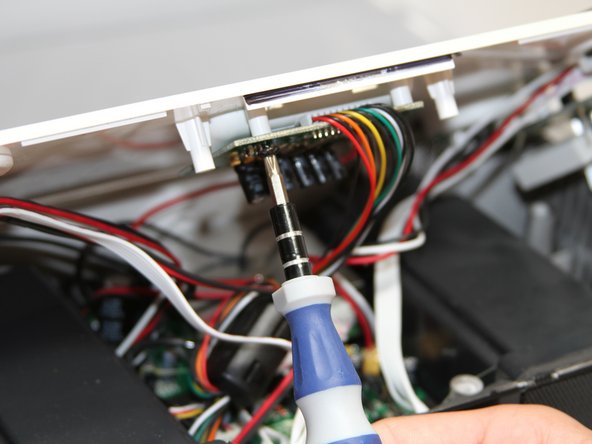
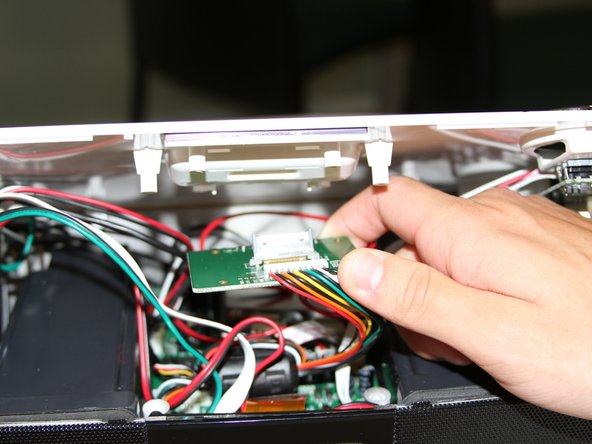
    • Unscrew the four black 7mm screws with the Phillips #1 screw driver that hold the middle circuit board to the top case.

결론

To reassemble your device, follow these instructions in reverse order.

Matt Ducasse

회원 가입일: 04/18/13

12 평판

안내서 3개 작성하였습니다

Cal Poly, Team 3-47, Amido Spring 2013 Cal Poly, Team 3-47, Amido Spring 2013 회원

CPSU-AMIDO-S13S3G47

4 회원들

안내서 8개 작성하였습니다

댓글 0개

댓글 쓰기

조회 통계:

24 시간 전: 0

7일 전: 4

30일 전: 12

전체 시간: 477