소개
For this guide, you will be taking apart the ZD-N Plus Wireless Controller’s rumble motors and replacing them. Rumble motors cause a vibration that helps the player feel immersed within the game. If there is no vibration, the rumble motors could be disconnected or defective. The cost for new rumble motors could go as low as around $6.00.
필요한 것
-
-
Remove the seven 12mm JIS #00 screws that hold the back panel in place.
 FixBot에 문의하기
-
-
-
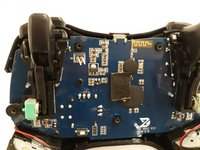
Lift up on the back panel of the ZD-N Plus to remove it from the rest of the controller.
-
-
-
-
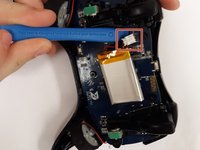
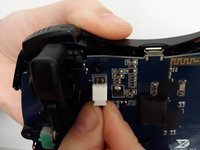
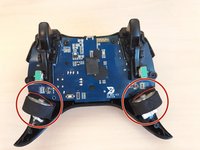
Remove the electrical connector attaching each rumble motor to the controller.
-
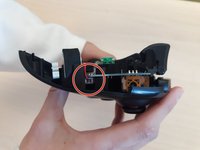
Lift up on the circular section of the rumble to remove it from the controller.
-


To reassemble your device, follow these instructions in reverse order.
다른 한 분이 해당 안내서를 완성하였습니다.

팀

Grand Valley State University, Team S4-G1, DeVasto Fall 2019 Grand Valley State University, Team S4-G1, DeVasto Fall 2019 회원
GVSU-DEVASTO-F19S4G1
4 회원들
안내서 7개를 작성함