주요 콘텐츠로 건너뛰기

ZTE Maven 3 Daughterboard Replacement

필요한 것

  1. ZTE Maven 3 Daughterboard Replacement, Back Cover: 1 단계, 이미지 1/3 ZTE Maven 3 Daughterboard Replacement, Back Cover: 1 단계, 이미지 2/3 ZTE Maven 3 Daughterboard Replacement, Back Cover: 1 단계, 이미지 3/3
    • Locate the small indent on the back right bottom corner of the phone.

    • Put the pry tool or your fingertip inside the small gap on the bottom right of the back of the phone and pop up the cover.

    • Continue to go around the phone until the cover is completely off the back of the pull and put it aside.

  2. ZTE Maven 3 Daughterboard Replacement, Battery: 2 단계, 이미지 1/3 ZTE Maven 3 Daughterboard Replacement, Battery: 2 단계, 이미지 2/3 ZTE Maven 3 Daughterboard Replacement, Battery: 2 단계, 이미지 3/3
    • Locate the battery in the middle of the back of the phone.

    • Push in and up on the battery to remove it from its slot.

    • Put the battery aside.

  3. ZTE Maven 3 Daughterboard Replacement, Midframe: 3 단계, 이미지 1/1
    • Use a Phillips #00 screwdriver to remove twelve 2 mm screws along the back outer edges of the phone.

  4. ZTE Maven 3 Daughterboard Replacement: 4 단계, 이미지 1/1
    • There’s a 13th 2 mm screw with a lock sticker over it on the bottom right corner. Insert the #00 Phillips screwdriver in the middle, breaking the sticker, and take the screw out.

  5. ZTE Maven 3 Daughterboard Replacement: 5 단계, 이미지 1/2 ZTE Maven 3 Daughterboard Replacement: 5 단계, 이미지 2/2
    • Slide the pry tool into the middle of the connection between the screen and the back of the phone.

    • Once in, slide the pry tool around the phone, separating the screen and the back of the phone.

    • The detached piece is the midframe, and you can place it aside when detached.

  6. ZTE Maven 3 Daughterboard Replacement, Motherboard: 6 단계, 이미지 1/1
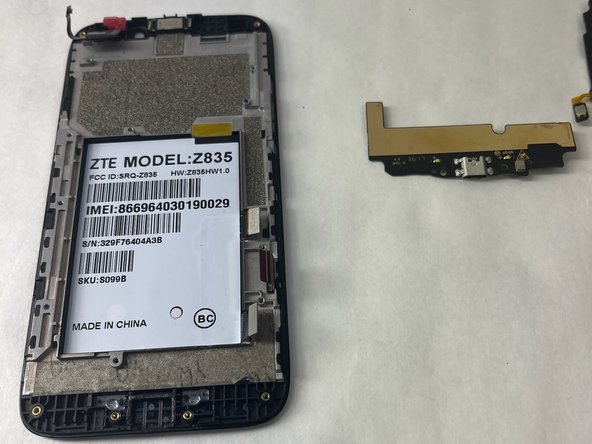
    • Use the Phillips #00 screwdriver and remove the four 2 mm screws that are located around the edges.

  7. ZTE Maven 3 Daughterboard Replacement: 7 단계, 이미지 1/1
    이 단계에 사용된 도구:
    Tweezers
    $4.99
    구매
    • Please locate the black wire that’s attached to gold plates on the left side of the device.

    • Using a pair of tweezers, carefully grab the black wire and detach it, then remove it.

  8. ZTE Maven 3 Daughterboard Replacement: 8 단계, 이미지 1/2 ZTE Maven 3 Daughterboard Replacement: 8 단계, 이미지 2/2
    • Using the tweezers, carefully detach the six ribbon cables also located along the edges.

    • 2 adhesive ribbon cables (green circles).

    • One ribbon cable that slides out (orange circles).

    • Three ribbon cables that pop in and out (yellow circles).

  9. ZTE Maven 3 Daughterboard Replacement: 9 단계, 이미지 1/3 ZTE Maven 3 Daughterboard Replacement: 9 단계, 이미지 2/3 ZTE Maven 3 Daughterboard Replacement: 9 단계, 이미지 3/3
    • You will also have to detach the two cameras by detaching the ribbon cable using the tweezers as well. Put those off to the side.

  10. ZTE Maven 3 Daughterboard Replacement: 10 단계, 이미지 1/2 ZTE Maven 3 Daughterboard Replacement: 10 단계, 이미지 2/2
    • Grab the opening pick and work it into the edges of the motherboard.

    • Make sure you are firmly pushing the pick to loosen the motherboard since it is placed with adhesive.

    • Remove the motherboard and put it aside.

  11. ZTE Maven 3 Daughterboard Replacement, Daughterboard/Charging Port: 11 단계, 이미지 1/2 ZTE Maven 3 Daughterboard Replacement, Daughterboard/Charging Port: 11 단계, 이미지 2/2
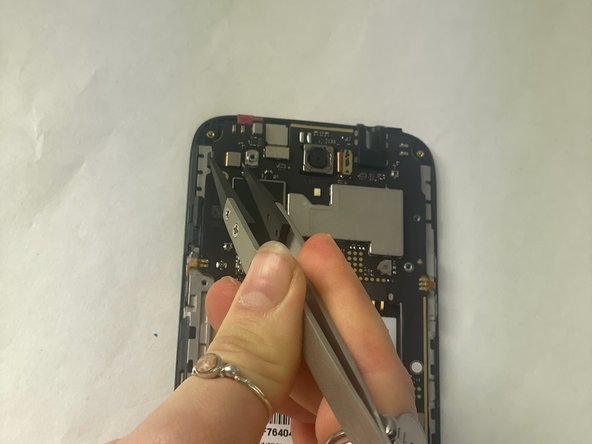
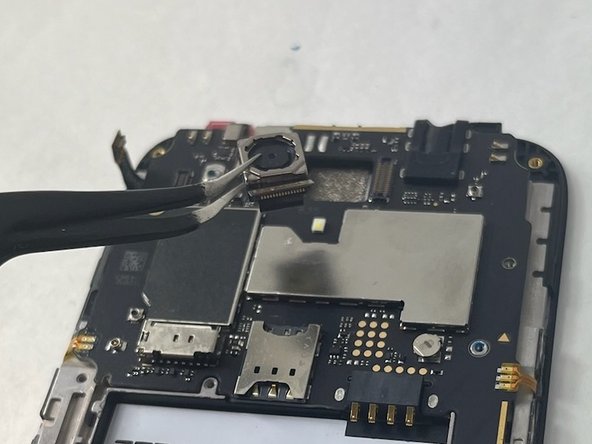
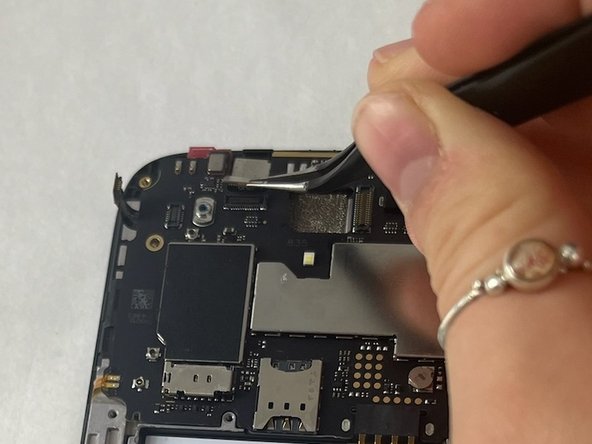
    • Use your fingertips or pry gently with a plastic tool to remove the daughterboard.

결론

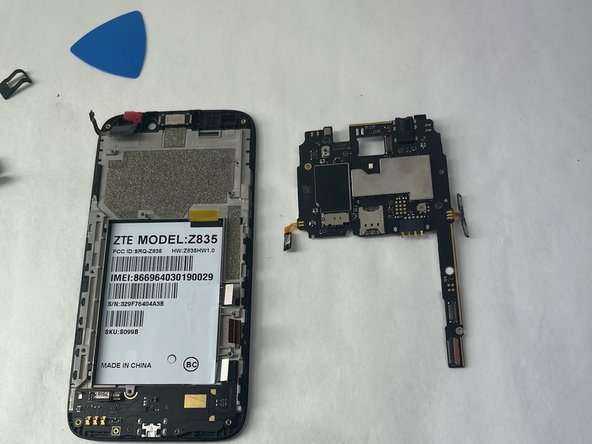
To reassemble your device, follow these instructions in reverse order.

Emma Thiboutot

회원 가입일: 10/30/23

699 평판

안내서 8개 작성하였습니다

UMass Dartmouth, Team 3-1, Konn Fall 2023 UMass Dartmouth, Team 3-1, Konn Fall 2023 회원

UMASSD-KONN-F23S3G1

3 회원들

안내서 10개 작성하였습니다

댓글 0개

댓글 쓰기

조회 통계:

24 시간 전: 0

7일 전: 0

30일 전: 0

전체 시간: 23