주요 콘텐츠로 건너뛰기

ZTE Max XL Front-Facing Camera Replacement

필요한 것

  1. ZTE Max XL Front-Facing Camera Replacement, Front-Facing Camera: 1 단계, 이미지 1/2 ZTE Max XL Front-Facing Camera Replacement, Front-Facing Camera: 1 단계, 이미지 2/2
    • Before disassembly, assure the phone is powered off.

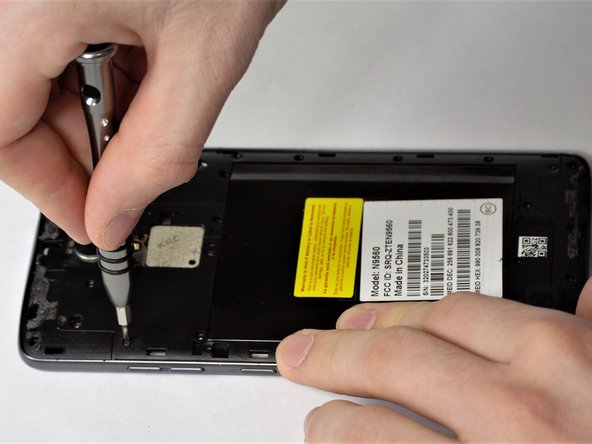
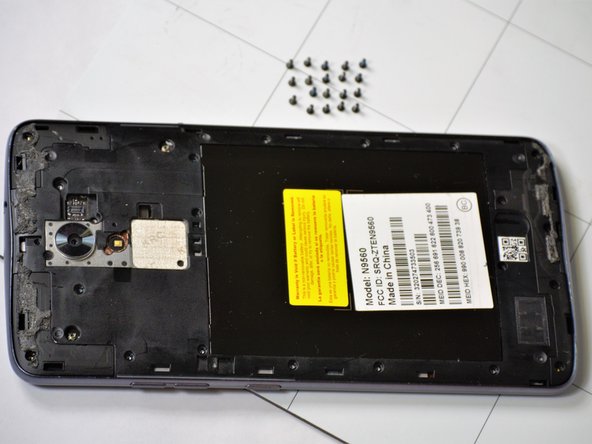
    • Use the SIM Card remover key, remove the SIM Card tray. To do this insert the key into the hole on the side of the phone near the SIM Card tray.

  2. ZTE Max XL Front-Facing Camera Replacement: 2 단계, 이미지 1/2 ZTE Max XL Front-Facing Camera Replacement: 2 단계, 이미지 2/2
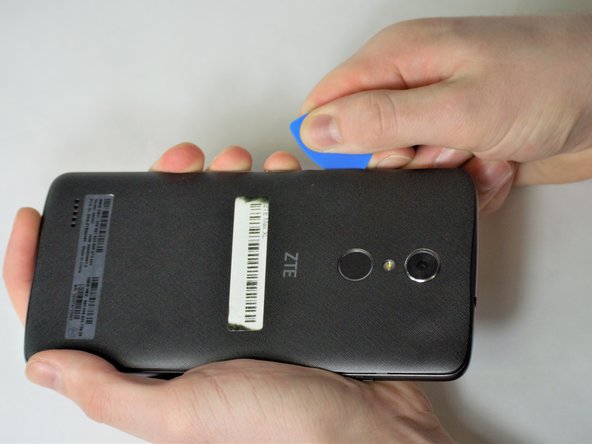
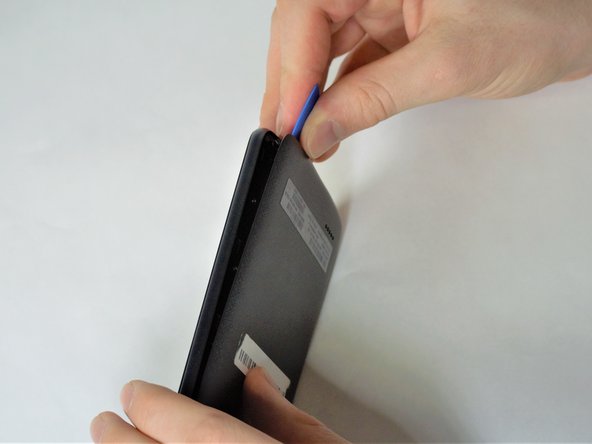
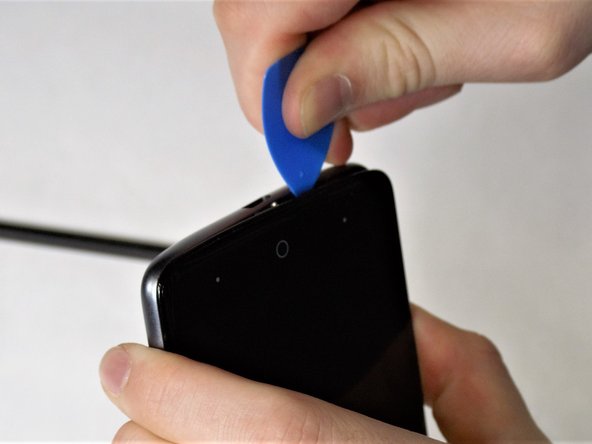
    • Apply the iOpener to the back of the phone. For instructions of how to use the iOpener, use this guide.

    • On our phone there was adhesive on the top and bottom of the phone backing, so we specifically heated these areas.

    • Do not heat the phone too much in one area - it may warp the plastic backing.

  3. ZTE Max XL Front-Facing Camera Replacement: 3 단계, 이미지 1/3 ZTE Max XL Front-Facing Camera Replacement: 3 단계, 이미지 2/3 ZTE Max XL Front-Facing Camera Replacement: 3 단계, 이미지 3/3
    • Start at one corner, and use the plastic opening pick from the iFixit kit to wedge underneath the plastic backing to start undoing the tabs that connect the backing to the phone. There are 3 tabs on top and bottom and 6 on each side.

    • Use extreme caution to not puncture the lithium ion battery.

  4. ZTE Max XL Front-Facing Camera Replacement: 4 단계, 이미지 1/2 ZTE Max XL Front-Facing Camera Replacement: 4 단계, 이미지 2/2
    • Carefully undo the ribbon wire for the fingerprint scanner before full removal of the backing.

    • There are two 3.4mm JIS #00 screws that hold the wire in place, one may be under a lock sticker. Remove the screws with the JIS #00 screwdriver.

  5. ZTE Max XL Front-Facing Camera Replacement: 5 단계, 이미지 1/2 ZTE Max XL Front-Facing Camera Replacement: 5 단계, 이미지 2/2
    • After removal of the two 3.4mm JIS #00 screws, disconnect the connector that attaches the ribbon wire from the main part of the phone.

  6. ZTE Max XL Front-Facing Camera Replacement: 6 단계, 이미지 1/3 ZTE Max XL Front-Facing Camera Replacement: 6 단계, 이미지 2/3 ZTE Max XL Front-Facing Camera Replacement: 6 단계, 이미지 3/3
    • Remove the nineteen 3.4mm JIS #00 screws on the perimeter of the back using the JIS #00 screwdriver.

  7. ZTE Max XL Front-Facing Camera Replacement: 7 단계, 이미지 1/3 ZTE Max XL Front-Facing Camera Replacement: 7 단계, 이미지 2/3 ZTE Max XL Front-Facing Camera Replacement: 7 단계, 이미지 3/3
    • Use a plastic pick between the screen and side trim battery cover to remove the screen.

    • If the SIM Card is still in place during removal of the siding, take care during removal to avoid damaging the SIM Card.

  8. ZTE Max XL Front-Facing Camera Replacement: 8 단계, 이미지 1/3 ZTE Max XL Front-Facing Camera Replacement: 8 단계, 이미지 2/3 ZTE Max XL Front-Facing Camera Replacement: 8 단계, 이미지 3/3
    • Now there is access to the phone's components; use the spudger to flip the metal connector to release the camera.

    • The camera itself is lightweight so take care during the removal of the connector not to lose it.

  9. ZTE Max XL Front-Facing Camera Replacement: 9 단계, 이미지 1/1
    • With the metal connector detached, the camera is fully disconnected from the phone and ready to be replaced.

결론

To reassemble your device, follow these instructions in reverse order.

다른 한 분이 해당 안내서를 완성하였습니다.

Olivia Wolf

회원 가입일: 02/15/18

1,400 평판

안내서 5개 작성하였습니다

UW Stout, Team S8-G2, Ogden Spring 2018 UW Stout, Team S8-G2, Ogden Spring 2018 회원

UWSTOUT-OGDEN-S18S8G2

4 회원들

안내서 10개 작성하였습니다

댓글 0개

댓글 쓰기

조회 통계:

24 시간 전: 0

7일 전: 0

30일 전: 1

전체 시간: 313