이 버전에는 잘못된 편집 사항이 있을 수 있습니다. 최신 확인된 스냅샷으로 전환하십시오.
필요한 것
-
이 단계는 번역되지 않았습니다. 번역을 도와주십시오
-
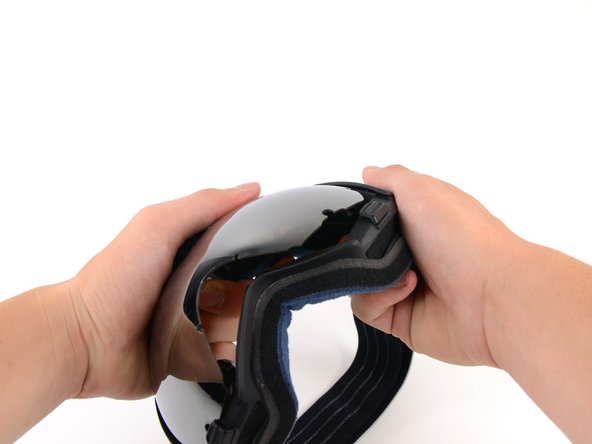
Hold the iON in your hands with your thumbs on the clips next to the middle of the lens.
-
Pull the rubber housing apart to release the first two clips.
-
-
이 단계는 번역되지 않았습니다. 번역을 도와주십시오
-
Grab the inside of the plastic nose rest with your thumb and index finger.
-
Rotate the nose rest upwards until you feel that it is free from the lens.
-
-
-
이 단계는 번역되지 않았습니다. 번역을 도와주십시오
-
Grab the top of the goggle frame that holds the camera assembly.
-
Rotate the frame outwards until you feel that the clips inside it are free.
-
-
이 단계는 번역되지 않았습니다. 번역을 도와주십시오
-
While firmly holding the goggles with the palm of one hand, grab the top right corner of the frame and rotate it away from the lens.
-
-
이 단계는 번역되지 않았습니다. 번역을 도와주십시오
-
While holding the goggles in one hand, use the other to grab the lens from opposite ends, and rotate it out of the housing and away from any remaining clips.
-


댓글 한 개
I’m guessing I need a special lens for a replacement could you point me in the direction of new lens for my zeal ions