주요 콘텐츠로 건너뛰기

이 버전에는 잘못된 편집 사항이 있을 수 있습니다. 최신 확인된 스냅샷으로 전환하십시오.

필요한 것

  1. 이 단계는 번역되지 않았습니다. 번역을 도와주십시오

    : 1 단계, 이미지 1/1
    • Remove the two screws on the bottom using a Phillips #00 screwdriver.

    • For differentiation purposes, these screws are 4mm long.

  2. 이 단계는 번역되지 않았습니다. 번역을 도와주십시오

    : 2 단계, 이미지 1/3 : 2 단계, 이미지 2/3 : 2 단계, 이미지 3/3
    • Using a spudger, start prying the case apart by working around the edge slowly.

    • Be careful not to damage any of the latches that hold the back panel in place, especially if you are using a metal spudger.

    • While prying, be careful to not lose the power and volume buttons; the case is the only thing holding them in place so they will easily come out once the panel has been removed

    • Be careful to not damage the speaker cables, they will still be connecting both panels.

  3. 이 단계는 번역되지 않았습니다. 번역을 도와주십시오

    : 3 단계, 이미지 1/1
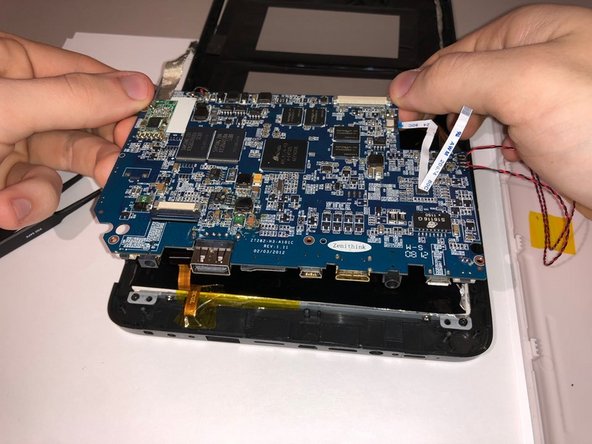
    • Peel back the touch interface chip (which is on the top right of the motherboard, covered in yellow tape.)

  4. 이 단계는 번역되지 않았습니다. 번역을 도와주십시오

    : 4 단계, 이미지 1/1
    • Flip up the small gate and unplug the ribbon cable shown.

  5. 이 단계는 번역되지 않았습니다. 번역을 도와주십시오

    : 5 단계, 이미지 1/1
    • Using a Phillips #00 screwdriver, remove the screws highlighted with the orange rings as shown in the picture.

    • For differentiation purposes, these screws are 3.5mm long.

  6. 이 단계는 번역되지 않았습니다. 번역을 도와주십시오

    : 6 단계, 이미지 1/1
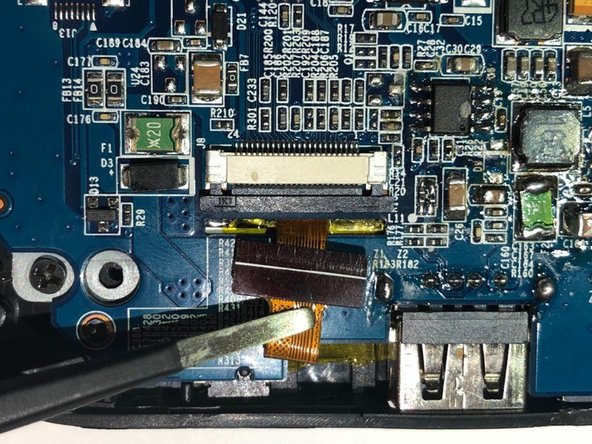
    • Slide back the plastic latch for the main display cable.

    • Carefully unplug the cable with tweezers.

  7. 이 단계는 번역되지 않았습니다. 번역을 도와주십시오

    : 7 단계, 이미지 1/2 : 7 단계, 이미지 2/2
    • Slide back the plastic latch for the camera cable.

    • Carefully unplug the cable with tweezers.

  8. 이 단계는 번역되지 않았습니다. 번역을 도와주십시오

    : 8 단계, 이미지 1/1
    • Peel back the reflective tape.

  9. 이 단계는 번역되지 않았습니다. 번역을 도와주십시오

    : 9 단계, 이미지 1/2 : 9 단계, 이미지 2/2
    • Lift up the motherboard assembly, starting by lifting up the top.

    • Be careful not to damage any of the ports on the underside of the tablet.

    • The camera cable will slide through a small notch and end up underneath the board.

결승점

다른 2명이 해당 안내서를 완성하였습니다.

Keelie Beach

회원 가입일: 09/21/18

435 평판

안내서 3개 작성하였습니다

댓글 0개

댓글 쓰기

조회 통계:

24 시간 전: 1

7일 전: 4

30일 전: 5

전체 시간: 203