주요 콘텐츠로 건너뛰기

dreamGEAR Quad Dock Pro Power Board Replacement

필요한 것

  1. dreamGEAR Quad Dock Pro Power Board Replacement, Prerequisite Guide to Accessing Interior: 1 단계, 이미지 1/2 dreamGEAR Quad Dock Pro Power Board Replacement, Prerequisite Guide to Accessing Interior: 1 단계, 이미지 2/2
    • Remove the rubber foot pads on the bottom of the device using a plastic opening tool.

  2. dreamGEAR Quad Dock Pro Power Board Replacement: 2 단계, 이미지 1/2 dreamGEAR Quad Dock Pro Power Board Replacement: 2 단계, 이미지 2/2
    • Remove the six 2 mm PH0 screws on the bottom of the device.

    • Four of those screws are located under the foot pads.

  3. dreamGEAR Quad Dock Pro Power Board Replacement: 3 단계, 이미지 1/1
    • Gently remove the bottom of the device.

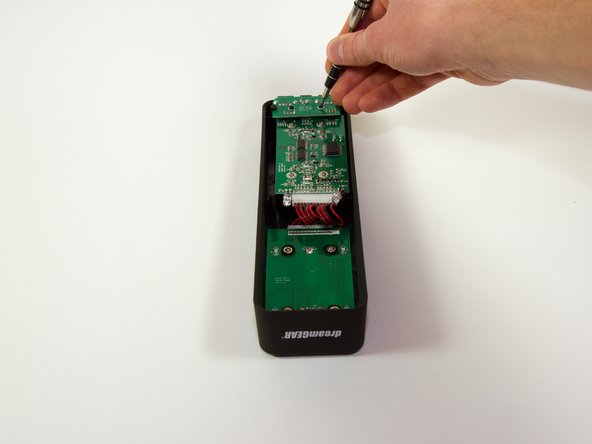
  4. dreamGEAR Quad Dock Pro Power Board Replacement, Mother Board: 4 단계, 이미지 1/2 dreamGEAR Quad Dock Pro Power Board Replacement, Mother Board: 4 단계, 이미지 2/2
    • Remove the four 1.8 mm J1 screws.

    • Remove the two 2mm PH0 screws.

  5. dreamGEAR Quad Dock Pro Power Board Replacement: 5 단계, 이미지 1/1
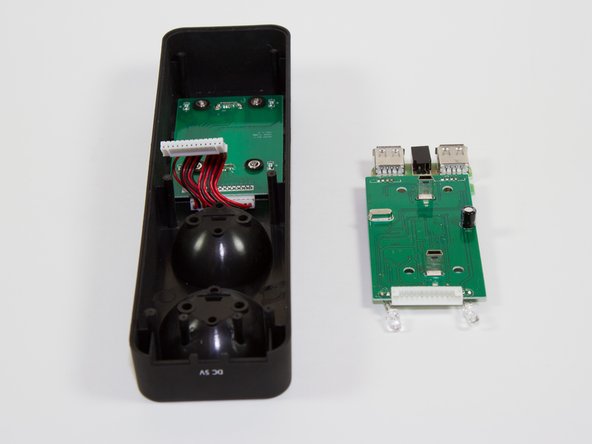
    • Gently pick up the mother board

    • Pick the mother board straight up or you may risk damaging the mini-USB charging ports.

  6. dreamGEAR Quad Dock Pro Power Board Replacement: 6 단계, 이미지 1/2 dreamGEAR Quad Dock Pro Power Board Replacement: 6 단계, 이미지 2/2
    • Use a plastic opening tool or similar tool to gently pry the power ribbon cord out of its port.

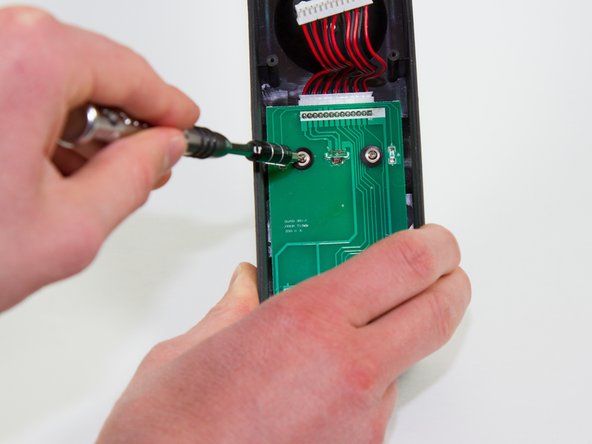
  7. dreamGEAR Quad Dock Pro Power Board Replacement, Power Board: 7 단계, 이미지 1/2 dreamGEAR Quad Dock Pro Power Board Replacement, Power Board: 7 단계, 이미지 2/2
    • Remove the four 1.8 mm PH0 screws that are holding the board in.

    • When you remove these screws, the plastic cups inside the PS Move stations will fall out.

  8. dreamGEAR Quad Dock Pro Power Board Replacement: 8 단계, 이미지 1/1
    • Pick up the board.

    • Pick the board straight up, or you risk damaging the charging ports.

  9. dreamGEAR Quad Dock Pro Power Board Replacement: 9 단계, 이미지 1/1
    • Using a plastic opening tool or a similar tool, gently pry the power ribbon cord out of its port.

결론

To reassemble your device, follow these instructions in reverse order.

다른 한 분이 해당 안내서를 완성하였습니다.

Jacob

회원 가입일: 03/11/15

757 평판

안내서 6개 작성하였습니다

Colorado Springs, Team 4-4, Panko Spring 2015 Colorado Springs, Team 4-4, Panko Spring 2015 회원

UCCS-PANKO-S15S4G4

3 회원들

안내서 12개 작성하였습니다

댓글 0개

댓글 쓰기

조회 통계:

24 시간 전: 0

7일 전: 1

30일 전: 4

전체 시간: 241