주요 콘텐츠로 건너뛰기

Nintendo Switch Lite 배터리 교체

3 단계
Nintendo Switch Lite Battery Replacement: 0 단계, 이미지 3개 중 1개 Nintendo Switch Lite Battery Replacement: 0 단계, 이미지 3개 중 2개 Nintendo Switch Lite Battery Replacement: 0 단계, 이미지 3개 중 3개
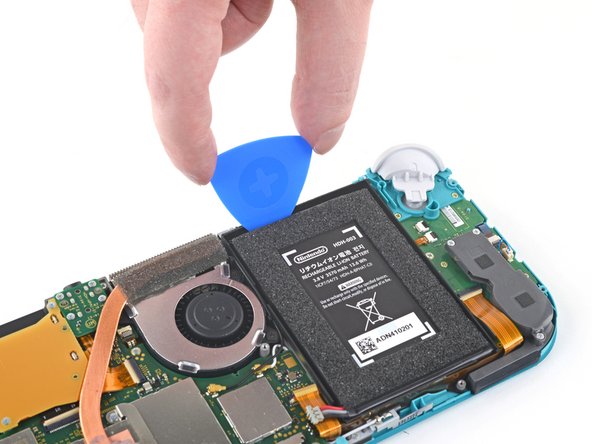
  • Insert an opening pick into the gap between the battery and the wall of the battery well.

  • Carefully dig the tip of the opening pick underneath the battery and slide it along the edge to begin slicing the adhesive.

  • Take care not to puncture or bend the battery with your tool—a punctured or bent battery may leak dangerous chemicals or cause a thermal event.

배터리와 배터리 웰 벽 사이 틈으로 여는 픽을 끼우세요.

배터리 아랫면을 여는 픽의 끝으로 조심히 파고 가장자리를 따라 밀어서 접착제 자르기를 시작하세요.

도구로 배터리에 구멍을 내거나 배터리를 구부리지 않도록 주의하세요—구멍이 나거나 구부러진 배터리는 위험한 화학 물질을 누출하거나 화재 상황을 유발할 수 있습니다.

귀하의 기여는 오픈 소스 Createive Commons 라이선스 하에 허가되었습니다.