주요 콘텐츠로 건너뛰기

Nexus 5X LCD Screen & Digitizer Replacement

1 단계 번역중

1 단계
Nexus 5X LCD Screen & Digitizer Replacement: 0 단계, 이미지 3개 중 1개 Nexus 5X LCD Screen & Digitizer Replacement: 0 단계, 이미지 3개 중 2개 Nexus 5X LCD Screen & Digitizer Replacement: 0 단계, 이미지 3개 중 3개
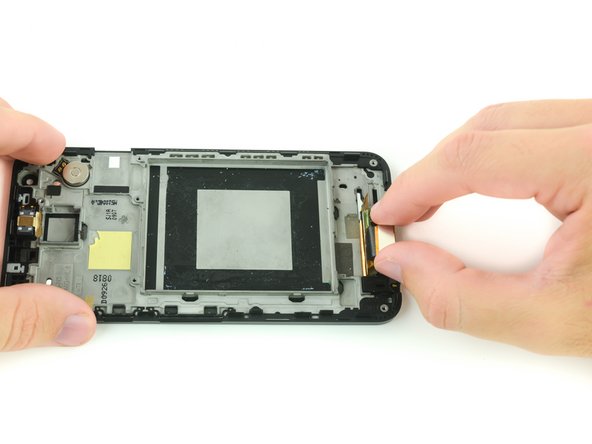
  • Use an iOpener or a heat gun over the digitizer ribbon cable to soften the adhesive that secures it to the plastic housing.

  • The Nexus 5X pictured here does not have a layer of shielding tape over the digitizer panel. If this tape is present on your device, simply peel it away from the plastic frame to free the digitizer panel.

  • You'll need to transfer or replace this strip of shielding tape when you install your new screen.

  • Gently wedge the flat end of a spudger into the gap between the battery housing and the digitizer ribbon cable, or use your fingers to gently pull the digitizer ribbon cable free.

여기에 번역 삽입

여기에 번역 삽입

여기에 번역 삽입

여기에 번역 삽입

귀하의 기여는 오픈 소스 Createive Commons 라이선스 하에 허가되었습니다.