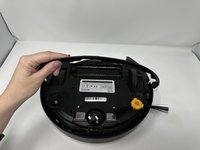
주요 콘텐츠로 건너뛰기

eufy RoboVac 11 Wheel and Wheel Motor Replacement

필요한 것

  1. eufy RoboVac 11 Wheel and Wheel Motor Replacement, Front Cover and Motherboard: 1 단계, 이미지 1/2 eufy RoboVac 11 Wheel and Wheel Motor Replacement, Front Cover and Motherboard: 1 단계, 이미지 2/2
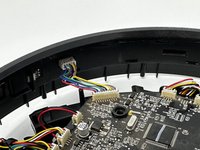
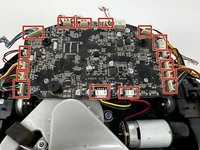
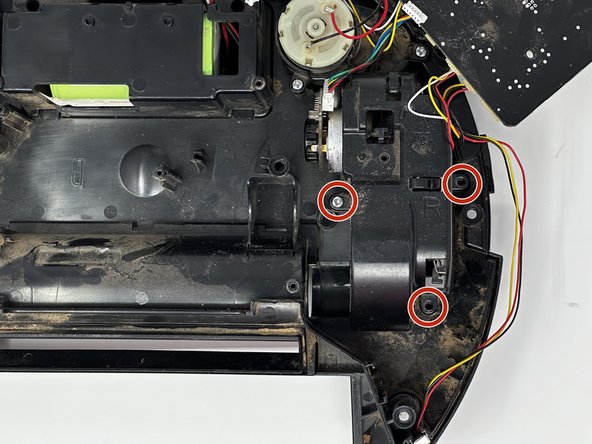
    • Remove the nine 10 mm screws with the Phillips #1 precision screwdriver.

    • Keep track of these screws. They are the same length as the interior screws but wider in diameter.

  2. eufy RoboVac 11 Wheel and Wheel Motor Replacement: 2 단계, 이미지 1/2 eufy RoboVac 11 Wheel and Wheel Motor Replacement: 2 단계, 이미지 2/2
    • Remove the six 7 mm screws on the bumper with the Phillips #1 screwdriver.

  3. eufy RoboVac 11 Wheel and Wheel Motor Replacement: 3 단계, 이미지 1/3 eufy RoboVac 11 Wheel and Wheel Motor Replacement: 3 단계, 이미지 2/3 eufy RoboVac 11 Wheel and Wheel Motor Replacement: 3 단계, 이미지 3/3
    • Remove the top plate from the body of the device.

    • Unplug the bumper from the motherboard.

  4. eufy RoboVac 11 Wheel and Wheel Motor Replacement: 4 단계, 이미지 1/2 eufy RoboVac 11 Wheel and Wheel Motor Replacement: 4 단계, 이미지 2/2
    • Remove the three 10 mm motherboard screws with a Phillips #1 screwdriver.

    • Cleaning the motherboard and inside of the device outdoors with a compressed air cleaner will help the robot last longer.

  5. eufy RoboVac 11 Wheel and Wheel Motor Replacement: 5 단계, 이미지 1/2 eufy RoboVac 11 Wheel and Wheel Motor Replacement: 5 단계, 이미지 2/2
    • Unplug the cables from the motherboard.

  6. eufy RoboVac 11 Wheel and Wheel Motor Replacement, Rolling Brush: 6 단계, 이미지 1/2 eufy RoboVac 11 Wheel and Wheel Motor Replacement, Rolling Brush: 6 단계, 이미지 2/2
    • Remove the single 10 mm screw with the Phillips #1 screwdriver.

    • Remove the rolling brush.
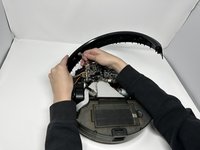
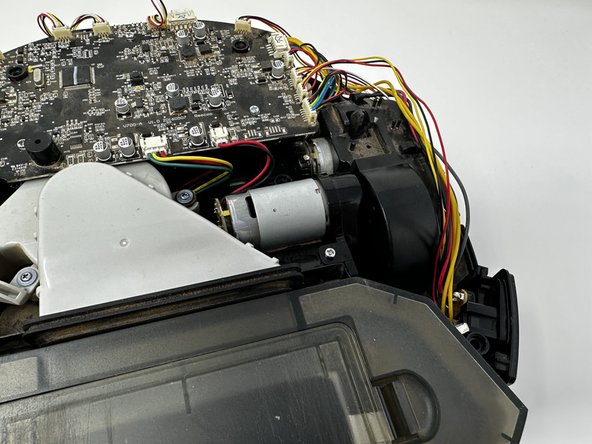
  7. eufy RoboVac 11 Wheel and Wheel Motor Replacement, Wheel and Wheel Motor: 7 단계, 이미지 1/3 eufy RoboVac 11 Wheel and Wheel Motor Replacement, Wheel and Wheel Motor: 7 단계, 이미지 2/3 eufy RoboVac 11 Wheel and Wheel Motor Replacement, Wheel and Wheel Motor: 7 단계, 이미지 3/3
    • Remove the wheels.

    • The removal of the two wheels is the same on both sides, but on the left side there is a motor in the way of the wheels.

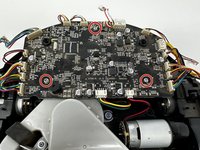
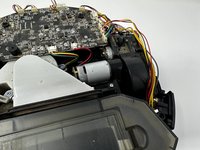
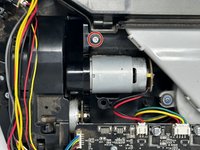
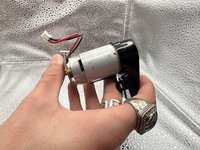
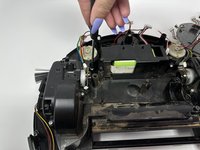
    • Remove the single 10 mm screw with the Phillips #1 screwdriver and then pull upwards to remove the piece preventing removal.

  8. eufy RoboVac 11 Wheel and Wheel Motor Replacement: 8 단계, 이미지 1/3 eufy RoboVac 11 Wheel and Wheel Motor Replacement: 8 단계, 이미지 2/3 eufy RoboVac 11 Wheel and Wheel Motor Replacement: 8 단계, 이미지 3/3
    • Remove the three 10 mm screws with the Phillips #1 screwdriver.

    • Remove motors.

    • The process for removing the left and right motors is the same.

결론

To reassemble your device, follow these instructions in reverse order.

Kyleigh Hill

회원 가입일: 09/27/22

223 평판

안내서 2개 작성하였습니다

Utah Tech University, Team 1-3, McMurrin Fall 2022 Utah Tech University, Team 1-3, McMurrin Fall 2022 회원

UTAHTECH-MCMURRIN-F22S1G3

3 회원들

안내서 6개 작성하였습니다

댓글 0개

댓글 쓰기

조회 통계:

24 시간 전: 0

7일 전: 7

30일 전: 53

전체 시간: 1,265