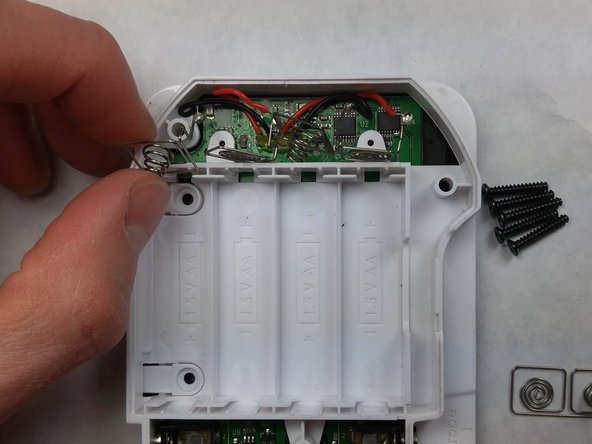
주요 콘텐츠로 건너뛰기

iDevices iGrill Power Delivery Wires and Springs Replacement

필요한 것

  1. iDevices iGrill Power Delivery Wires and Springs Replacement, Power Delivery Wires and Springs: 1 단계, 이미지 1/1
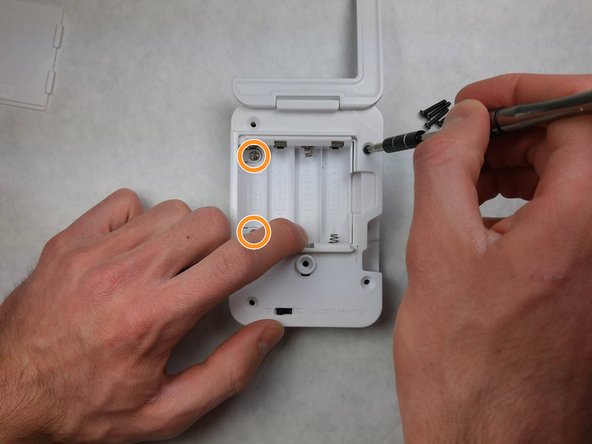
    • Place the front screen of the device on a flat surface, this allows access to the back cover. Remove the back cover from the device to access the batteries.

  2. iDevices iGrill Power Delivery Wires and Springs Replacement: 2 단계, 이미지 1/1
    • Remove the batteries from the device, allowing you to access the screws necessary for removal of the back panel.

  3. iDevices iGrill Power Delivery Wires and Springs Replacement: 3 단계, 이미지 1/2 iDevices iGrill Power Delivery Wires and Springs Replacement: 3 단계, 이미지 2/2
    • Remove five black 10 mm Phillips #0 screws from the back side of the device.

    • Remove two silver-colored 5 mm Phillips screws from the left side of the internal cover.

  4. iDevices iGrill Power Delivery Wires and Springs Replacement: 4 단계, 이미지 1/1
    • Gently and slowly pull the back cover off of the iGrill, exposing the power cables to the motherboard.

  5. iDevices iGrill Power Delivery Wires and Springs Replacement: 5 단계, 이미지 1/2 iDevices iGrill Power Delivery Wires and Springs Replacement: 5 단계, 이미지 2/2
    • Gently pull the metal terminals to the batteries out of their plastic holders.

    • Position the metal terminals such that you will be able to pull the plastic component that holds the batteries away from the motherboard.

    • Remove the internal cover from the device.

  6. iDevices iGrill Power Delivery Wires and Springs Replacement: 6 단계, 이미지 1/1
    • After you have peeled back the rear plastic covering, you will have access to the motherboard.

  7. iDevices iGrill Power Delivery Wires and Springs Replacement: 7 단계, 이미지 1/1
    • From here, you will have access to both the metal terminals of the power transfer wires and the soldering points of the power transfer wires to the motherboard.

    • If any of these connections have been broken, repair them with a solder and soldering wire.

결론

To reassemble your device, follow these instructions in reverse order.

다른 한 분이 해당 안내서를 완성하였습니다.

Kyle McElyea

회원 가입일: 02/16/16

259 평판

안내서 2개 작성하였습니다

IUPUI, Team 3-4, Harley Spring 2016 IUPUI, Team 3-4, Harley Spring 2016 회원

IUPUI-HARLEY-S16S3G4

4 회원들

안내서 4개 작성하였습니다

댓글 0개

댓글 쓰기

조회 통계:

24 시간 전: 0

7일 전: 0

30일 전: 0

전체 시간: 259