소개
The probes may need to be replaced if your device is not reading the temperature properly. In this guide you will learn how to replace the connectors.
필요한 것
-
-
Remove the back plastic cover from the device; this should allow you access to the batteries.
-
-
-
-
Remove five black 10 mm Phillips #0 screws from the back side of the device.
-
Remove two silver-colored 5 mm screws using a Phillips screwdriver. The screws are located on the left side of the internal cover.
-
Remove the accompanying plastic tabs under the screws.
-
Gently pull off the back cover from the device.
-
-
-
If you have not removed the 2 silver-colored screws; you must remove them now.
-
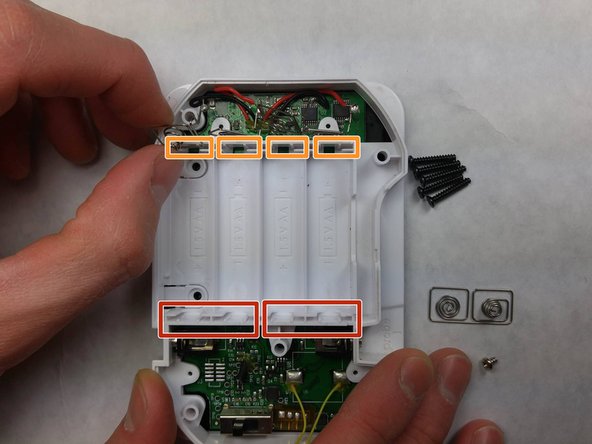
Remove the metal terminals from the battery slot closest you.
-
Pull the remaining metal terminals out of their slots. Position them such that when removing the internal cover they will not be caught.
-
Remove the internal cover.
-


To reassemble your device, follow these instructions in reverse order.
To reassemble your device, follow these instructions in reverse order.
팀

IUPUI, Team 3-4, Harley Spring 2016 IUPUI, Team 3-4, Harley Spring 2016 회원
IUPUI-HARLEY-S16S3G4
4 회원들
안내서 4개 작성하였습니다