이 버전에는 잘못된 편집 사항이 있을 수 있습니다. 최신 확인된 스냅샷으로 전환하십시오.
필요한 것
-
이 단계는 번역되지 않았습니다. 번역을 도와주십시오
-
On the opposite side of the speaker should be a sticker, remove it with your fingers or the flat plastic iFIxit tool.
-
Use a Philip's screwdriver to take the screws out of the cover.
-
-
이 단계는 번역되지 않았습니다. 번역을 도와주십시오
-
Once the screws are all out, the cover should come off revealing the motherboard.
-
-
-
이 단계는 번역되지 않았습니다. 번역을 도와주십시오
-
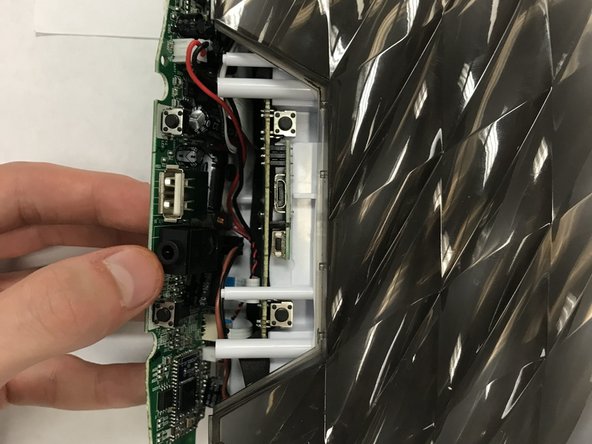
You will notice that the triangular black volume piece is loose, make sure to take that off revealing the buttons.
-
Once that is done, the motherboard can be taken out. May require some wiggling.
-
Make sure none of the wires are damaged and that they are all connected.
-
-
이 단계는 번역되지 않았습니다. 번역을 도와주십시오
-
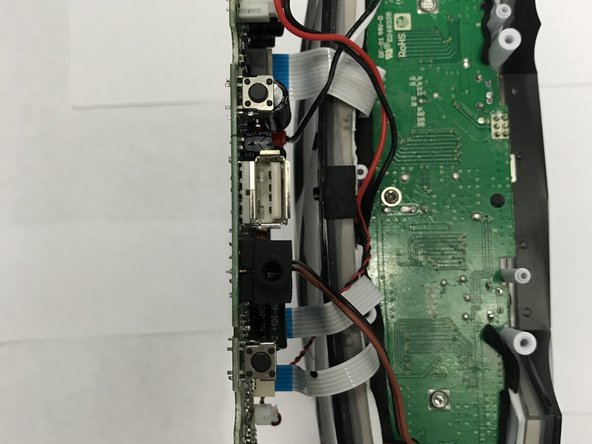
The connections shown here can be taken off by pulling on the white plastic connector piece.
-
The same can be said about the white, paper like, connectors. Pull on them gently.
-
Once all connections are apart, the motherboard is safe to be replaced.
-


다른 한 분이 해당 안내서를 완성하였습니다.

팀

University of North Texas, Team S1-G3, Thompson Fall 2017 University of North Texas, Team S1-G3, Thompson Fall 2017 회원
UNT-THOMPSON-F17S1G3
4 회원들
안내서 2개 작성하였습니다