이 버전에는 잘못된 편집 사항이 있을 수 있습니다. 최신 확인된 스냅샷으로 전환하십시오.
필요한 것
-
이 단계는 번역되지 않았습니다. 번역을 도와주십시오
-
Unscrew the bottom of the iHome at the marked points with a #2 phillips
-
-
-
이 단계는 번역되지 않았습니다. 번역을 도와주십시오
-
Flip the board over.
-
Unplug the eight wires for the board with tweezers. If they're tight pliers can be used instead.
-
There is one in the orange box.
-
There are two in the yellow box.
-
The are five in the green box.
-
-
이 단계는 번역되지 않았습니다. 번역을 도와주십시오
-
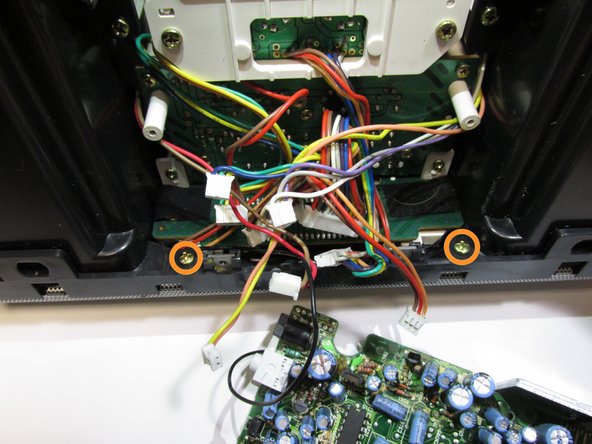
Remove the two screws with a #2 Phillips screwdriver.
-
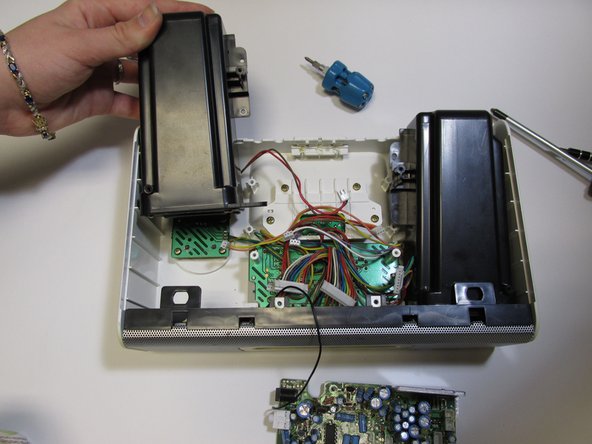
Flip the device on its front then remove the two screws with a #2 Phillips screwdriver.
-
Grab the speaker and pull it up until it looks like the speaker on the right. Then pull is straight back like shown with the speaker on the left.
-
-
이 단계는 번역되지 않았습니다. 번역을 도와주십시오
-
Remove the four screws with a #2 Phillips screwdriver.
-
Replace the broken speaker.
-


팀

New Mexico State, Team 1-6, Easley Spring 2014 New Mexico State, Team 1-6, Easley Spring 2014 회원
NMSU-EASLEY-S14S1G6
5 회원들
안내서 4개 작성하였습니다