주요 콘텐츠로 건너뛰기

iHome iH9 Volume/Tuning Dials Replacement

필요한 것

  1. iHome iH9 Volume/Tuning Dials Replacement, Backup Batteries: 1 단계, 이미지 1/3 iHome iH9 Volume/Tuning Dials Replacement, Backup Batteries: 1 단계, 이미지 2/3 iHome iH9 Volume/Tuning Dials Replacement, Backup Batteries: 1 단계, 이미지 3/3
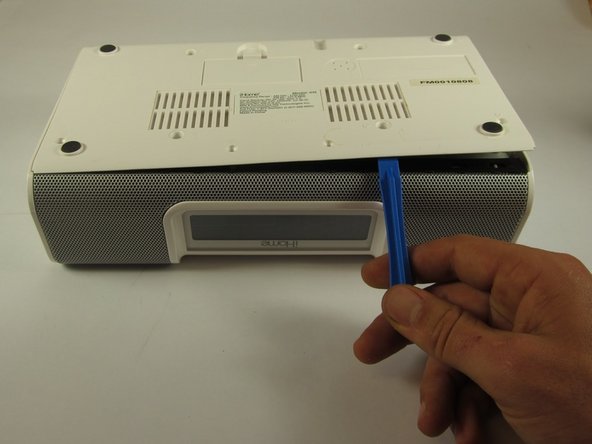
    • Pull the tab towards you and lift up to remove the battery cover.

    • Remove the two AA batteries.

  2. iHome iH9 Volume/Tuning Dials Replacement, Opening the iHome iH9: 2 단계, 이미지 1/1
    • Unscrew the four 8mm Phillips #2 screws.

    • Unscrew the six 25mm Phillips #2 screws.

    • Reinstall the backup battery cover so it is out of the way.

  3. iHome iH9 Volume/Tuning Dials Replacement: 3 단계, 이미지 1/3 iHome iH9 Volume/Tuning Dials Replacement: 3 단계, 이미지 2/3 iHome iH9 Volume/Tuning Dials Replacement: 3 단계, 이미지 3/3
    • Pry the backplate up with a plastic opening tool between the back plate and the speaker grill.

    • Be careful when lifting the bottom plate up; there is a short white and orange 4-pin connector attached to its underside.

    • Lift the bottom plate up while making sure the connector remains attached.

  4. iHome iH9 Volume/Tuning Dials Replacement: 4 단계, 이미지 1/3 iHome iH9 Volume/Tuning Dials Replacement: 4 단계, 이미지 2/3 iHome iH9 Volume/Tuning Dials Replacement: 4 단계, 이미지 3/3
    • Use your hands to flip the backing plate away from you and rest it upside down on the iH9.

    • Unplug the white and orange 4-pin connector by pulling it in the direction of the wires.

    • Set the backing plate aside.

  5. iHome iH9 Volume/Tuning Dials Replacement: 5 단계, 이미지 1/1
    • Place the device so that the speaker grill is face down.

    • Remove the two 10mm Phillips #2 screws on interior sides of the speaker housings.

  6. iHome iH9 Volume/Tuning Dials Replacement: 6 단계, 이미지 1/2 iHome iH9 Volume/Tuning Dials Replacement: 6 단계, 이미지 2/2
    • Place the iH9 upside down.

    • Wires connect the core assembly to the housing; do not attempt to pull the core assembly completely out.

    • Using both hands, pull the housing siding away from the device while simultaneously lifting the motherboard and speaker assembly straight up.

    • Repeat for the other side.

  7. iHome iH9 Volume/Tuning Dials Replacement: 7 단계, 이미지 1/1
    • Stand the iH9 on its grill.

    • Separate the motherboard and speaker assembly by rocking it back and forth and pulling the assembly towards you.

    • Remove the small back panel.

  8. iHome iH9 Volume/Tuning Dials Replacement: 8 단계, 이미지 1/3 iHome iH9 Volume/Tuning Dials Replacement: 8 단계, 이미지 2/3 iHome iH9 Volume/Tuning Dials Replacement: 8 단계, 이미지 3/3
    • Firmly pull the wide 9-pin connector with black covering on the underside of the upper housing to unplug it.

    • Lay the housing and core assembly flat and close to each one another.

  9. iHome iH9 Volume/Tuning Dials Replacement: 9 단계, 이미지 1/2 iHome iH9 Volume/Tuning Dials Replacement: 9 단계, 이미지 2/2
    • Unplug the narrow 9-pin connector from the motherboard.

  10. iHome iH9 Volume/Tuning Dials Replacement: 10 단계, 이미지 1/1
    • Cut the zip tie holding the wires together with a wire cutter. The two sides of the device housing are now fully separated.

  11. iHome iH9 Volume/Tuning Dials Replacement, Volume/Tuning Dials: 11 단계, 이미지 1/1
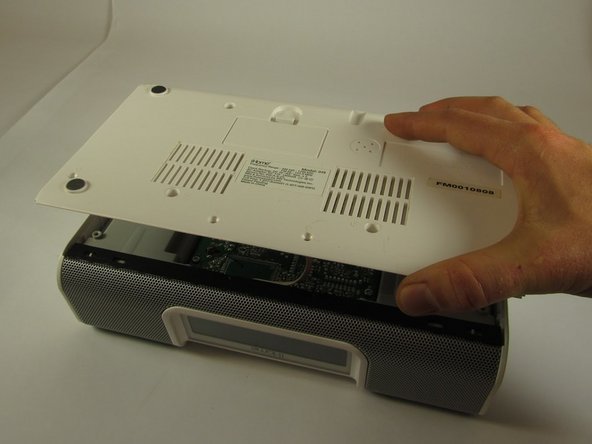
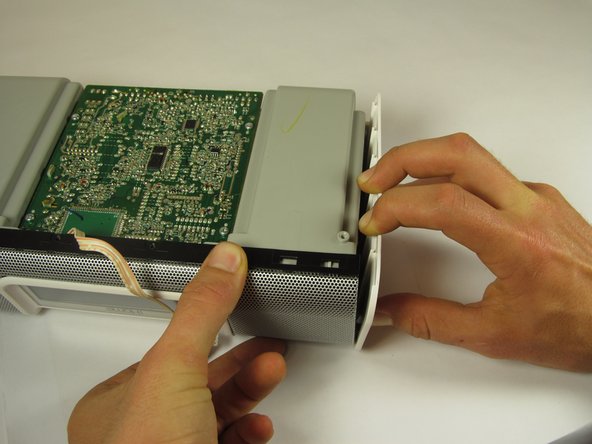
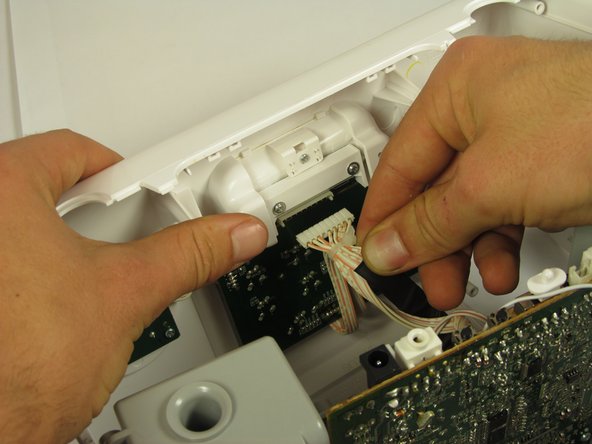
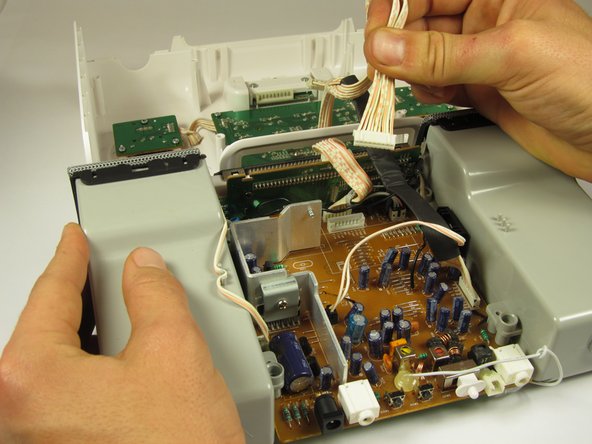
    • Take the top cover off and flip it so the buttons are face down.

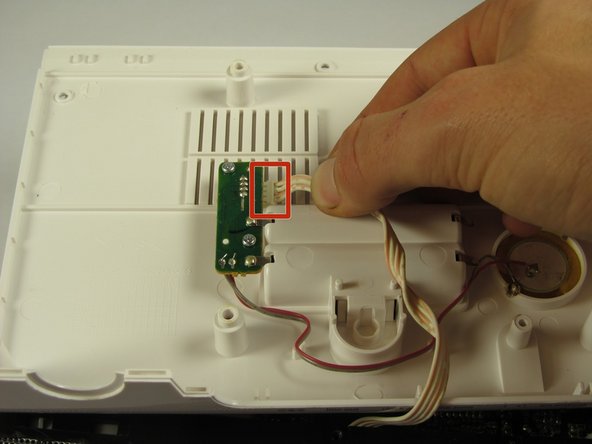
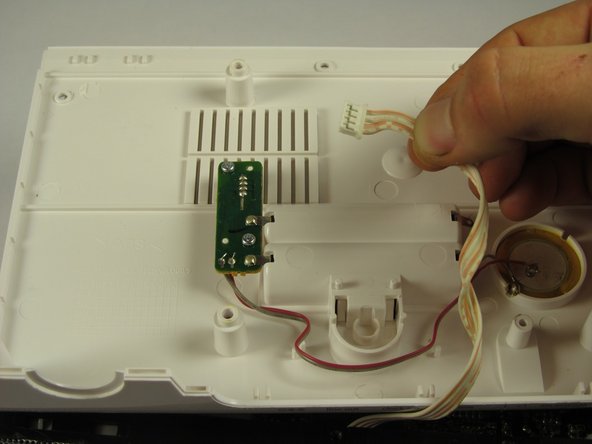
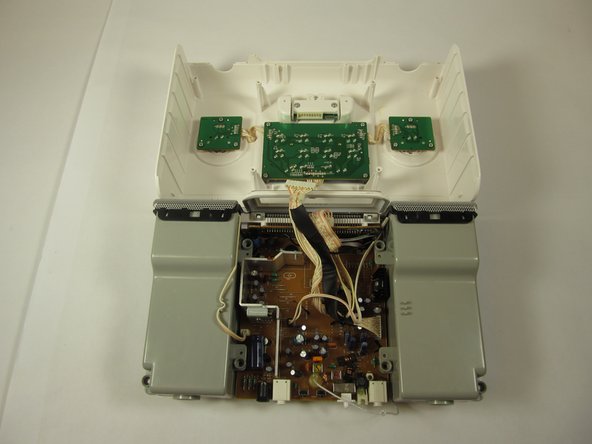
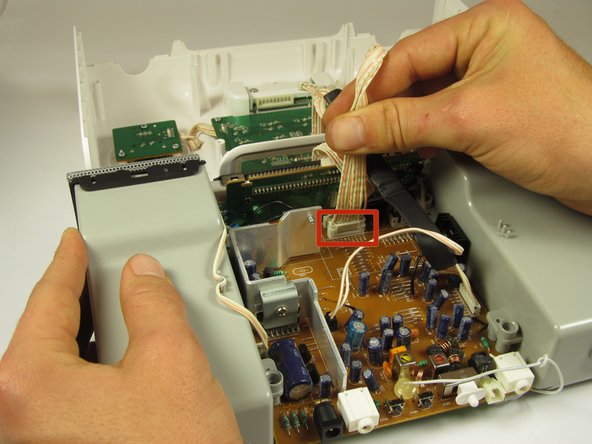
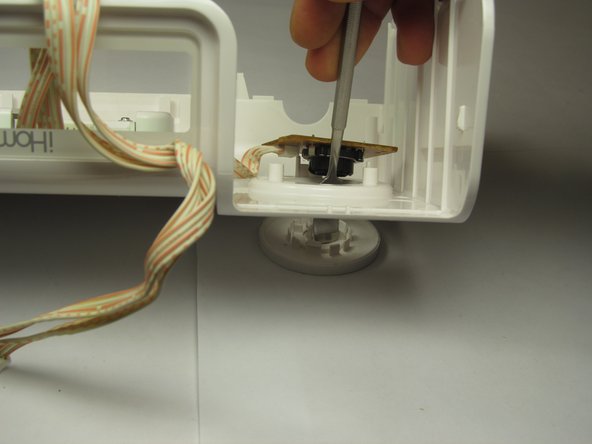
    • Remove the three 8mm Phillips #0 screws on the back of the dial circuit board.

  12. iHome iH9 Volume/Tuning Dials Replacement: 12 단계, 이미지 1/1
    • Use one hand to tilt the front edge of the cover up.

    • Use the other hand to rotate the dial from underneath until you see one of larger tabs on the back side of the dial.

    • There are two large tabs which are located on opposite sides of the dial, between the circuit board and the cover.

  13. iHome iH9 Volume/Tuning Dials Replacement: 13 단계, 이미지 1/2 iHome iH9 Volume/Tuning Dials Replacement: 13 단계, 이미지 2/2
    • Use the nylon or metal spudger tool to push one of these larger tabs inward.

    • After pressing tab inward, forcefully push down on back of dial.

    • Pushing down will pop the whole circuit board, button, and dial assembly apart.

결론

To reassemble your device, follow these instructions in reverse order.

다른 한 분이 해당 안내서를 완성하였습니다.

Samantha

회원 가입일: 02/02/15

128 평판

안내서 1개 작성함

Cal Poly, Team 8-39, Amido Winter 2015 Cal Poly, Team 8-39, Amido Winter 2015 회원

CPSU-AMIDO-W15S8G39

4 회원들

안내서 8개 작성하였습니다

댓글 한 개

Could you provide any information about part numbers for the dial and switch? Possibly even where they can be obtained? Thanks!

Lieven DeBock - 답글

댓글 쓰기

조회 통계:

24 시간 전: 0

7일 전: 1

30일 전: 4

전체 시간: 772