주요 콘텐츠로 건너뛰기

iLive IKBC384S Motherboard Replacement

필요한 것

  1. iLive IKBC384S Motherboard Replacement, Top Cover: 1 단계, 이미지 1/2 iLive IKBC384S Motherboard Replacement, Top Cover: 1 단계, 이미지 2/2
    • Make sure you remove all seven 3 mm screws before proceeding to the next step.

  2. iLive IKBC384S Motherboard Replacement: 2 단계, 이미지 1/2 iLive IKBC384S Motherboard Replacement: 2 단계, 이미지 2/2
    • Use iOpener or heat gun on all sides except the front.

  3. iLive IKBC384S Motherboard Replacement: 3 단계, 이미지 1/2 iLive IKBC384S Motherboard Replacement: 3 단계, 이미지 2/2
    • Be cautious when taking the top of the device off there may still be some adhesive stuck to device.

    • The top of the device will be very difficult to remove because of the adhesive holding it together.

  4. iLive IKBC384S Motherboard Replacement, Motherboard: 4 단계, 이미지 1/1
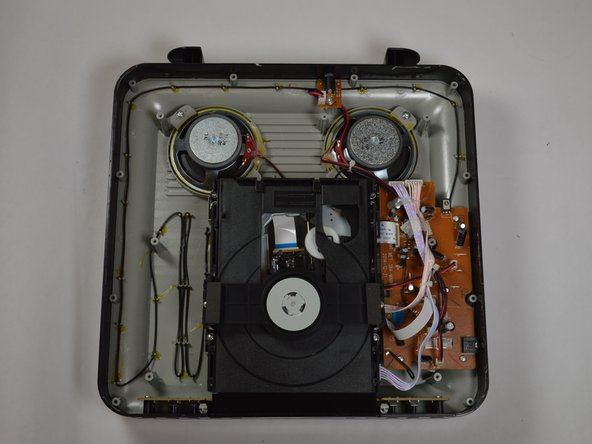
    • After removing the top of the device, locate the screws on the motherboard. Gently unscrew all four of the 3.5mm screws on the motherboard.

  5. iLive IKBC384S Motherboard Replacement: 5 단계, 이미지 1/2 iLive IKBC384S Motherboard Replacement: 5 단계, 이미지 2/2
    • Unplug the ribbon cable connected to the motherboard that stems from the disc drive.

    • Disconnect the two power connectors from the motherboard.

  6. iLive IKBC384S Motherboard Replacement: 6 단계, 이미지 1/1
    • You will need to desolder the antenna.

    • Be sure to desolder the piece connected to the motherboard not the wire.

  7. iLive IKBC384S Motherboard Replacement: 7 단계, 이미지 1/1
    • You will need to remove the speakers and power connector.

    • Once you have removed all of these from the motherboard, the motherboard can be removed

결론

To reassemble your device, follow these instructions in reverse order.

Tracy Walts

회원 가입일: 03/21/17

201 평판

안내서 2개 작성하였습니다

Texas Tech, Team S46-G6, Bennett Spring 2017 Texas Tech, Team S46-G6, Bennett Spring 2017 회원

TTU-BENNETT-S17S46G6

3 회원들

안내서 6개 작성하였습니다

댓글 0개

댓글 쓰기

조회 통계:

24 시간 전: 0

7일 전: 0

30일 전: 0

전체 시간: 265