이 버전에는 잘못된 편집 사항이 있을 수 있습니다. 최신 확인된 스냅샷으로 전환하십시오.
필요한 것
-
이 단계는 번역되지 않았습니다. 번역을 도와주십시오
-
The iMac G3. This was a great computer for the time, and had plenty of features.
-
-
이 단계는 번역되지 않았습니다. 번역을 도와주십시오
-
Start by flipping the iMac upside-down. It may help to lay it on a towel, so you don't damage the screen, or scratch the face.
-
-
이 단계는 번역되지 않았습니다. 번역을 도와주십시오
-
Remove this Phillips screw.
-
Using a flathead screwdriver, work your way around the bottom cover, until it comes off.
-
Then, lift the bottom cover up and out, and set it aside.
-
-
이 단계는 번역되지 않았습니다. 번역을 도와주십시오
-
Now, remove the DB-15 Video connector from the logic board.
-
It may be helpful to use a Phillips screwdriver to remove the thumbscrews.
-
-
-
이 단계는 번역되지 않았습니다. 번역을 도와주십시오
-
Remove the front panel connector. (You may also need to remove an additional screw that connects the front panel connector to the logic board assembly).
-
-
이 단계는 번역되지 않았습니다. 번역을 도와주십시오
-
Now, remove these Phillips screws.
-
Now, grab the logic board assembly by the piece of plastic, and lift it out.
-
-
이 단계는 번역되지 않았습니다. 번역을 도와주십시오
-
The logic board assembly. This is the heart of the computer, it contains the motherboard, CPU, RAM, V-RAM, PRAM battery, the hard drive, and the optical drive.
-
-
이 단계는 번역되지 않았습니다. 번역을 도와주십시오
-
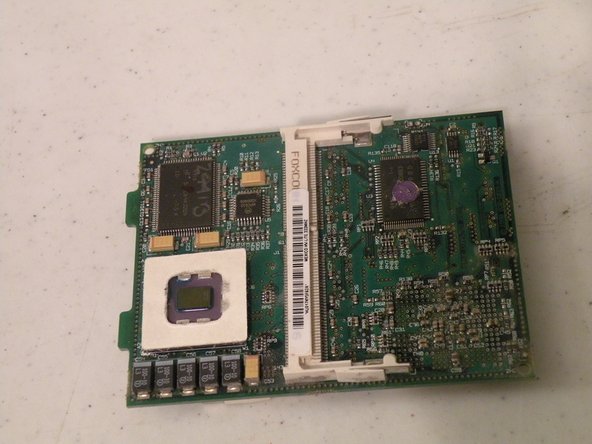
Remove the CPU shield, this will reveal the "top slot". This is the user-serviceable RAM slot, though there is a a second slot of RAM under the CPU card.
-
The iMac uses PC100 Laptop Ram, and according to Apple, it supports up to 256MB RAM (2X128MB) but unofficially. Some later models can support 512MB (2X256MB).
-
Push the tabs out, and the RAM should pop up, then pull the ram out.
-
-
이 단계는 번역되지 않았습니다. 번역을 도와주십시오
-
RAM (bottom slot).
-
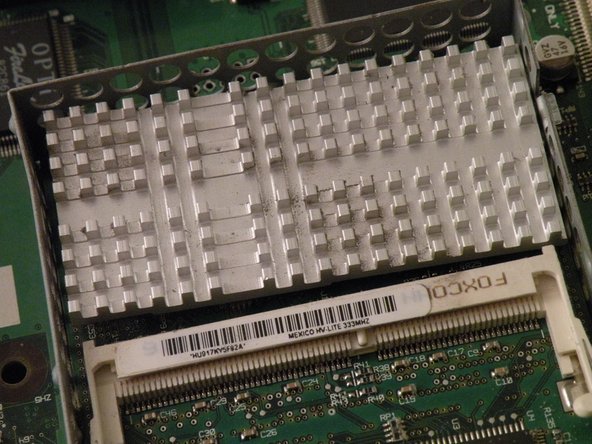
Remove the CPU Heatsink.
-
Use a flathead screwdriver. Remove the heatsink clip, it will pop off, and may get lost if you don't keep track of it.
-
Remove the heatsink revealing the CPU, then lift the CPU card up, and it should come free with a little tug.
-
-
이 단계는 번역되지 않았습니다. 번역을 도와주십시오
-
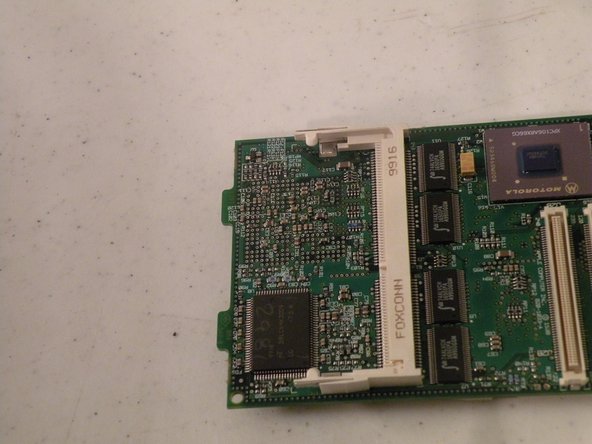
Now, flip the card over.
-
This will reveal another stick of laptop PC66.
-
This is most likely a 32MB Stick, because the iMac shipped standard with only 32MB of RAM.
-
Now, remove it by pushing the tabs, it should pop up, and you can set it aside.
-
-
이 단계는 번역되지 않았습니다. 번역을 도와주십시오
-
The RAM.
-
The iMac supports two pieces of PC66 laptop RAM, though it can use PC100 and PC133 (laptop size of course).
-


다른 23명이 해당 안내서를 완성하였습니다.

팀
