이 버전에는 잘못된 편집 사항이 있을 수 있습니다. 최신 확인된 스냅샷으로 전환하십시오.
필요한 것
-
이 단계는 번역되지 않았습니다. 번역을 도와주십시오
-
Unplug all the cables from the computer, including the power cable. Lay the computer face-down, supporting the neck and base with a soft cloth under the screen.
-
-
이 단계는 번역되지 않았습니다. 번역을 도와주십시오
-
Open the housing plate.
-
A fixed plug connector between the logic board and upper unit will cause some resistance. Pull gently but firmly.
-
-
-
이 단계는 번역되지 않았습니다. 번역을 도와주십시오
-
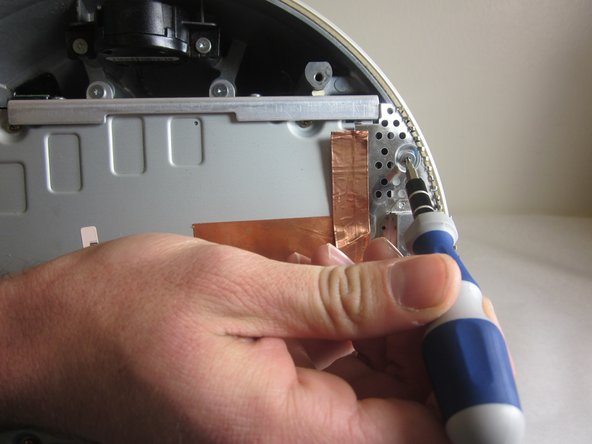
Remove the 2 torx 10mm screws on the EMI shield
-
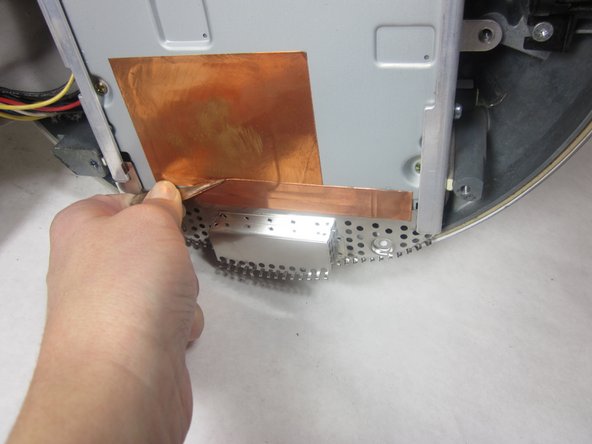
Carefully remove shield and copper tape
-
-
이 단계는 번역되지 않았습니다. 번역을 도와주십시오
-
Grasp the carrier with both hands on each side.
-
Remove the carrier by lifting up and out.
-
-
이 단계는 번역되지 않았습니다. 번역을 도와주십시오
-
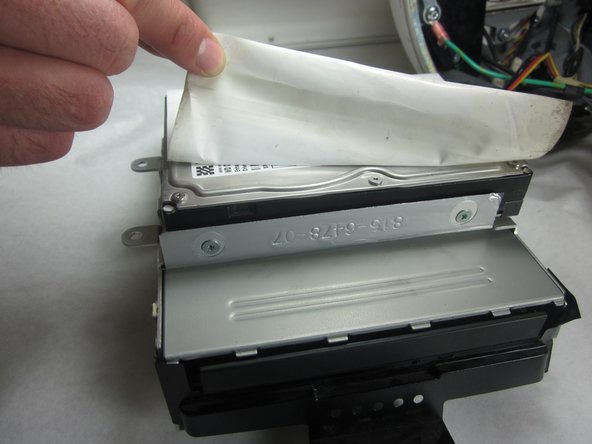
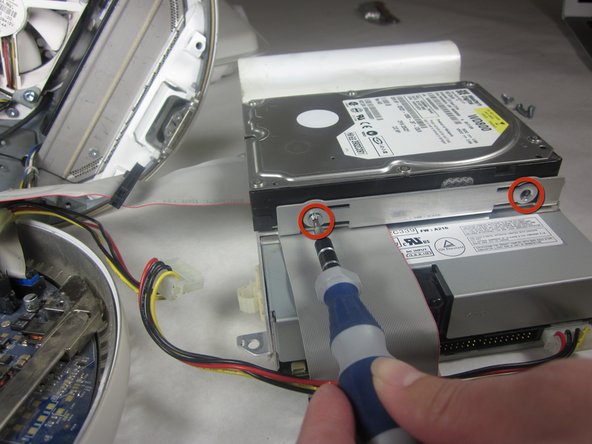
Peel back the white paper, revealing the screws that connect the hard drive to the carrier.
-
Remove the 4 T-10 5mm screws connecting the hard drive and frame. (There are 2 screws on each side)
-
-
이 단계는 번역되지 않았습니다. 번역을 도와주십시오
-
Before you reassemble the computer, double check that your new hard drive has the same jumper configuration as the old one. This ensures the IDE "Master-Slave" protocol isn't interrupted. Some systems do not require this, but if you are having issues booting up afterwards with the storage or the disc drive, this could be the source of the problem.
-


다른 7명이 해당 안내서를 완성하였습니다.
팀

Cal Poly, Team 21-22, Maness Fall 2011 Cal Poly, Team 21-22, Maness Fall 2011 회원
CPSU-MANESS-F11S21G22
4 회원들
안내서 13개 작성하였습니다
댓글 2개
Should step ten of removing the optical drive be broken into two different steps
Which brands/models should one use to replace a faulty optical drive in one of these iMac G4’s?