이 버전에는 잘못된 편집 사항이 있을 수 있습니다. 최신 확인된 스냅샷으로 전환하십시오.
필요한 것
-
이 단계는 번역되지 않았습니다. 번역을 도와주십시오
-
Stick a suction cup near each of the two top corners of the glass panel.
-
If your suction cups refuse to stick, try cleaning both the glass panel and the suction cup with a mild solvent.
-
-
이 단계는 번역되지 않았습니다. 번역을 도와주십시오
-
Gently lift the glass panel perpendicular to the face of the LCD enough to clear the steel mounting pins attached along the underside of the top edge of the glass panel.
-
Pull the glass panel away from the lower edge of the iMac and carefully set it aside.
-
-
이 단계는 번역되지 않았습니다. 번역을 도와주십시오
-
Remove the eight 8 mm T10 Torx screws securing the display to the outer case.
-
-
-
이 단계는 번역되지 않았습니다. 번역을 도와주십시오
-
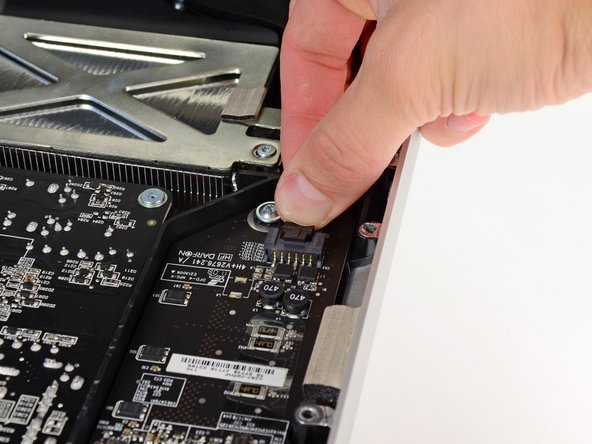
Pull the vertical sync cable connector out of its socket on the LED driver board near the top left corner of your iMac.
-
-
이 단계는 번역되지 않았습니다. 번역을 도와주십시오
-
Rotate the display out of the outer case enough to disconnect the LED backlight power cable from the LED driver board.
-
-
이 단계는 번역되지 않았습니다. 번역을 도와주십시오
-
Grab the plastic pull tab secured to the display data cable lock and rotate it towards upwards.
-
Pull the display data cable straight out of its socket on the logic board.
-
-
이 단계는 번역되지 않았습니다. 번역을 도와주십시오
-
Disconnect the LCD thermal sensor cable connector from its socket on the logic board.
-
-
이 단계는 번역되지 않았습니다. 번역을 도와주십시오
-
Carefully pull the display toward the top edge of your iMac and lift it out of the outer case, minding any cables that may get caught.
-
-
이 단계는 번역되지 않았습니다. 번역을 도와주십시오
-
Remove the two 9 mm T10 Torx screws securing the LED driver board to the outer case.
-
-
이 단계는 번역되지 않았습니다. 번역을 도와주십시오
-
Lift the LED driver board out of its recess in the outer case, minding the DC-In cable still attaching it to the power supply.
-
Disconnect the DC-In cable by depressing the locking mechanism while pulling the connector away from its socket on the LED driver board.
-


다른 2명이 해당 안내서를 완성하였습니다.
